Relax
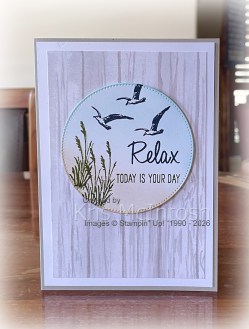
This week in my Facebook Live I shared some cards I created using the Relaxing Waterside Bundle and today I have another card to share with you. I attached a piece of Waterside Retreat 12″ x 12″ Designer Series Paper to Basic White card and then scored and folded Gray Granite card. I die cut Basic White card using the largest circle from the Stylish Shapes Dies. I used a Blending Brush to add Crumb Cake ink across the bottom of the circle and Balmy Blue ink across the top of the circle.
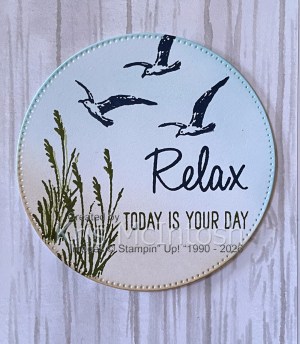
I stamped the small grass image from the Relaxing Waterside stamp set onto the lower left hand side of the circle using Old Olive ink.I stamped the three birds from the Relaxing Waterside stamp set onto the top part of the circle using Night of Navy ink.
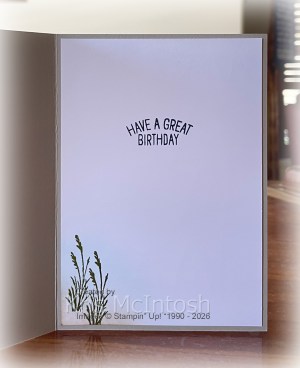
I stamped “Relax” using Night of Navy ink and “today is your day” using Old Olive ink onto the circle. Both greetings come from the Relaxing Waterside stamp set. The stamped circle is attached to the card front using dimensionals. To decorate the inside of the card, I used a blending brush to add Crumb Cake and Balmy Blue ink to the lower left hand corner of Basic White card. I stamped the small grass image from the Relaxing Waterside stamp set twice onto the blended ink using Old Olive ink. I also stamped “have a great birthday” from the Relaxing Waterside stamp set onto the panel using Night of Navy ink. I attached the stamped Basic White panel to the inside of the Gray Granite card base. This bundle will be available for customers to purchase when the next catalogue goes live on the 5th May. Just in case you don’t know this bundle co-ordinates with our very first Paper Pumpkin release in Australia. How exciting!
Bye for now,
Kris
Product Used:


Thank You

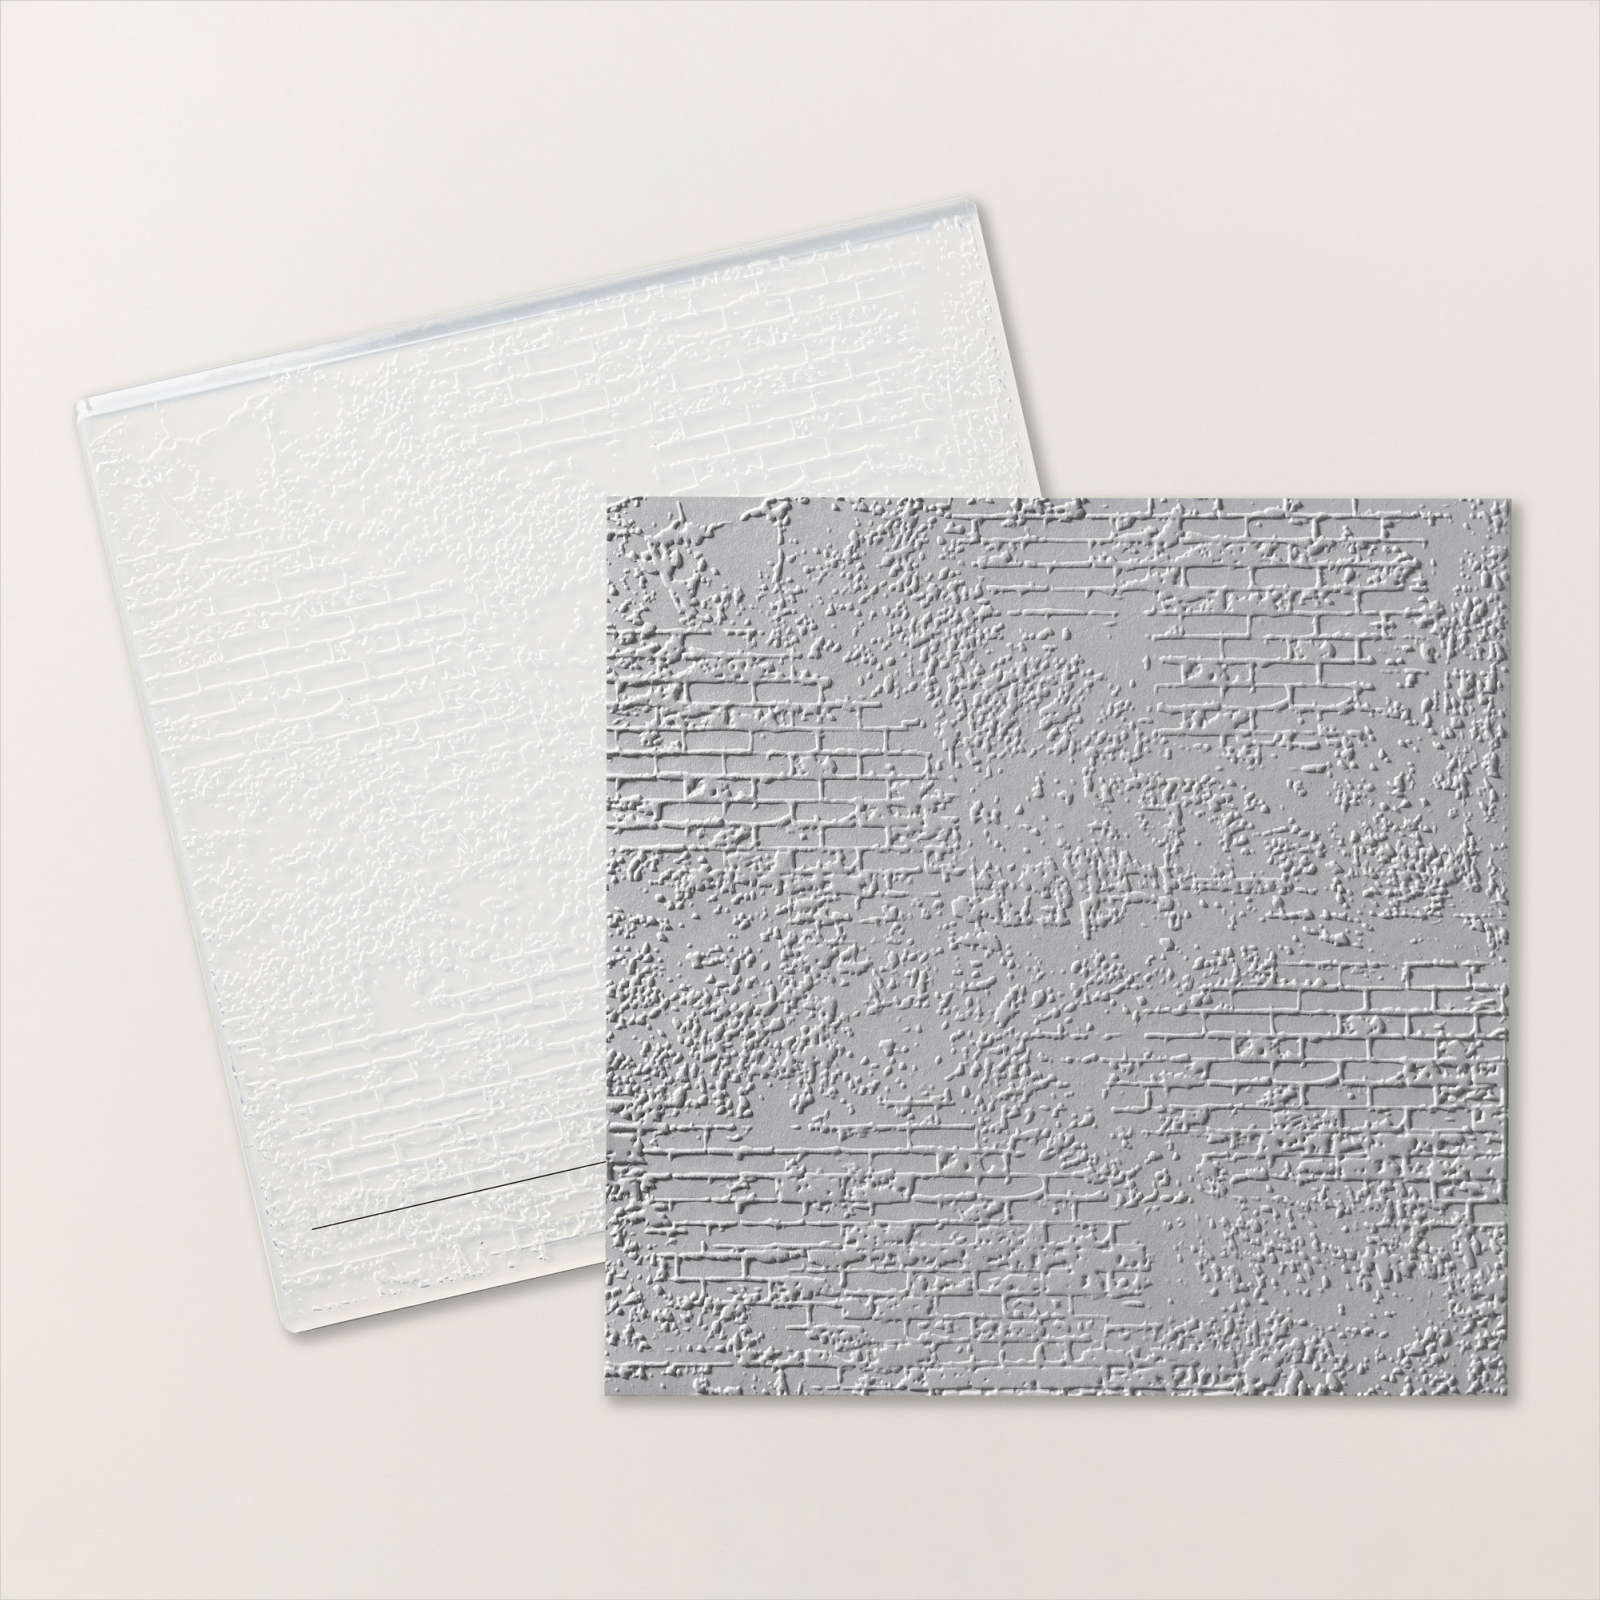
Today I have a card I created whilst playing with the February Product of the Month – Painted Illusions 12″ x 12″ Designer Series Paper. I embossed Basic White card using the Exposed Brick 3D Embossing Folder. I cut a piece of Misty Moonlight card using the circle background die from the Lovely Arrangments Die so that I got a long line. I attached the circle die cut behind one long edge of aa piece of the Painted Illusions Designer Series Paper before attaching it to the embossed Basic White card. I stamped “thank you” from the Lovely Arrangments stamp set onto Misty Moonlight card using Misty Moonlight ink and attached it to the embossed panel, cutting off the right hand edge.
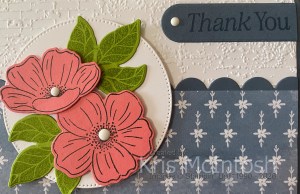
The whole panel is attached to scored and folded Misty Moonlight card. I cut a circle from Basic White card using the largest circle from the Stylish Shapes Dies. I stamped each of the flowers from the Lovely Arrangements stamp set onto Flirty Flamingo card using Memento Tuxedo Black ink. I cut out the flowers using the co-ordinating dies from the Lovely Arrangments Dies. I stamped the three leaf image from the Lovely Arrangements stamp set twice onto Granny Apple Green card using Granny Apple Green ink. I used the co-ordinating Lovely Arrangments Die to cut out the images.
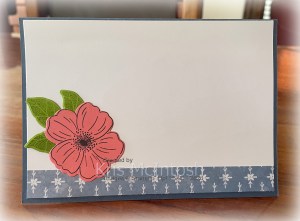
I layered the flowers and leaves onto the Basic White circle using dimensionals underneath the flowers. The image panel is attached to the card front using dimensionals. I also added three white dots from the Moody Palette Glossy Dots to the card front. To decorate the inside of the card, I attached a narrow strip of Painted Illusions Designer Series Paper across the bottom of Basic White card. I created another flower and leaf using the same technique as the card front. I layered the leaf and flower images onto the lower left hand corner of the Basic White card before attaching the panel to the inside of the Misty Moonlight card base. I am getting into the groove of this gorgeous paper and I am loving the Lovely Arrangments Bundle.
Bye for now,
Kris
Product Used:


Turning Four
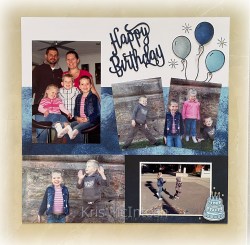
Today’s pages are dedicated to photos celebrating Ethan’s fourth birthday – quite a while ago. I used Noreen Smith’s March 2026 1, 2, 3 Layout to create my pages. I cut a piece of Nature Walk 12″ x 12″ Designer Series Paper and added the pieces to White Willow 12″ x 12″ card. I swapped around the photos on the left hand page but didn’t change anything else on her layout. I used a retired Happy Birthday Thinlits Die to cut the title from Night of Navy card.

For the left page I stamped three balloons from the Arched Wishes stamp set (retired) onto scrap Basic White card using Memento Tuxedo Black ink. For the right hand page I stamped the balloons directly onto the page. I coloured the balloons using Cloud Cover, Night of Navy and Balmy Blue Stampin’ Blends. I stamped the starry image from the Arched Wishes stamp set directly onto the pages and added a Basic Rhinestone to the centre of each one.

I stamped the birthday cake from the Along These Lines stamp set and used Balmy Blue, Dark Night of Navy and Dark Daffodil Delight Stampin’ Blends to colour the image. I cut it out and attached it to the left hand page using dimensionals. I also added three Basic Rhinestones around the cake image. I printed my journaling onto Basic White card and cut it into strips before attaching it to the right hand page. I love how this page turned out, so thank you Noreen for the inspiration.
Bye for now,
Kris
Product Used: