I neglected to post the winner of my SOS #52 BINGO giveaway! Well, this was easy since I only had ONE COMMENT from a challenge participant. I don't even need to make up a non-scientific and totally unfair method of selection -- the answer will be the same!
So Dr J, come on down!!! Please send me an email with your mailing address and I'll get your embossing folders out to you.
Thanks for playing, everyone!

Thursday, May 31, 2012
Sketchy Thanks (sorta)
When I spied this CPS sketch:

I had an idea. This effort would be another example of a morphed idea, and the card taking on a life of its own. Here's my card, then I'll explain:
 You can sorta see the tiny part of my card that was inspired by the sketch. I forgot how small the SU Lattice die is, so all I had was a card part; nothing big enough to cover the whole card. I was sad.
My Authentique 6x6 pad was still out, so I used it to build the rest of the card around the part on the blue strip. And those lovely embellishments? I had to piece the black circle, and the embellishments cover the seams. :) I also think I glued my tweezers together trying to rescue the pearl from the center of the smaller of the two flowers. It was drowning in Glossy Accents. In the end, I just added another pearl on top of it. And I need to check on those tweezers.
The "thanks" was in my UFO pile, and I layered it onto a piece of black so you can seeee it.
Now that I look at this card, it's tres busy. Tres tres. I need to learn when to just stop. Maybe putting that blue strip on a card all by itself would have been a better plan. Or just the lattice by itself. Oh, well. In the end, I used up a bunch of remnants of black and pieces of my Authentique papers and that "thanks" UFO, so there's that. Not a total loss. Maybe someone's favorite colors are blue and black. You just never know. :)
Thanks for stopping by!

I had an idea. This effort would be another example of a morphed idea, and the card taking on a life of its own. Here's my card, then I'll explain:

My Authentique 6x6 pad was still out, so I used it to build the rest of the card around the part on the blue strip. And those lovely embellishments? I had to piece the black circle, and the embellishments cover the seams. :) I also think I glued my tweezers together trying to rescue the pearl from the center of the smaller of the two flowers. It was drowning in Glossy Accents. In the end, I just added another pearl on top of it. And I need to check on those tweezers.
The "thanks" was in my UFO pile, and I layered it onto a piece of black so you can seeee it.
Now that I look at this card, it's tres busy. Tres tres. I need to learn when to just stop. Maybe putting that blue strip on a card all by itself would have been a better plan. Or just the lattice by itself. Oh, well. In the end, I used up a bunch of remnants of black and pieces of my Authentique papers and that "thanks" UFO, so there's that. Not a total loss. Maybe someone's favorite colors are blue and black. You just never know. :)
Thanks for stopping by!
Wednesday, May 30, 2012
Poppy Sympathy
Way back when I was taking the A Cut Above class* from Online Card Classes (Day 2, to be exact!), we learned about window cards, and several of the samples used elements that spanned the windows, which I decided was very cool.
So when Jennifer McGuire enabled me to need the Memory Box Prim Poppy die, I knew exactly what I'd do with it. Today I finally got to that project. Here's what I made:
 My still-out pack of textured 2008 In Color card stock was the victim here. I die-cut the poppy out of Wild Wasabi, then cut the flowers out of Groovy Guava and trimmed them to layer over the green. Next, I cut the opening in the top layer with one of my petite oval nesties, then cut the frame out of Basic Gray. I prayed and prayed I'd kept a pack of the Afternoon Tea papers, and I did! Whoot! I cut a rectangle from one of the pieces and stuck it behind the window. I was going to stick it to the base to leave a real "window", but I wanted to stick down the droopy flower and didn't want to mess with a layer of acetate. Lazy.
A sentiment, some pearls, and done! I kinda like it. :)
Thanks for stopping by!
*Haven't taken the A Cut Above class yet? I HIGHLY recommend it! And, Julie Ebersole is giving away a seat in the class! All you need to do is go to her post and leave a comment by Thursday evening. Check her post for details.
So when Jennifer McGuire enabled me to need the Memory Box Prim Poppy die, I knew exactly what I'd do with it. Today I finally got to that project. Here's what I made:

A sentiment, some pearls, and done! I kinda like it. :)
Thanks for stopping by!
*Haven't taken the A Cut Above class yet? I HIGHLY recommend it! And, Julie Ebersole is giving away a seat in the class! All you need to do is go to her post and leave a comment by Thursday evening. Check her post for details.
Tuesday, May 29, 2012
SOS #53 - Flowers
Welcome to challenge 53 over at Shopping Our Stash. This week we ask you to use flowers on your card! That's right! You can use anything floral-related -- flowers, roses, sunflowers, gardens, vases, potted flowers, etc. You can use paper with flowers in the design or use flowers as embellishments. Hey, take this opportunity to use up some scrap paper and make your own flowers! LOTS of options here, kids!
Here's my card:
 This card is NOT what I set out to make. Nope. However, as I pondered my options, I spied that punched flower in my UFO pile, and a card was born. Here it is again at a slight angle so you can see the white-on-white embossed background on the panel:
 This card is all remnants and UFOs, except for the base. I'm quite pleased with it, actually. :)
I'm sure I have another flower card in me, so I may be back later this week with another sample for you.
Now it's YOUR turn. Go into your stash and find some unloved flowers of some kind. They can be paper flowers, stickers, floral patterned papers, flowers made from scraps, whatever! Then make a card and come back to Shopping Our Stash to link us up so we can see what you've made!
Thanks for stopping by!
Here's my card:


I'm sure I have another flower card in me, so I may be back later this week with another sample for you.
Now it's YOUR turn. Go into your stash and find some unloved flowers of some kind. They can be paper flowers, stickers, floral patterned papers, flowers made from scraps, whatever! Then make a card and come back to Shopping Our Stash to link us up so we can see what you've made!
Thanks for stopping by!
Monday, May 28, 2012
Gingham Baby Cards
Ah, the power of the Interwebz. One of my tweeps and bloggy friends, Donna, posted this card for the Moxie Fab Gingham Challenge, and I said, "Wha?". I ran to look at the Moxie Fab post. Who remembers something aaaaaalllll the way back to early May? But the great thing is we have until June 4th to post a card, so I got to work!
I knew immediately what I'd use, too! I knew I had some A*Muse gingham papers in The Heaplet, but I wasn't sure which color(s). I found both light blue and light pink, so baby cards it was!
Here's what I made, then I'll explain:

 I punched openings in the white layer with my SU Heart to Heart punch, then layered that over the gingham. I used two gingham hearts (punched from some smaller pieces of the same gingham papers) on the card front, and added some Studio Calico wood veneer hearts. I covered the wood hearts with Inkssentials Enamel Accents* to make them white and shiny. In hindsight, I might use white paint next time. We'll see what I think once it dries ... maybe tomorrow.
The sentiment is from A*Muse, and I just love it! I think the last time I used it was on a card with an elaborate Corset. HAHA! Yeah, this is a little different and perhaps more appropriate.
So I've pretty much disappeared those two papers from The Heaplet. Baby steps, people. Baby steps. (no pun intended)
Thanks for stopping by!
* When I first applied the enamel accents, it came out clear. I shook it a little and it came out white, so I mixed some into the clear stuff that was already on the wood hearts, which made them a little streaky. Just a word of caution in case your bottles of enamel accents have been sitting on the shelf as long as mine have. :(
I knew immediately what I'd use, too! I knew I had some A*Muse gingham papers in The Heaplet, but I wasn't sure which color(s). I found both light blue and light pink, so baby cards it was!
Here's what I made, then I'll explain:


The sentiment is from A*Muse, and I just love it! I think the last time I used it was on a card with an elaborate Corset. HAHA! Yeah, this is a little different and perhaps more appropriate.
So I've pretty much disappeared those two papers from The Heaplet. Baby steps, people. Baby steps. (no pun intended)
Thanks for stopping by!
* When I first applied the enamel accents, it came out clear. I shook it a little and it came out white, so I mixed some into the clear stuff that was already on the wood hearts, which made them a little streaky. Just a word of caution in case your bottles of enamel accents have been sitting on the shelf as long as mine have. :(
PDCC133 Keep Calm
I finally got a clue for the Play Date Cafe challenge:

I broke out my new SU Carry On hostess set (only $10 with Hostess Bucks starting June 1st!) and made this:
 The dark blue is the new SU Midnight Muse -- it is a very yummy, deep blue. And the new
 felt firm foam ink pads are awesome! I used Real Red and Pool Party for the other colors.
I need to get a clue more often. :)
Thanks for stopping by!

I broke out my new SU Carry On hostess set (only $10 with Hostess Bucks starting June 1st!) and made this:

I need to get a clue more often. :)
Thanks for stopping by!
Challenge Challenged
Making a card can be a long and winding road. Well, at least in my world it usually is. Once in a while I get an idea and execute it very close to what I saw in my head, but most of the time there is major morphing and distraction. Major.
For example, I had printed off this Play Date Cafe challenge:
 thinking "manly", "patriotic", and perfect for this Memorial Day weekend.
First out of the gate was an attempt to use some "close, but not really" colors of new washi tape. I've actually played with this one for several days, and this is what finally came out:
 Well, the rust one is sorta red, and the blue is blue, but the tan ... isn't. I've had those three strips of tape on that layer for days ... DAYS. I finally broke down and made that flower today. I covered 2x2 squares of vellum with the tapes and die-cut them. Not bad. Kinda muted.
Then I saw this card and immediately NEEDED those triangle dies. Isn't that card awesome? I found the dies and decided they were too spendy for how often I'd use them, so I tried to make my own triangles. I tried the Silhouette. Fail. Next I tried to cut my own. I pulled out my textured 2008 In Color card stock and started measuring and hacking. Looking at the pile of paper shards, I thought I could see the justification of the spendy part. Also, those papers aren't the right colors, anyway. But I was so invested in this project, I just couldn't stop, though perhaps I should have. This is what finally came out:
 I think my favorite part of this card is (are?) the four black pearls between the triangles, which were white pearls I colored with my Touch Twin black marker. My second favorite part of this is it's off my work table. I killed a lot of card stock for this one.
I still don't have a card for the PDCC challenge. I may give up and move on. We'll see.
Thanks for stopping by!
For example, I had printed off this Play Date Cafe challenge:

First out of the gate was an attempt to use some "close, but not really" colors of new washi tape. I've actually played with this one for several days, and this is what finally came out:

Then I saw this card and immediately NEEDED those triangle dies. Isn't that card awesome? I found the dies and decided they were too spendy for how often I'd use them, so I tried to make my own triangles. I tried the Silhouette. Fail. Next I tried to cut my own. I pulled out my textured 2008 In Color card stock and started measuring and hacking. Looking at the pile of paper shards, I thought I could see the justification of the spendy part. Also, those papers aren't the right colors, anyway. But I was so invested in this project, I just couldn't stop, though perhaps I should have. This is what finally came out:

I still don't have a card for the PDCC challenge. I may give up and move on. We'll see.
Thanks for stopping by!
Memorial Day Mojo
When I saw today's Mojo Monday sketch:
 it spoke to me. I took the square one and rotated it 90 degrees (and you thought you'd never use your High School Algebra ...):
 The sketch screamed Memorial Day to me, so I made this:
 The papers in the Authentique Celebrate Collection are prefect for a patriotic card! I used my Kim Hughes Eagle and Freedom stamps I got when Kim was with Cornish Heritage Farms. I love these stamps and don't use them nearly enough! At one point, probably about this time last year, they were lost somewhere in The Captain's Quarters. I'm so glad I found them!
The banner on the left was made with my MFT banner dies, and the brad that I've had forEVER is actually glued on. Shhhh, don't tell anyone.
So sometime today, maybe between bites of burgers and sips of beer, please take a moment to remember why today is a Federal holiday, and think of those who have given their lives for our great country.
Okay, I'm off my soap box and going back to stamp some more!
Thanks for stopping by!
Sunday, May 27, 2012
Moxie Fab World: Tuesday Trigger: Man-tastic!
The current Tuesday Trigger Challenge at Moxie Fab World caught my eye:
 I love the colors! Definitely "manly" colors, but I didn't make a manly card. Instead, I pulled out my Paper Smooches Reflections set and used one of the leaf stamps to make flowers:

I'm also unable to shoot this totally in focus. Sorry.
I stamped the leaves in Ranger Distress Barn Door, Faded Jeans and Broken China. For each color, I stamped it once, then turned the stamp 90 degrees and stamped it again to make a flower. Just so you know I *am* capable of getting something mostly in focus, here are the flowers:
 I added tiny buttons to the flowers' centers, then stamped Happy Birthday (SU Curly Cute) in Ranger Distress Gathered Twigs. Once I had the idea, this came together pretty quickly. :)
More stamping in on my horizon today, so I'll be back later.
Thanks for stopping by!


I'm also unable to shoot this totally in focus. Sorry.
I stamped the leaves in Ranger Distress Barn Door, Faded Jeans and Broken China. For each color, I stamped it once, then turned the stamp 90 degrees and stamped it again to make a flower. Just so you know I *am* capable of getting something mostly in focus, here are the flowers:

More stamping in on my horizon today, so I'll be back later.
Thanks for stopping by!
Saturday, May 26, 2012
WMSC99 - Wedding
I think we've established I am incapable of photographing a white card, so I've just made another white card. When I saw this week's Waltzingmouse Sketch, I had an idea. Their challenges ask us to use a Waltzingmouse image, and where I don't have a lot, I do have a set I bought a while ago and have yet to use. Until now.
Here's the sketch:
 I had the idea to use a heart for the circle element, and I'd break out my Waltzingmouse You're Lovely set to initiate the dress. It looks like a prom dress, but I always imagined it as a wedding dress. Here's my card, then I'll explain:
 Again with the vellum, I know. I stamped a Hero Arts lace stamp on the vellum and embossed it with white EP. Then I turned it over, stamped the dress, heat-embossed THAT with white EP, then cut it out.
The heart is from the SU Filled With Love set, stamped in Baja Breeze. I colored the one heart with my Poppy Parade marker. Sentiment is from the Paper Smooches Word Up set, also stamped in Baja Breeze. All of that Baja Breeze bizness was because that's the color SU ribbon I used. Matchy-matchy! :) And yes, I know it's crooked. I see that now. Sigh.
Here is a closer shot of the dress:
 At the bottom you can kinda see where it's embossed on both sides. Most of those pearls on the dress hide the mini glue dots I remembered to use so the dress stays in place. ;/
I hope to tackle some challenges in between the loads of laundry the rest of the weekend, so I'll be back to share when I have something that doesn't land in the trash! :)
Thanks for stopping by!
Here's the sketch:


The heart is from the SU Filled With Love set, stamped in Baja Breeze. I colored the one heart with my Poppy Parade marker. Sentiment is from the Paper Smooches Word Up set, also stamped in Baja Breeze. All of that Baja Breeze bizness was because that's the color SU ribbon I used. Matchy-matchy! :) And yes, I know it's crooked. I see that now. Sigh.
Here is a closer shot of the dress:

I hope to tackle some challenges in between the loads of laundry the rest of the weekend, so I'll be back to share when I have something that doesn't land in the trash! :)
Thanks for stopping by!
Thursday, May 24, 2012
ColourQ Birthday
I've been playing with the current ColourQ Challenge all evening, and I FINALLY got something that didn't end up in the trash. Thank goodness for recycling.
Here's their color prompt:
 And my card:
 (Oooh, that's a bit out of focus. Tired eyes syndrome. Sorry.)
I used an image from the Paper Smooches Potpourri set, stamped it in black on a remnant of textured white*, and again on each of four scraps of patterned paper. I cut out the colored pieces, glued them down, stamped a sentiment (from SU Curly Cute), and stuck that onto a Pool Party base. Done.
This was waaaaay easier than the first two I tried. Some of those parts-is-parts may actually be salvageable and live on to grow up to become part of another card. We'll see.
Thanks for stopping by!
* For one very brief moment, I actually considered stamping the image again, once on either side of the first one, to get a row across. Then I remembered who I was, and laughed out loud. Did you hear me? Man, I crack myself up.
Here's their color prompt:


I used an image from the Paper Smooches Potpourri set, stamped it in black on a remnant of textured white*, and again on each of four scraps of patterned paper. I cut out the colored pieces, glued them down, stamped a sentiment (from SU Curly Cute), and stuck that onto a Pool Party base. Done.
This was waaaaay easier than the first two I tried. Some of those parts-is-parts may actually be salvageable and live on to grow up to become part of another card. We'll see.
Thanks for stopping by!
* For one very brief moment, I actually considered stamping the image again, once on either side of the first one, to get a row across. Then I remembered who I was, and laughed out loud. Did you hear me? Man, I crack myself up.
Tuesday, May 22, 2012
Washi Frame
Still with the Washi thing. This card was inspired by one of my tweeps who used Washi tape as a frame for her scrapbook photos. It was so cool, I thought I'd try it on a card.
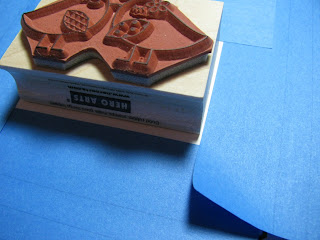
Now, where to begin ... I settled on not one, but TWO uninked Hero Arts stamps so I can shamelessly enter the Dust 'Em Off challenge over at A Blog Named Hero for a third time. Then I opted for a skinny tape to use as the frame. This is what came out:
 The first thing I did was frame the center rectangle by masking it off with Post-It Notes, and I made it just a touch bigger than the stamp:
 That made it easier to center the stamp later, and the post-its also covered the card front so I could stamp a background stamp over the opening. Well, I put the card stock on top of the bg stamp, but ... whatever. You know what I mean.
Here's the framed part:
 First, I stamped the Hero Arts Fly Away Newsprint background in SU Going Grey, then I removed the post-it-notes and was left with the small rectangle for a pale background for the birds. I stamped the birds (Hero Arts Two Birds) onto the rectangle, then again onto white and cut them out so I could stick them back over the stamped images to get white birds. It was easy to put the skinny Washi tape around the rectangle as a frame, and I didn't even need to get the ends even!
I colored the two little hearts between the birds with my R59 Copic marker. Then I stamped the word 'always' from my Paper Smooches Word Salad set below the frame, and stamped the heart from Paper Smooches Falling For You set below that. Actually, I stamped the heart twice, overlapping them a bit, then colored them with the same R59 Copic marker. I was going to add Glossy Accents to the hearts, but decided against it.
So there's a quick frame from Washi tape. Now if you'll excuse me, I need to go link this up at the Dust 'Em Off challenge. Thank you, A Blog Named Hero, for inspiring me to take these stamps out of their packages and USE them! :)
And thank YOU for stopping by!
Now, where to begin ... I settled on not one, but TWO uninked Hero Arts stamps so I can shamelessly enter the Dust 'Em Off challenge over at A Blog Named Hero for a third time. Then I opted for a skinny tape to use as the frame. This is what came out:


Here's the framed part:

I colored the two little hearts between the birds with my R59 Copic marker. Then I stamped the word 'always' from my Paper Smooches Word Salad set below the frame, and stamped the heart from Paper Smooches Falling For You set below that. Actually, I stamped the heart twice, overlapping them a bit, then colored them with the same R59 Copic marker. I was going to add Glossy Accents to the hearts, but decided against it.
So there's a quick frame from Washi tape. Now if you'll excuse me, I need to go link this up at the Dust 'Em Off challenge. Thank you, A Blog Named Hero, for inspiring me to take these stamps out of their packages and USE them! :)
And thank YOU for stopping by!
SOS Challenge 52 - Week 2
Welcome to week two of our special two-week BINGO challenge over at Shopping Our Stash! Here's that handsome BINGO card again:
 Last week I used the elements in the B column. This week I used the top row across (Yellow, Bling, Buttons, Patterned Paper and Embossing) to made this card:
 LOTS of stash here. I die-cut lots of yellow patterned paper to make the flower; I used an ancient yellow rub-on as leaves for the flower; I dry-embossed a border around the card; I tied a button to the pink ribbon; and I scattered bling everywhere.
If I was less of a slug, I'd go back and swap out one of the pieces of bling for a pearl, and I'd also have one of the diagonals: Yellow, Pearls, Ribbon and Pink. See how EASY this could be? Have you played yet? Why not? And if you have, why not play again? Just think of all that stash you could use!!!!
And remember, some of us are giving away some of our loot, so when you link up your card over at the original post at Shopping Our Stash, make sure to come back to the individual DT blogs to enter! My post from last week is here, where you'll need to link for a chance to win my schtuff.
Thanks for stopping by!
Monday, May 21, 2012
Bookmark Card
When I first saw the latest sketch over at Twisted Cards:

I knew what I'd do, and I only hoped I'd get to it before time ran out. :) I DID! Lookie:
 I saw the bookmark opportunity, and the horizontal elements were the perfect holder! The yellow paper I used for the background and the strip of green were remnants from another card that failed me. The bookmark is from the same pack of papers: Basic Grey Indie Bloom.
As an added bonus, I broke open my pack of Recollections tulle flowers and used two of them. I colored the center pearls with my R05 Copic marker. They needed to be red.
Here's what the card looks like with the bookmark removed:
 It stands alone! The flourish is an (until now) uninked Hero Arts stamp -- Fabulous Flourish. This qualifies this card as a last-minute entry to the Dust 'Em Off challenge over at A Blog Named Hero.
Oh, the bookmark is a PTI die.
So how fun is this for the recipient? A card, a bookmark, AND a reminder on the bookmark that the sender adores you. I think that's pretty perfect. :)
Thanks for stopping by!

I knew what I'd do, and I only hoped I'd get to it before time ran out. :) I DID! Lookie:

As an added bonus, I broke open my pack of Recollections tulle flowers and used two of them. I colored the center pearls with my R05 Copic marker. They needed to be red.
Here's what the card looks like with the bookmark removed:

Oh, the bookmark is a PTI die.
So how fun is this for the recipient? A card, a bookmark, AND a reminder on the bookmark that the sender adores you. I think that's pretty perfect. :)
Thanks for stopping by!