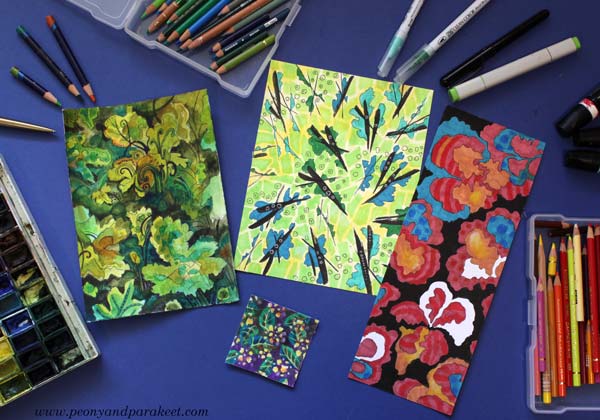
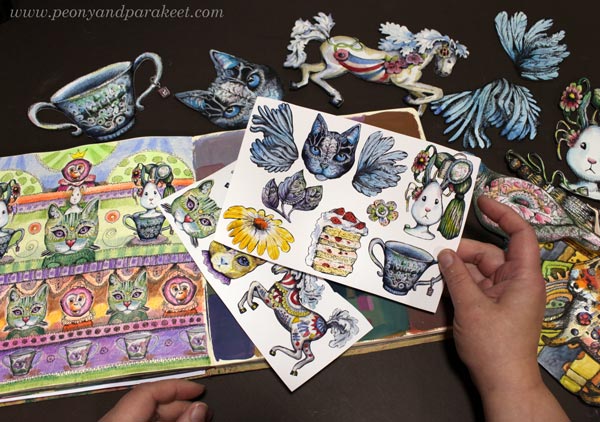
You Can Draw Patterned Papers!
This week, I answer the question: “I want to draw, but don’t know how or what! How to start?” My suggestion is to start with patterns. So, draw repeated shapes and make a collection of patterned papers that you can use for collage art, for example.
The No-Pencil Approach
I usually start my line drawings with a black thin-tipped drawing pen or a blue ball-point pen.
If you say you can’t draw, say goodbye to the pencil era. Don’t be one of those who sketch many parallel lines and erase all the time! A pencil is a crutch that might feel helpful, but trust that you can walk and pick up a pen. The first steps may be scary, but when you risk more, you draw better. Your line is not just a vague and neutral curve, but one that expresses your existence.
Let’s draw four patterned papers!
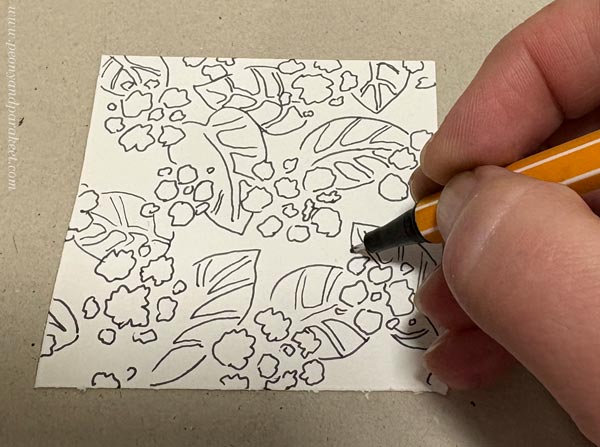
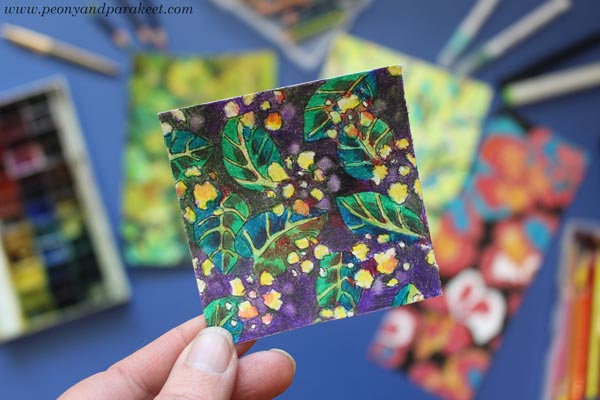
Paper #1 – Small Flowery Shapes
Pick a tiny piece of paper and a pen, not a pencil. When you can’t erase, you focus more and draw better. Small paper doesn’t need anything grand, so clusters of tiny flowery circles are enough, and if not, you can add some leaves.
I colored my pattern with colored pencils. The fun thing with colored pencils is that you can use an eraser to add more patterning. I have a precision eraser pen that is handy for small dots. If you use a bigger eraser, color the dots smaller after erasing.
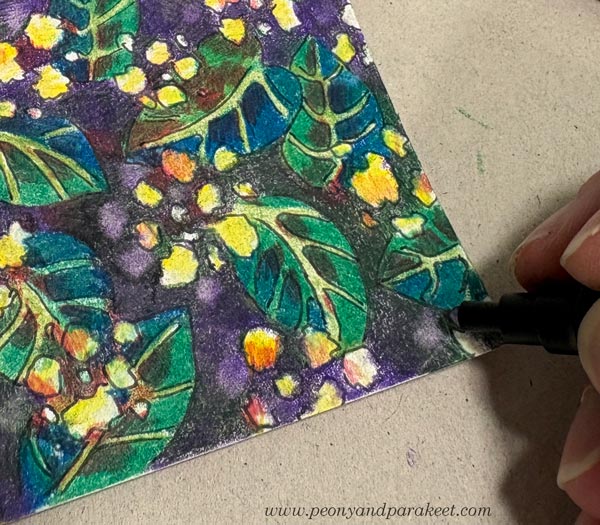
I love colored pencils because it’s easy to layer the colors to get a variety of tones.
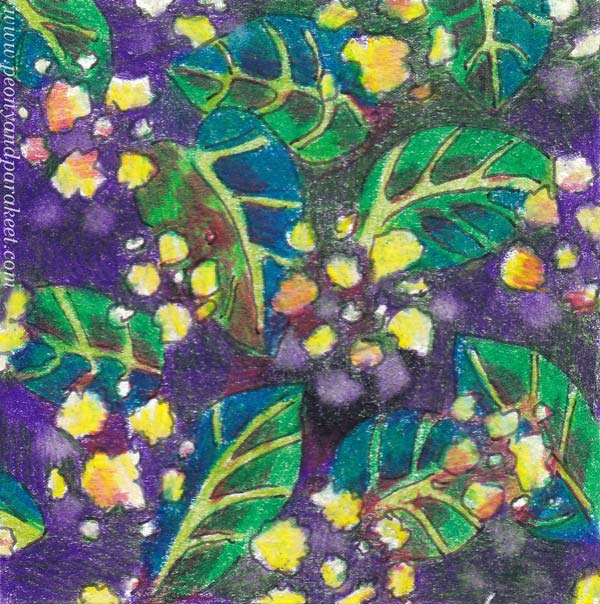
People may say: “It’s just a pattern, not a picture.” Or: “Tiny scraps mean nothing.” But I think it’s a packet of seeds, ready to grow and expand. The first paper may be a secret thing, something you glue on your notebook or planner, to freshen up all the mundane words like “To do” or “Meeting at 9 AM.”
Paper #2 – Big Nested Shapes
Let’s get bolder and pick a bigger paper! The shapes should now be so big that most of them are only partly visible.
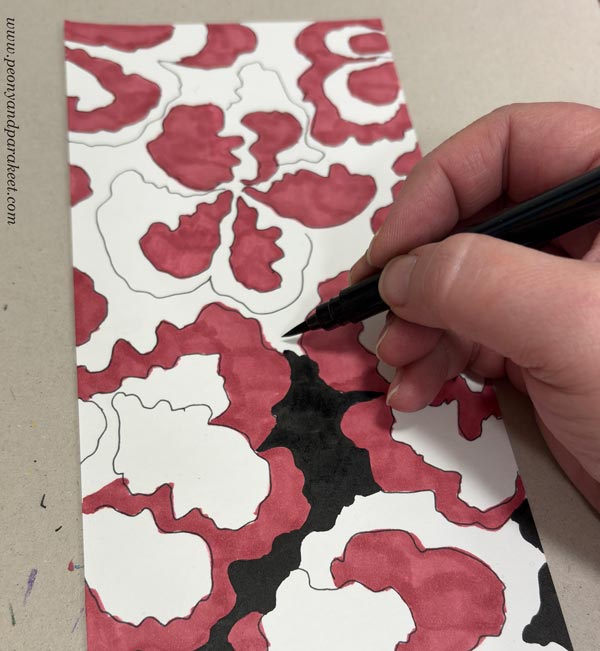
Draw nested shapes. The first lines define the inner shapes, and the second lines are the outer shapes that group them. These are fun to color! I used felt-tipped pens and strong contrasts.
Then I added circles, stripes, and some color variation with colored pencils.
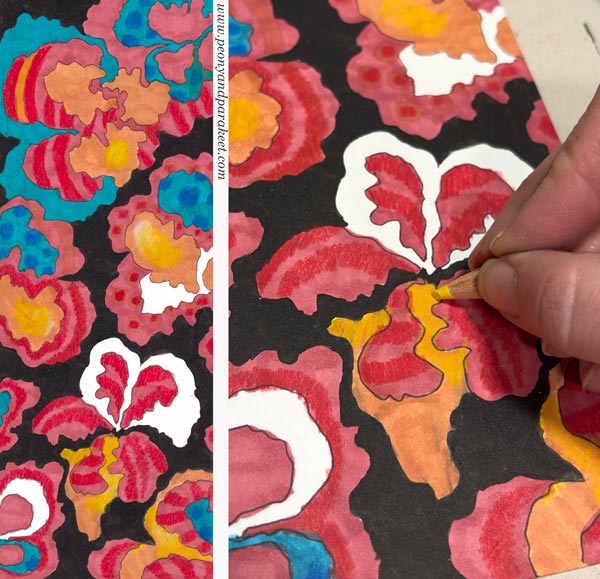
When the motifs are big and the colors bold, the shapes can be quite simple. The Finnish design company Marimekko has produced great patterns over the years. See inspiring examples here at Marimekko’s site!
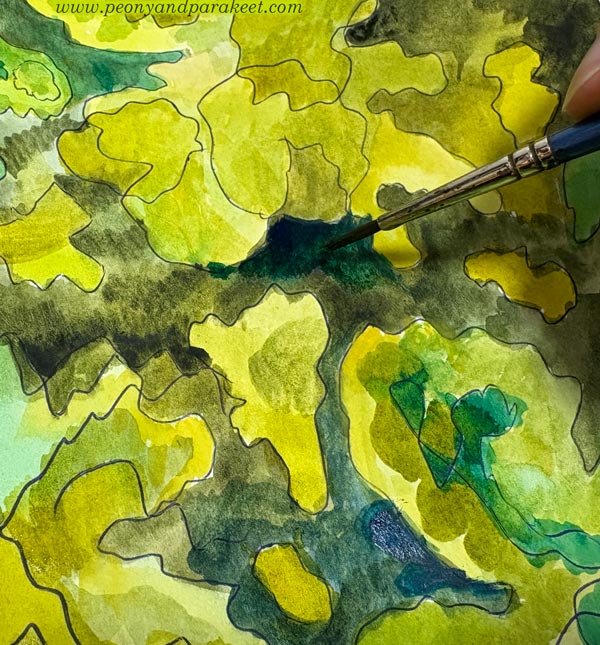
Paper #3 – Dynamic Strokes
Pick a pen with a brush tip. You can also use ink or watercolors with a paintbrush. Draw clusters of three intersecting strokes. Then draw curvy lines that travel around the strokes. The result is dynamic and looks like flying trees or the sight when looking up at the trees. You can add small, flowery shapes and circles too.
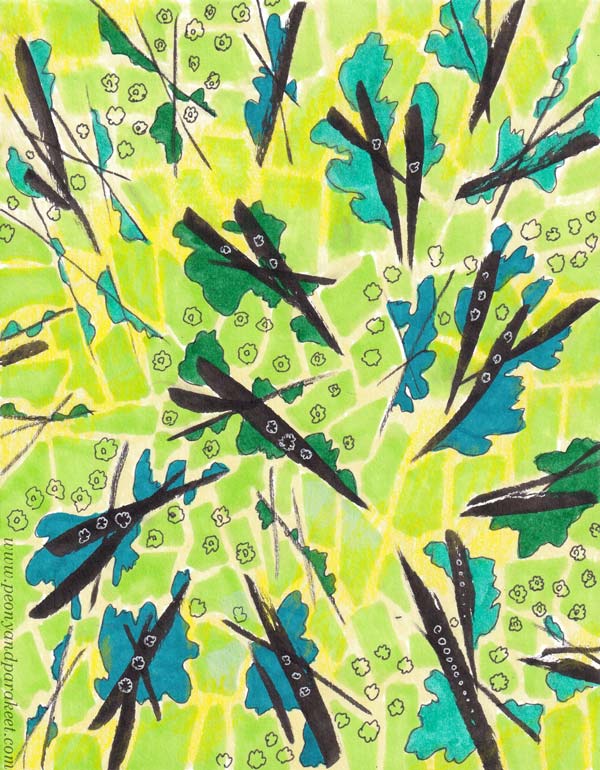
I also played with the background and added a free-form low-contrast grid that is like a city map or a tiled wall. The more you draw patterns, the more you will cluster and layer. This way, you will gradually move towards making expressive art rather than staying in the area of surface design.
Paper #4 Traveling Line
Now let your line travel more freely. Repeat what you have learned in the previous exercises, but do it in a more relaxing way, without too much care about what comes on paper. Think about the line being just a foundation for coloring.
When the first lines are just a foundation, you can add decorations like swirls and small dots, which are often seen in surface patterns. Some motifs might be more decorative than others, and the result becomes more like scenery than a design.
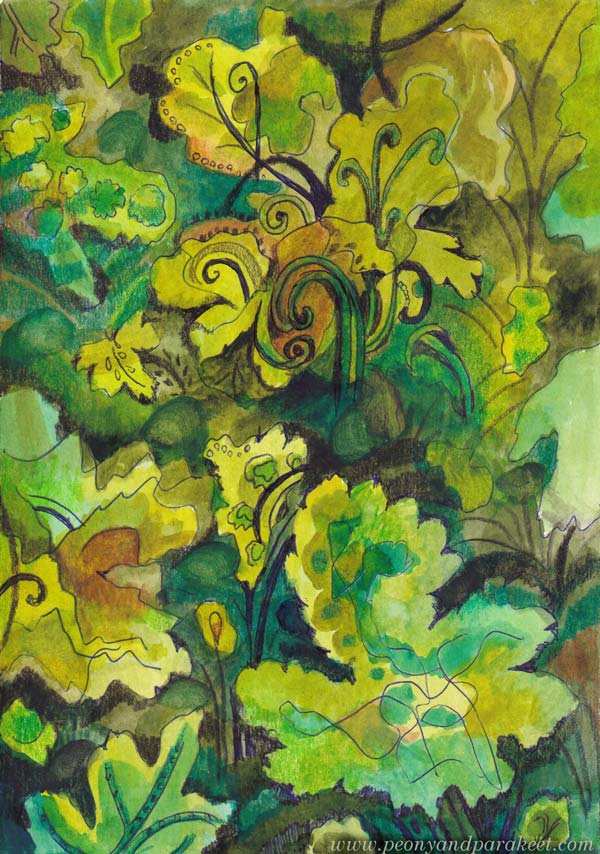
I used a regular ball-point pen for the first lines, then colored the paper with watercolors, and finally added decorative details with colored pencils.
To Draw Freely? – What It Is
Drawing means letting your pen take the lead. It means guiding it forward, meandering, and turning. It means traveling your own paths, daring to go back, and driving over and past them. When drawing freely, you don’t really care about the destination, but you want to enjoy the ride.
Your pencil should be firmly on the road, but not so heavily that it’s hard to move. A person who travels with their pencil and focuses on the line knows how to draw, unlike those whose line merely flits across the paper before fleeing. Drawing isn’t about the line representing something, but about the line having someone who treasures it.
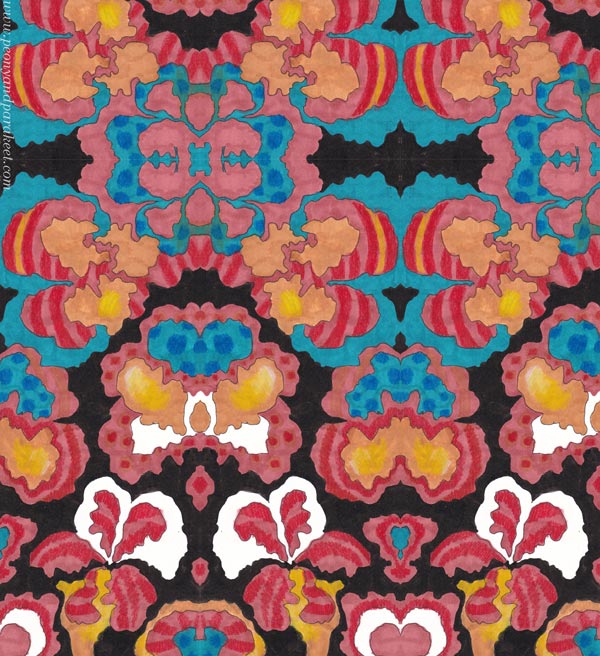
Extra – From Hand-drawn Paper to Digital Kaleidoscope Pattern
If you can use image processing software like Adobe Photoshop, scan or photograph your design and duplicate it several times. Flip some copies vertically and some horizontally to build a continuous kaleidoscope pattern.
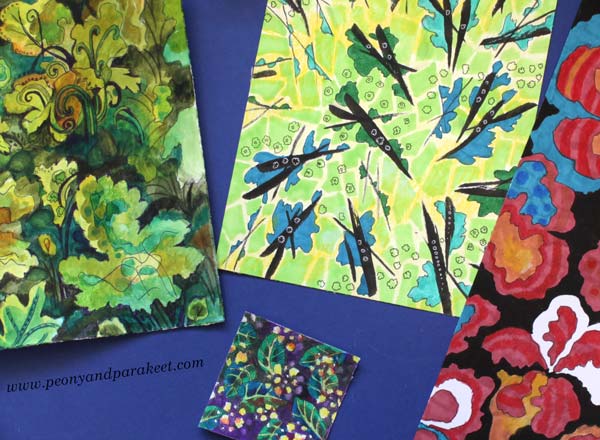
Draw and Use Patterned Papers -More Inspiration
Use your papers! See this project: Painterly Collage in Rut Bryk’s style
Create more paper and make collages: See the class Collageland
Draw freely: See the classes Intuitive Coloring, Joyful Coloring, and Mystical Minis
Modernistic Style – Create Abstract Art Step by Step!
This week, we take a practical dive into modernistic style. My favorite modernist painters are Birger Carlstedt (1907-1975) and Sam Vanni (1908-1992) from Finland. The most famous modernist was, of course, Pablo Picasso, who was Spanish.
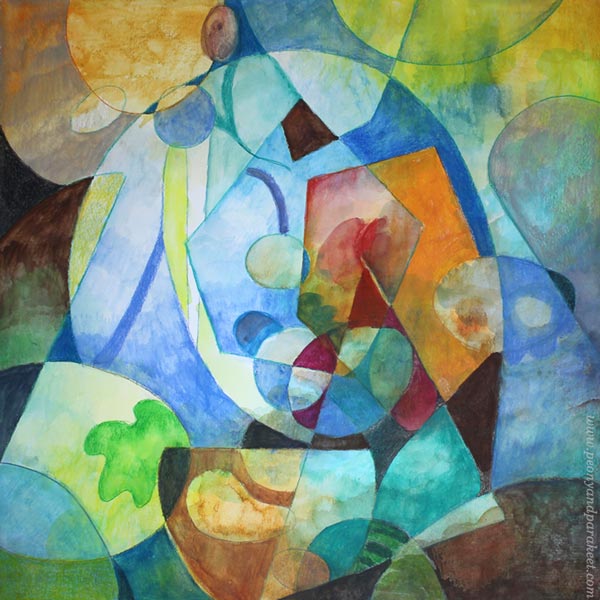
My piece has some figurative elements. Although it’s abstract, you can also see plants and light.
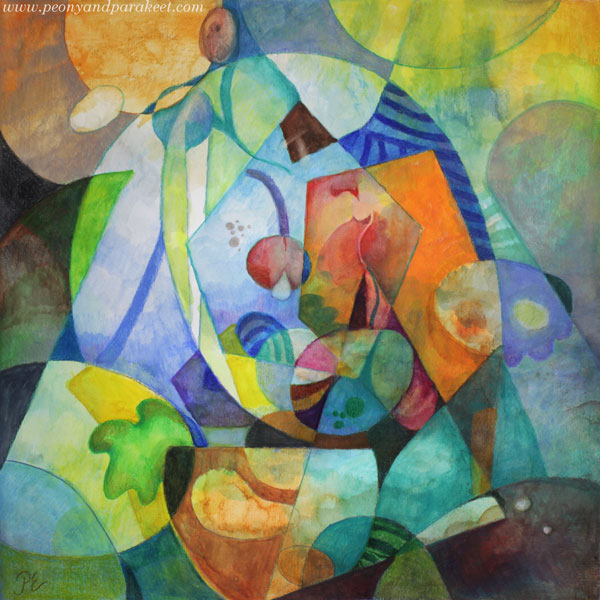
With this technique, you can create a fully abstract piece like Birger Carlsted (see examples from the past exhibition at the Amos Rex art museum), play with the perspective like Sam Vanni (see his artwork called Polydimensional Space), or use linework boldly like Pablo Picasso (see how he used strong outlines in his famous artwork Weeping Woman).
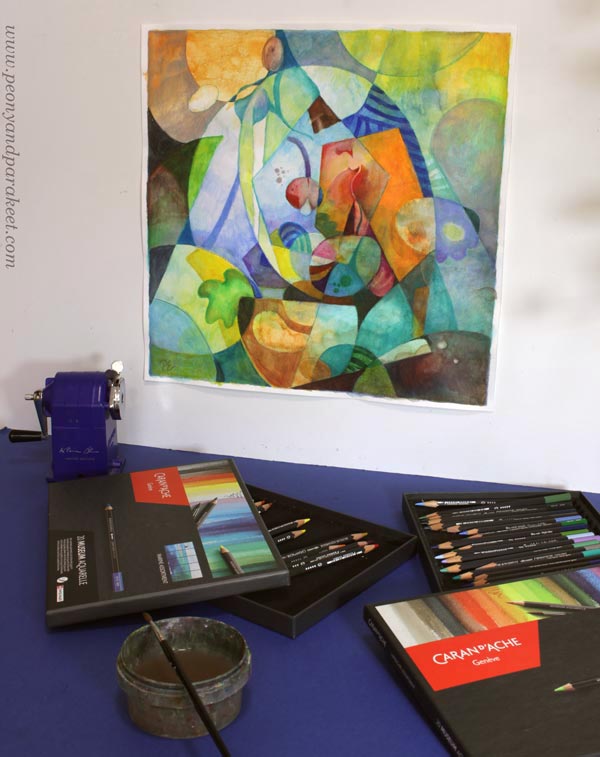
Supplies – Watercolor pencils or Use What you Have!
I created my piece on thick drawing paper with watercolor pencils and water. Its size is 16 x 16 inches (about 40,5 x 40,5 cm). You can choose your supplies and the size of your artwork freely.
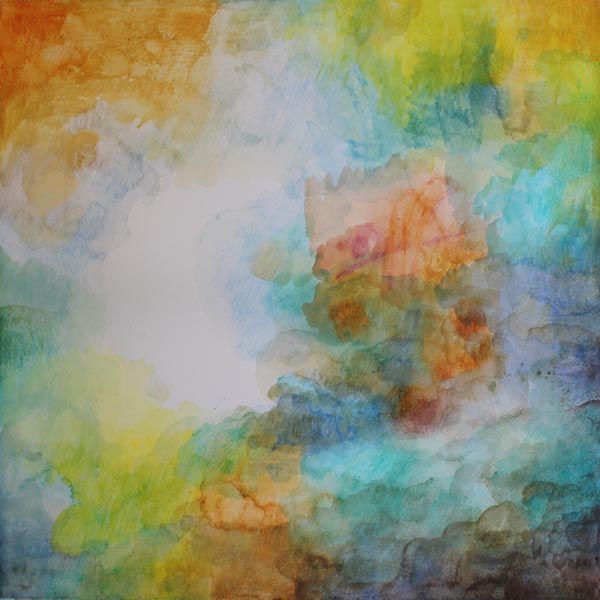
Step 1 – Fill the Background with Colors
Don’t overthink, but just start adding colors!
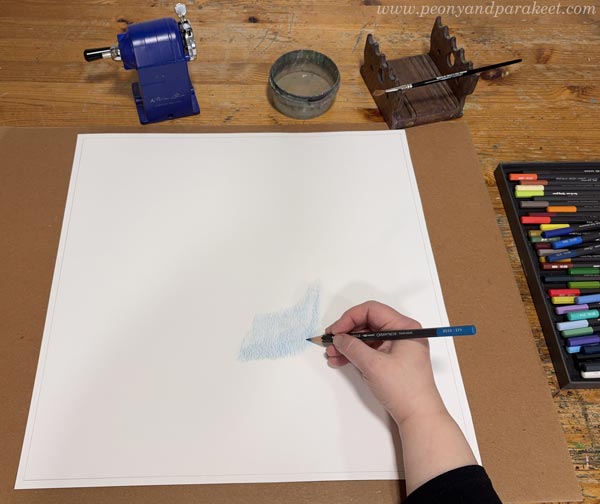
You can play with shapes if it helps you keep going.

The idea is to cover most of the paper. Leave an area near the center blank if you are not working with paints that have bright white. For colored pencils, watercolor pencils, and watercolors, the best white is always paper white. To get some white and other pale colors in your finished piece, leave a fairly large area white at this point. Later, you can reduce its size and break it into several shapes.
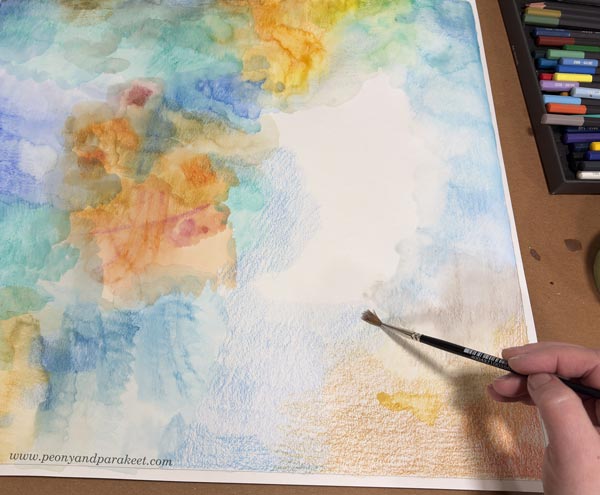
My paper is quite big, so I change the orientation once in a while. I move from one area to another by first coloring an area with a pencil and then spreading the color with water.
Add layers and darker colors. At the end of this step, your paper looks like a landscape without the horizon.
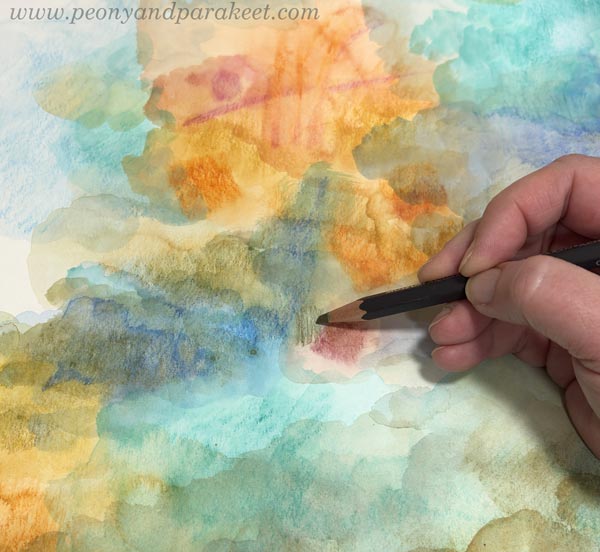
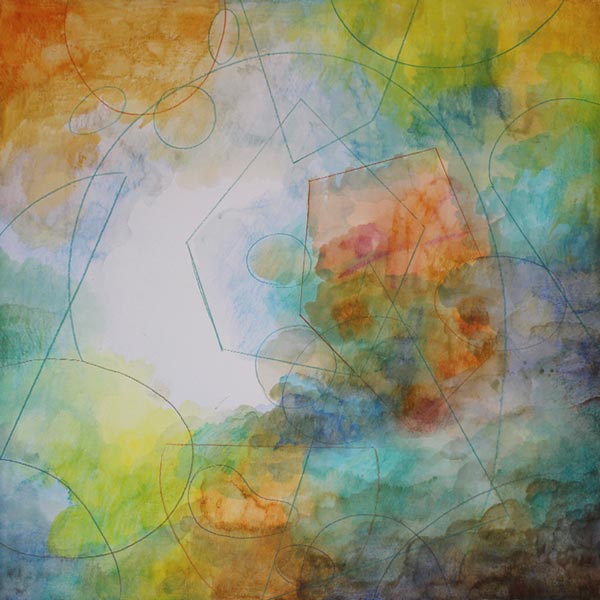
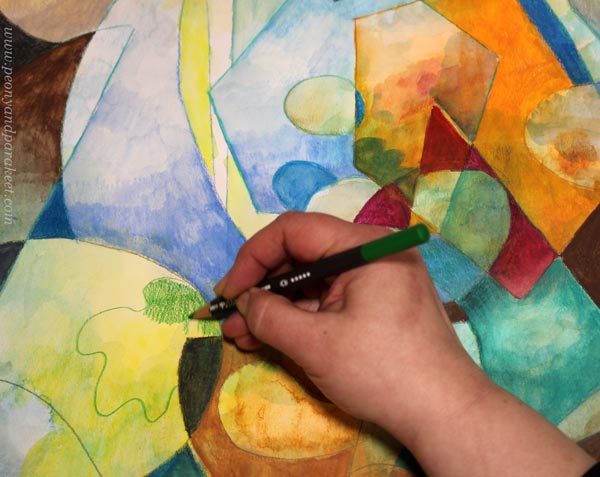
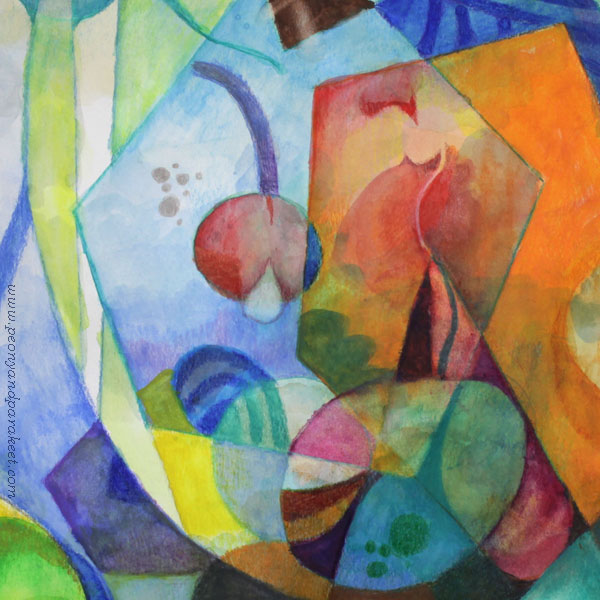
Step 2 – Draw the Shapes
Use the filled background as inspiration and draw intersecting geometric shapes. A ruler can be handy here.
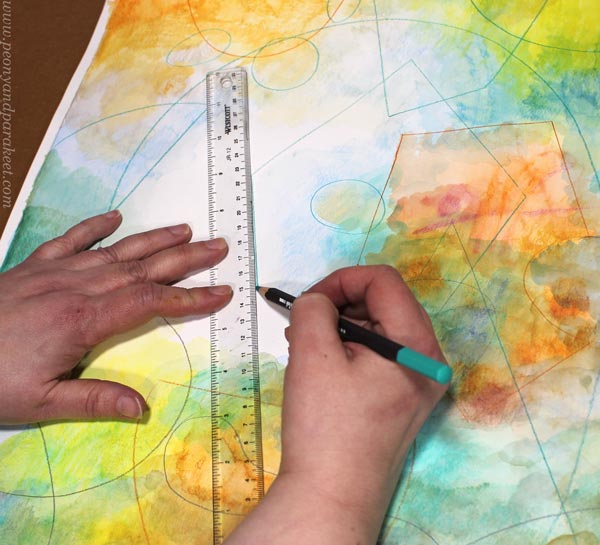
I use watercolor pencils for drawing the outlines.
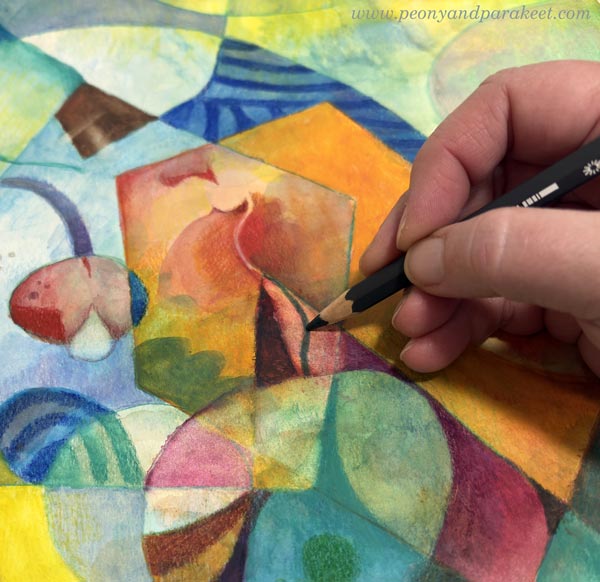
Step 3 – Color the Shapes
Modernistic art often has strong colors. Now add more color to the shapes.
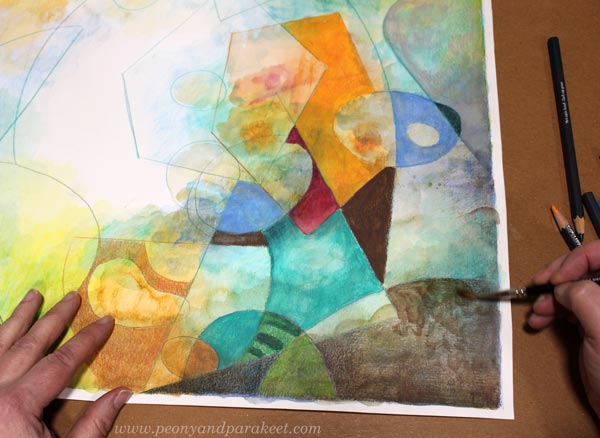
You can fill shapes creatively. Use stripes and add textures. Some shapes can have bold colors, others more muted. If there are nice details in the background, leave them visible.
You can also draw new geometric or more freeform shapes.
You can adjust the shapes, for example, by changing a straight line to a slightly curvy one.
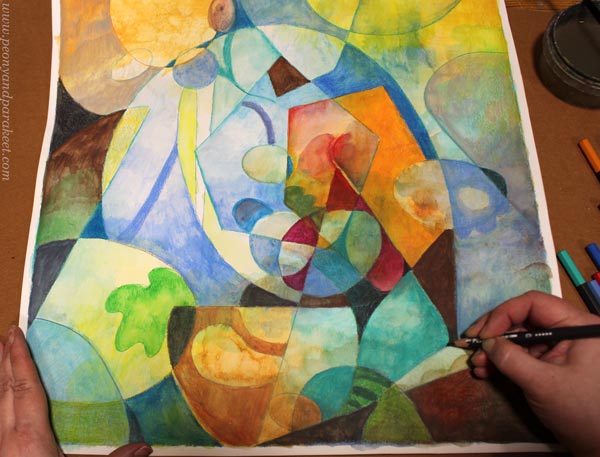
After you have gone through all the shapes, decide how abstract you want your piece to be.
I wanted to add a bit more realism: make more organic shapes and express light as well.
Step 4 – Finishing
Carefully go through every shape one more time. Don’t just look at the big picture and adjust the composition. Focus on a small area at a time, and make it as expressive as you can. Remember that a modernistic style is quite minimalistic and based on abstract expression. Refine existing colors and shapes instead of creating more and more new ones.
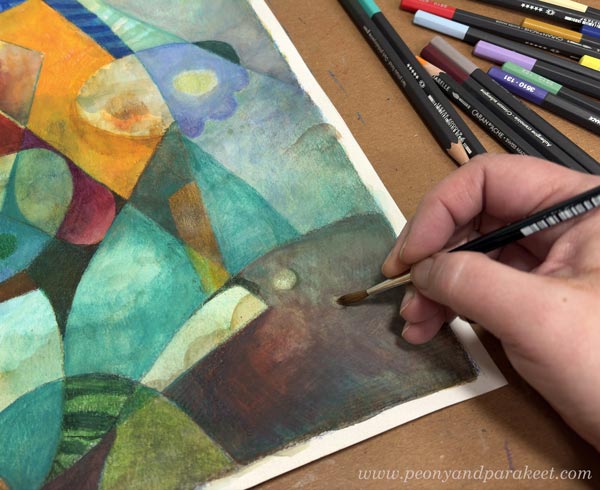
Make sure that all the shapes are not similar in size. I created small dots by removing paint with water and drew some thin lines.
Simple But Rich Modernistic Style
By starting with the background first, you can achieve subtle richness for a minimalistic look. Here’s a close-up where you can see the effects of the background layer.

It’s good to keep all the best things – bold colors and interesting details – in the center. Often, the composition needs nothing else!
The more you learn about different styles, the more unique your own style will be. A style is never just one thing, but a combination of many. I hope you enjoyed this exercise!
P.S. Check my class Mystical Minis for creating more modernistic abstract art!
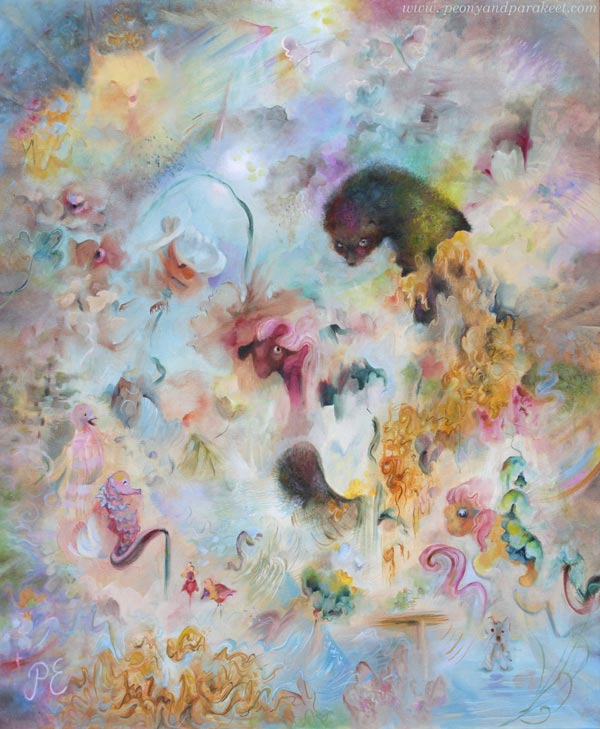
Can Playful Art Be Serious?
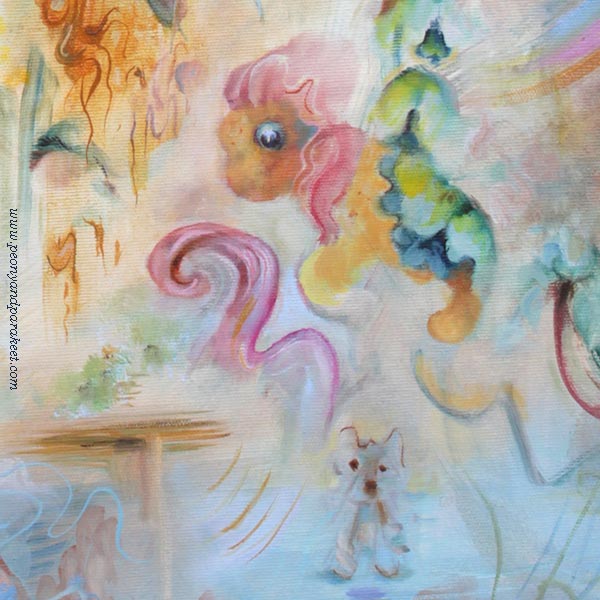
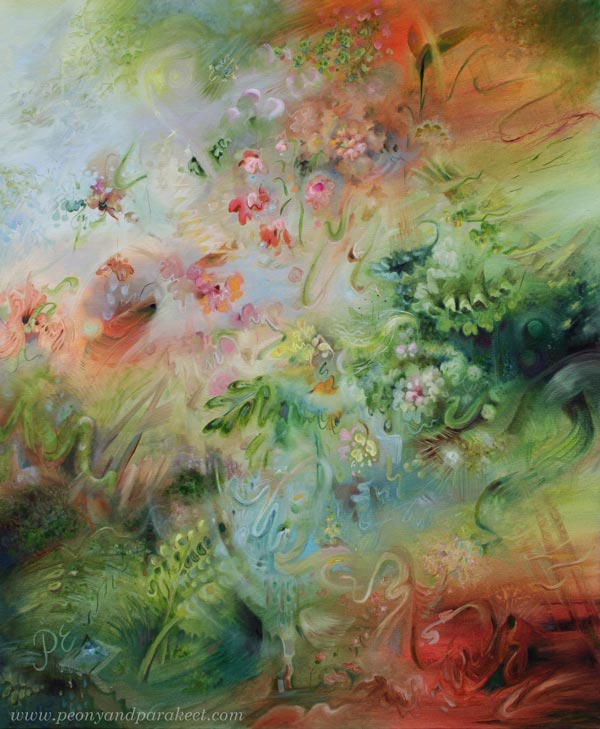
This week, I want to talk about my newly finished painting titled Fauna. This is one of my most peculiar pieces, filled with strange ideas. With this, I want to challenge us to ponder the question: Can playful art be serious?
Ideas Have a Mental Age
This painting combines many ideas. I tend to come up with all sorts of ideas quite easily, and I usually try to categorize them: some make it here to the blog, some become sketches in my planner, and others turn into courses. Only the most mature ones are usually included in the paintings.
But let’s think about this word: mature.
Ideas have a mental age. Some ideas are like those of a five-year-old, while others contain ancient wisdom. For a long time, I have tried to ensure that my best ideas are “sensible adults”.
Fauna’s Ideas
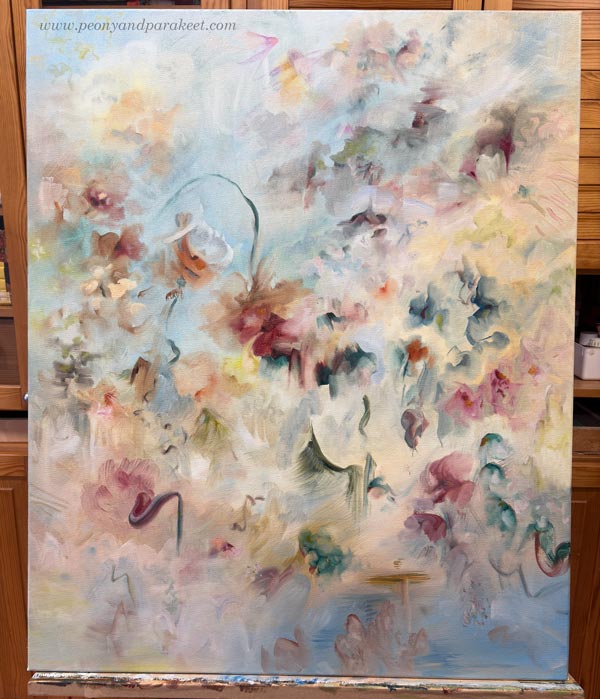
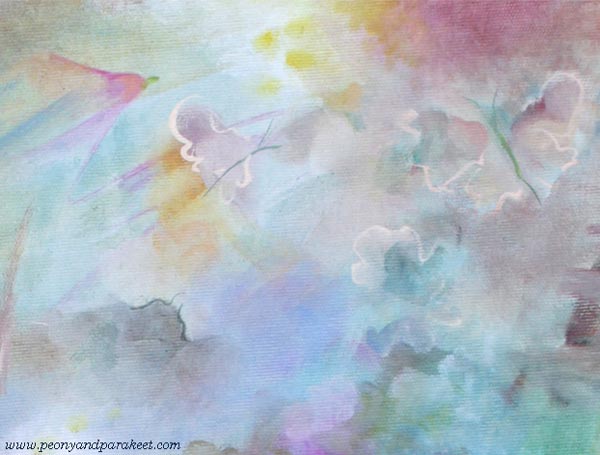
Fauna started from an old idea: the Baroque style and historical ceiling murals. So I thought that the painting could feature flowers and have plenty of light blue. Here’s how it started:
But then I heard my inner child whisper that I should include an animal: “Fur is so wonderful to paint. Let’s include something like a ferret!” The adult me wondered, “Who would want a painting featuring a weasel?” But you know, some ideas are like tiny butterflies that appear and vanish in an instant, while others are like moose that take over your entire mind. And this was a “moose idea.” It wouldn’t leave me alone, so fine —let there be a weasel of some kind!
But what else could be included?
Words help when I am brainstorming. I read through various word lists and wait for the moment my intuition says “Bingo!” That’s how I found the word “hunaja” – honey. I thought about the intricate swirls of the Baroque style and the way honey drips, and I boldly added them to the painting.
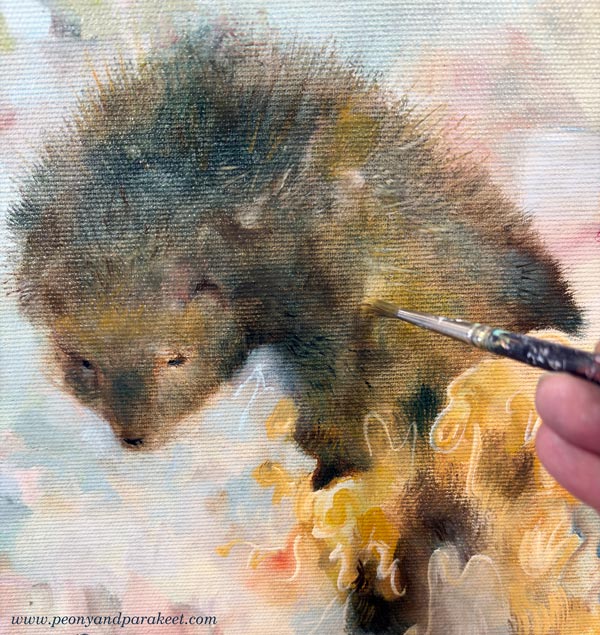
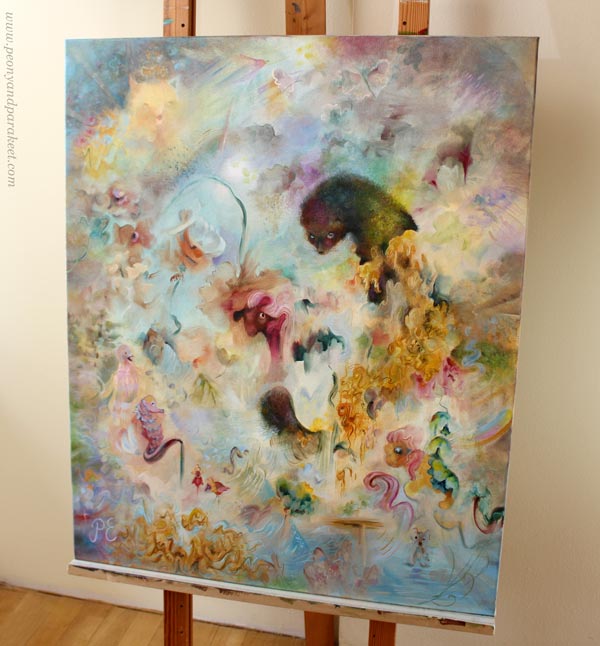
Here I am painting the fur. I use not only short strokes, but also paint small patches with different tones. Layering is the key!
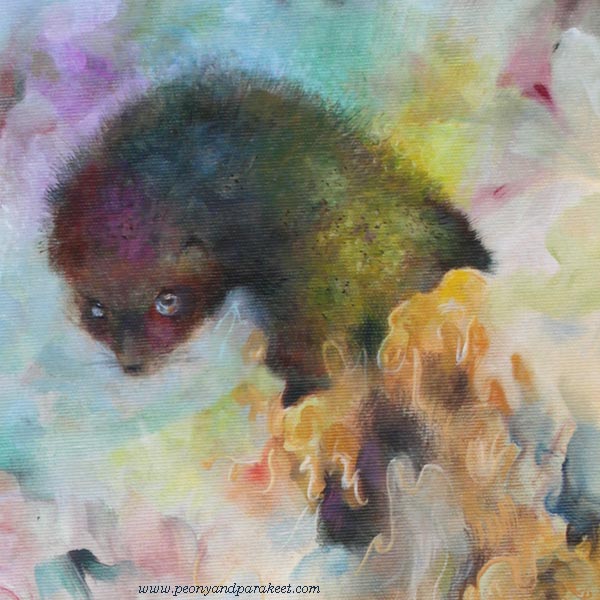
In the final version, the fur is softer and shorter, and lit by a rainbow. It took some time to decide whether the fur should be spiky or softer.
With the idea of painting honey, I found myself on a “mad path” where I stopped categorizing my ideas and challenged myself instead: could I create a painting that looks like a floral piece from a distance, but reveals a more playful character upon closer inspection? Could the animal theme lead toward animal figures—even toys? I wanted to achieve a purity of style that isn’t tied to a single era, but rather to my own way of dealing with shapes and lines.
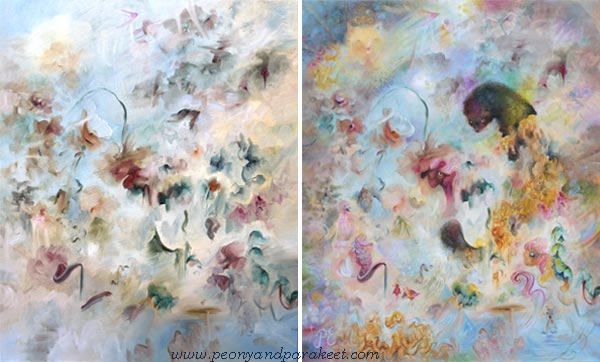
Here you can see the beginning and the end side by side.
Playful Art – Drawing Animals
I have always loved animals and have drawn them a lot. Drawing with a pen is much easier than drawing with a brush.
Animal Inkdom and Magical Inkdom have been highlights of my course creation because, while making them, I decided to believe that everyone wants to draw animals. That mindset brought a lot of confidence and joy to the process, which also translates into the atmosphere of the courses.
I have had so much fun with all the animals drawn in those courses. My father used to draw with quite a similar technique, so I have continued on his path here.

The Playfulness is in the Details
Fauna is full of playful details. Many of them are quite subtle, barely noticeable. Here are some detail pics.

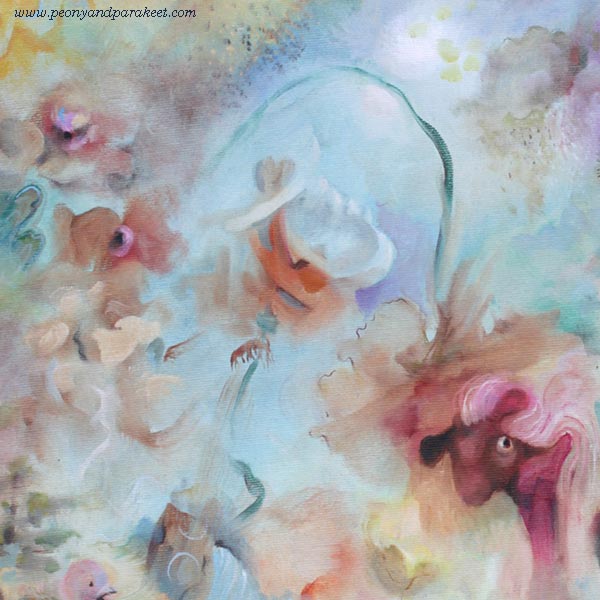

I see myself in this painting—all the versions of me at different ages, with ideas of all ages.
Even if Fauna was a challenge to create, it was also fun. I think I will create more of this kind of playful art.
Age of Ideas – Just Playing or Only Focusing on the Serious Side
This painting process made me reflect on how people who start making art often fixate on the “age” of their ideas. Some decide they are just having fun and playing. Others believe that skills—and thus art—can only be born through realism. But as artistic thinking and skills develop, there is an opportunity to combine the playful with the more serious. It is possible to be a child, an adult, and an elder all at once. Art doesn’t need to be narrowed down, because creating is a search not just for oneself, but for a broader understanding of humanity.
Fauna is a bit different from Halo – the painting that I showed last week.
See the blog post about creating this painting
See more pics and a video