Dynamic Visibility Overview
The tutorial details the main settings of the Dynamic Visibility for Widgets and Sections module of the JetEngine plugin to manage visibility conditions for meta fields, posts, listings, and relations in Elementor and Gutenberg.
Dynamic Visibility is a JetEngine module intended to configure the content visibility logic according to custom conditions. Conditions can be mixed, but shouldn’t contradict each other. The feature is accessible through Elementor widget settings, Gutenberg dynamic content, and Bricks element settings.
Dynamic Visibility is powered by custom field values, user-specific data, etc., and applies to content sections, widgets, blocks, elements, and columns. It can be used to show and hide certain page elements on the front end by setting restrictions.
Module Activation
The module can be activated in the WordPress Dashboard > JetEngine > JetEngine > Modules > Default Modules tab by enabling the Dynamic Visibility toggle.

Dynamic Visibility for Elementor Widgets
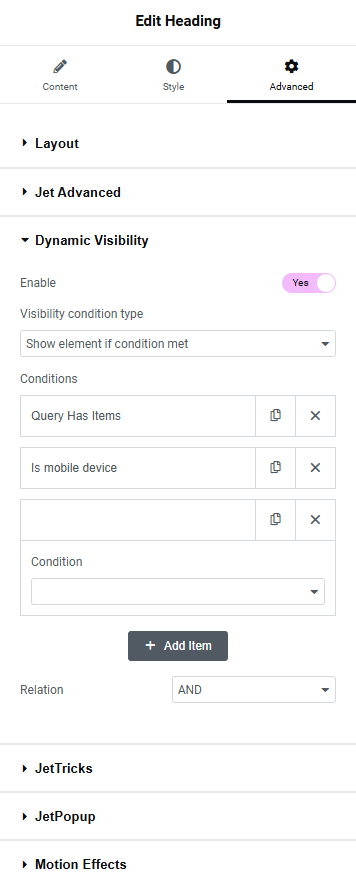
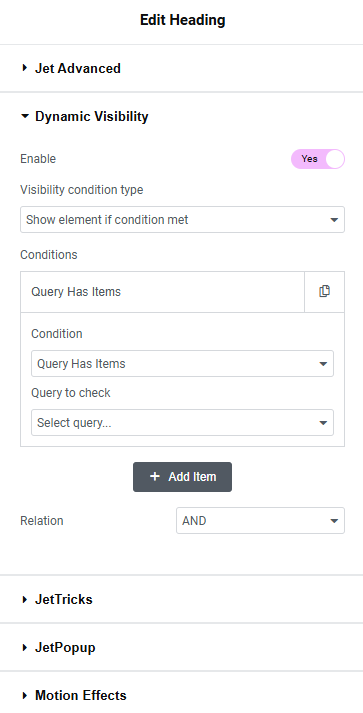
The Dynamic Visibility tab is located in the Advanced section of any Elementor widget or other elements, such as Sections or Containers. To activate the Dynamic Visibility functionality, the Enable toggle should be enabled.

After that, the Dynamic Visibility settings will be available.
Dynamic Visibility Settings
The Dynamic Visibility settings section in Elementor is presented by the Visibility condition type drop-down list, Conditions field, and Relations drop-down list.

The Visibility condition type drop-down list has two options:
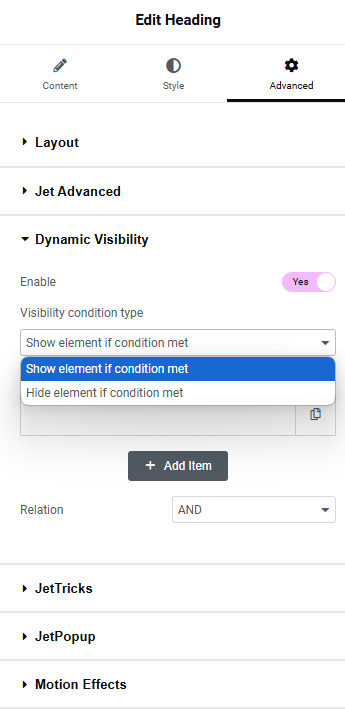
- Show element if condition met — the element will be visible if the adjusted conditions are satisfied;
- Hide element if condition met — the element will be hidden if the conditions are fulfilled.
The Conditions field allows the selection of different groups of conditions. One or several conditions can be applied to every element.
The “+ Add Item” button creates a new Condition. The conditions can be duplicated by hitting a “duplicate” button (a doubled paper sheet icon) or deleted by pressing the “cross” button. All conditions are described below in the Conditions chapter of this overview.
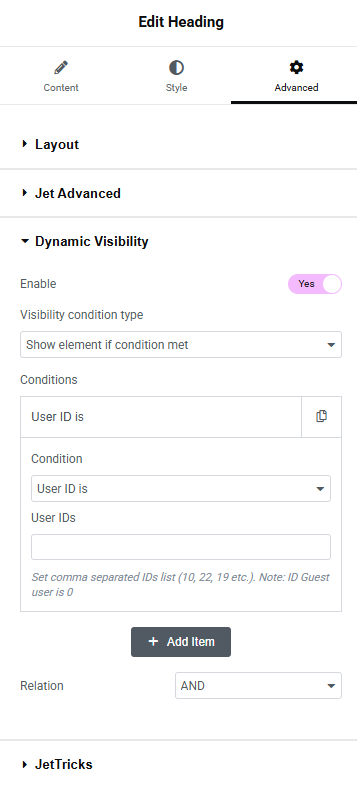
The last drop-down list is Relation, and it has only two options:
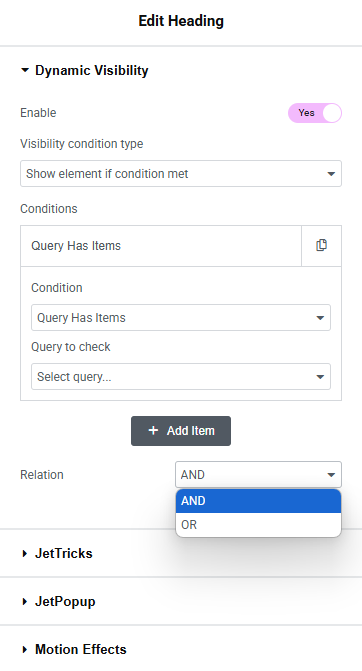
- AND — a visibility condition type option that works only if all the defined conditions are met;
- OR — works if any of the defined conditions are met.
Conditions
The Conditions presented in the corresponding drop-down list are divided into the following sections: Posts, User, Date & Time, JetEngine specific, and more.
General сonditions
The General section in the Conditions drop-down list includes such options:
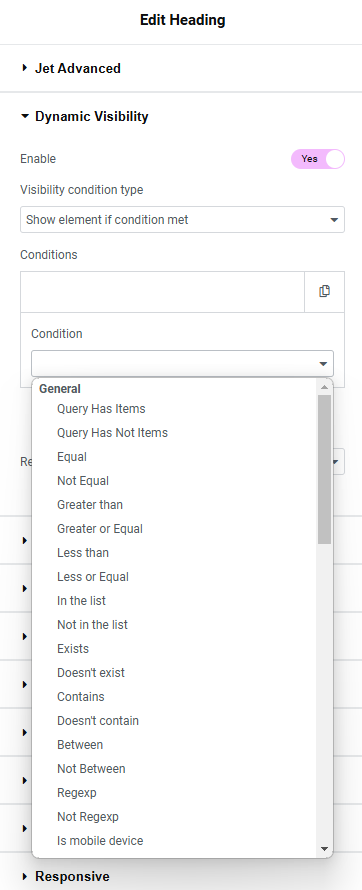
- Query Has Items and Query Has Not Items — turn on the Query to check drop-down list to select a query with or without the necessary items accordingly;
- Equal, Not Equal, Greater than, Greater or Equal, Less than, and Less or Equal — allow setting the way the values will be compared. If a condition is met, the element will be shown or hidden;
- In the list and Not in the list — the dynamic tags for the “Checkbox,” “Select,” and “Radio” meta fields. The element will be shown or not if a user chooses from the list the value typed into the Value text area accordingly;
- Exists and Doesn’t exist — allow the element to appear or not on the page only if the chosen meta field is filled or filled with data;
- Contains and Doesn’t contain 一 allow the element to be shown or not, only if the selected meta field contains or doesn’t contain the data typed into the Value text area;
- Between and Not Between 一 allow displaying elements with values between or not between two values accordingly;
- Regexp and Not Regexp 一 allow displaying or not displaying elements if the element matches or does not match the regular expression value;
- Is mobile device 一 allows displaying elements on mobile devices only.
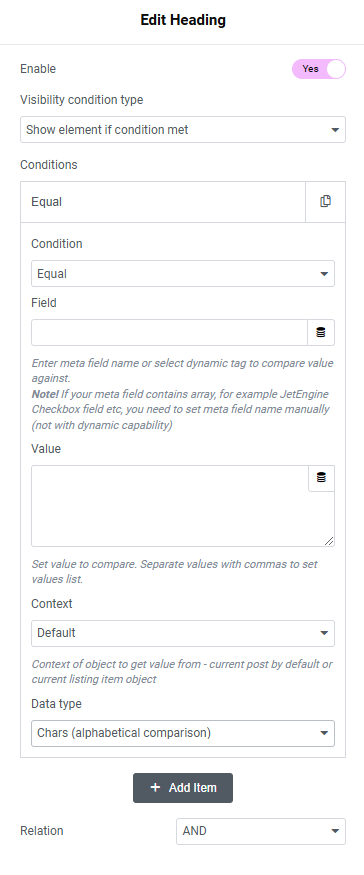
If chosen, some conditions can activate additional fields:
- Field — allows typing a field name or choosing the option from the drop-down list by pressing the “Dynamic Tags” button. More details about the options from this drop-down list are described in the Dynamic Tags Overview;
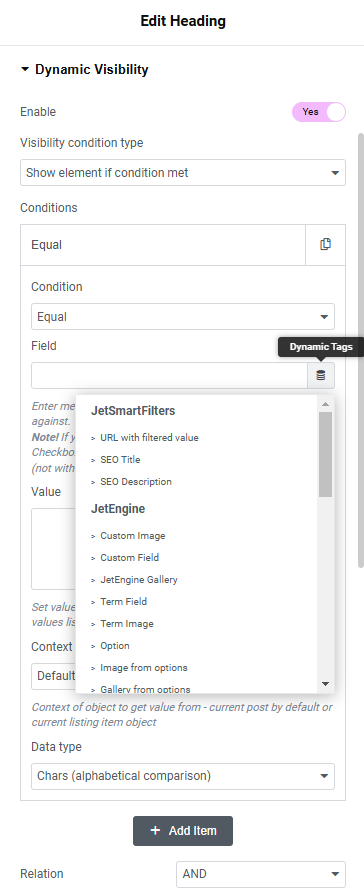
- Value — a field that allows setting values or value lists (numbers, letters, words, phrases) to compare data. Multiple values should be separated by commas;
- Context — a dropdown menu that has two options:
- Default — to get the value from the current post by default;
- Current listing item object — to get the value from the current listing item object.
- Data type — a dropdown menu that allows specifying what kind of data is entered into the Value text area:
- Chars (alphabetical comparison) – alphabetical data. Letters are compared according to alphabetical order. In it, every letter has its sequence number (“b” has priority over “a,” for example);
- Numeric – whole numbers only;
- Datetime – date and time are compared according to their position in the timeline.
JetEngine specific conditions
The JetEngine specific section contains such options:
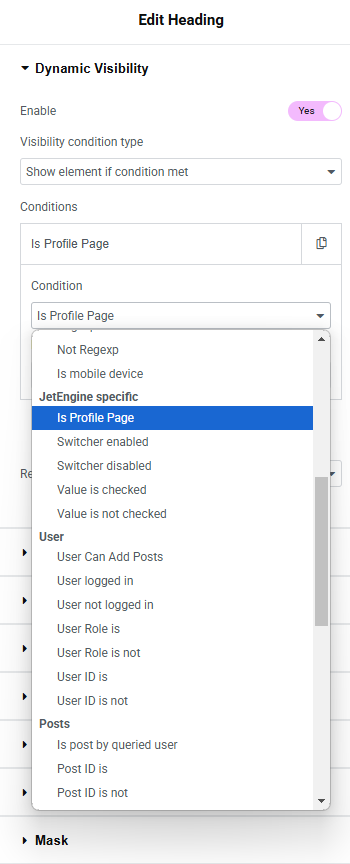
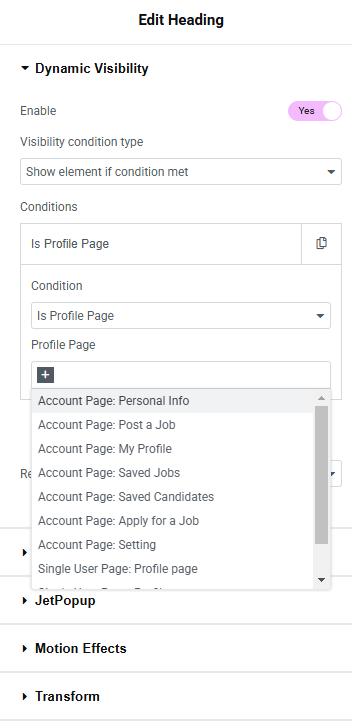
- Is Profile Page — allows the element to be displayed only on the user’s profile page. It also provides for the selection of specific Account and Profile subpages;
- Switcher enabled and Switcher disabled — two conditions for the JetEngine “Switcher” custom fields that, if selected, allow the element to be shown if the switcher in the mentioned Field is enabled or disabled;
- Value is checked and Value is not checked — two conditions for the “Checkbox” custom meta fields that, if selected, allow the element to be shown if users tick the previously set Field and Value.
User conditions
The User section contains such options:

- User meta is — allows the element to be shown if users have a specified Value in the meta Field. Also, a custom field can be added to users via a Meta Box;
- User has required field — allows users to enter fields that need to be checked in the Fields List textarea. It can be default WordPress fields (e.g., ‘first_name’, ‘last_name’, ‘description’, ‘user_nicename’) or custom meta fields added via meta boxes. The condition will be met if users have the provided data in all the specified fields;
- User meta is equal to post meta (put post meta key into value) — shows the element if user and post metadata have the same values. This metakey should be entered into the Value field to compare its value with the user metadata;
- User Can Add Post — the element will be visible to users who have permission to publish this type of post. In the Profile Builder maintenance window, some users can be restricted from publishing certain post types. The restricted post-type slug should be inserted into the Value field. More details can be found in the How to Limit User’s Access with Profile Builder tutorial;
- User logged in / User not logged in — allows the element to be shown only to authorized/non-authorized users. The usage example is described in the How to Show Content Only to Authorized Users tutorial;
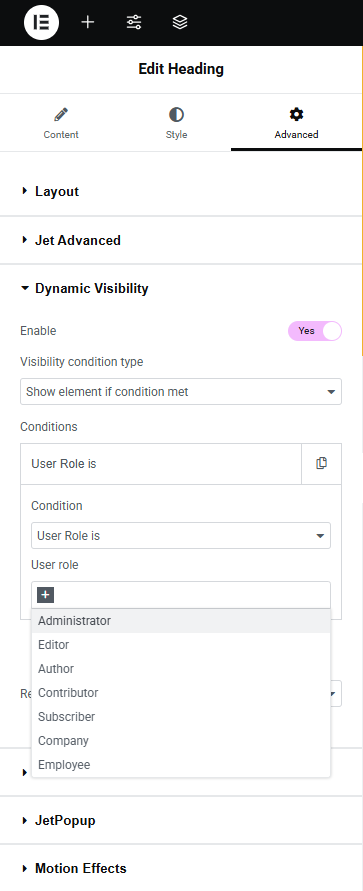
- User role is / User role is not — allows the element to be shown only to the users who have/haven’t a specific role assigned to them. The user roles can be specified in the User role drop-down list. More information about assigning roles to users is described in the How to Create a New User in WordPress Dashboard tutorial;
- User ID is / User ID is not — allows the element to be shown only to the users whose ID numbers are/aren’t entered in the User IDs field.
Posts conditions
The Posts section contains such options:
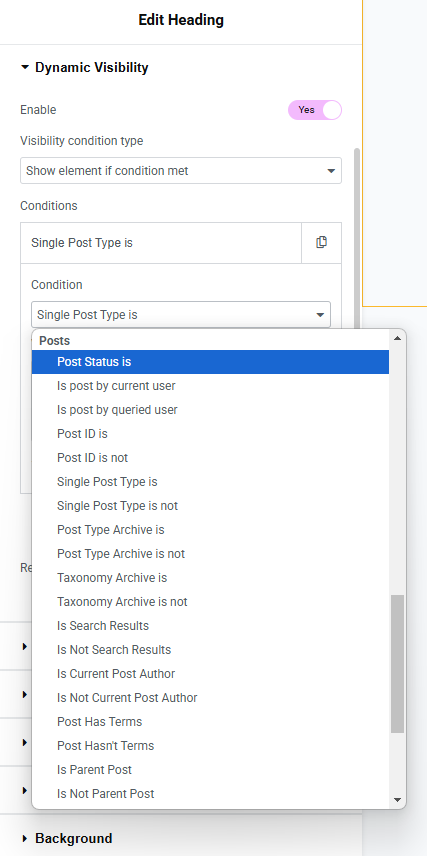
- Post Status Is — allows the element to be shown only on pages with the specified status. The required status should be entered in the Value field (e.g., “draft”). Several statuses should be separated by commas;
- Is post by current user — an option that allows the element to be shown only on pages built by the current user. It can be used on the User Account page;
- Is post by queried user — allows the element to be shown only on pages built by the queried user. It can be used only on the Profile Builder pages and in the listing for users;
- Post ID is — the element will be shown only on the pages mentioned in the Value area. The page ID should be typed there (the number only). Every post or page has its unique ID number. To find it, one can open the post or page and look at its URL. The number after “post=” will be the post ID. If there’s more than one post, the values should be separated with commas (no additional spaces needed);
- Post ID is not — the element will be shown on all the pages except for the ones mentioned in the Value area;
- Single Post Type is — for this condition, one should type in the post type slug to the Value text area. The element will be shown only on the pages that are referred to that post type. To find the necessary slug, one should go to WordPress Dashboard > JetEngine > Post Types and look at the Post Type Slug column;
- Single Post Type is not — the element will be shown for all posts except posts of the post type with a slug typed in the Value text area;
- Post Type Archive is — shows the element only on the post type archive with a slug entered in the Value text area;
- Post Type Archive is not — the element is visible for all post type archives except the ones with a slug entered in the Value text area;
- Taxonomy Archive is — shows the element only on the taxonomy archive, with a slug entered in the Value text area;
- Taxonomy Archive is not — the element will be shown for all taxonomy archives except the one with a slug entered in the Value text area;
- Is Search Results — shows the element only on the Search Results Archive page;
- Is Not Search Results — shows the element everywhere except the Search Results Archive page;
- Is Current Post Author — displays the element only if the current user is the post author;
- Is Not Current Post Author — displays the element if the current user is not the author of the post;
- Post Has Terms — shows the element if a post has assigned terms;
- Post Hasn’t Terms — shows the element if a post doesn’t have assigned terms.
Hierarchical conditions for posts
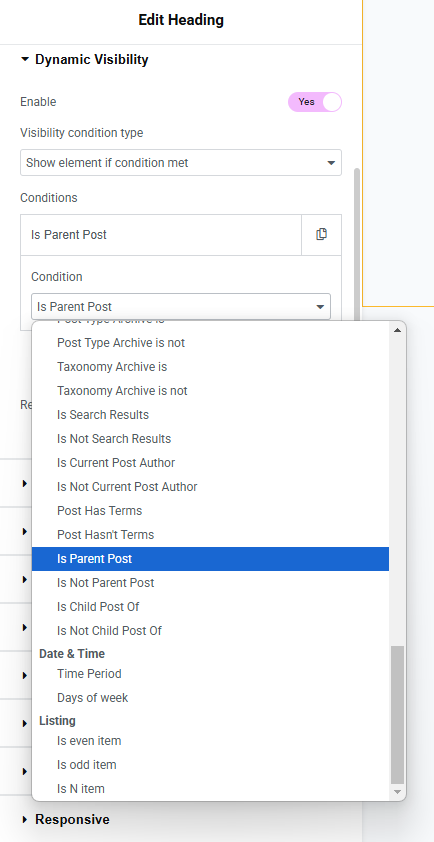
The Is Parent Post, Is Not Parent Post, Is Child Post of, and Is Not Child Post of conditions work for the Custom Post Types (CPTs) with the WordPress Dashboard > JetEngine > Post Types > Hierarchical toggle enabled.
This toggle allows for making the post type hierarchical and setting parent and child posts.

To be able to attach a parent to a post, one should add the “Page Attributes” option in the Supports drop-down list.

Then, one can go to the hierarchical post type, click “Quick Edit” of one of the posts, select the Parent post, and press the “Update” button.

Date & Time conditions
This section contains two conditions:
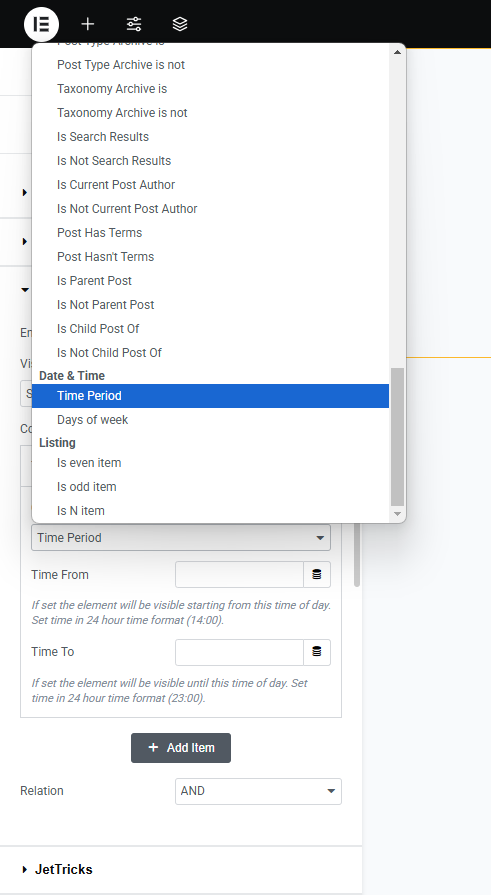
- Time Period — the element will be shown only at specified time periods. The preferred time should be entered into the Time From and Time To fields in the 24-hour format (for example, 23:00). Also, the dynamic tags can be used, e.g., values from the custom fields;
- Days of week — the element will be shown only on specified days of the week. The desired weekdays can be selected in the Days of Week dropdown menu.
The usage examples are described in the How to Set Dynamic Visibility Based on the Days of the Week tutorial.
Listings conditions
These conditions can be applied to the elements in the Listing templates. For example, by setting the “Is even item” and “Is odd item” conditions, one can alternate different elements in the listing. Also, be aware that these conditions are applied only to the nearest listings and aren’t applicable from the nested listing to the parent and vice versa.
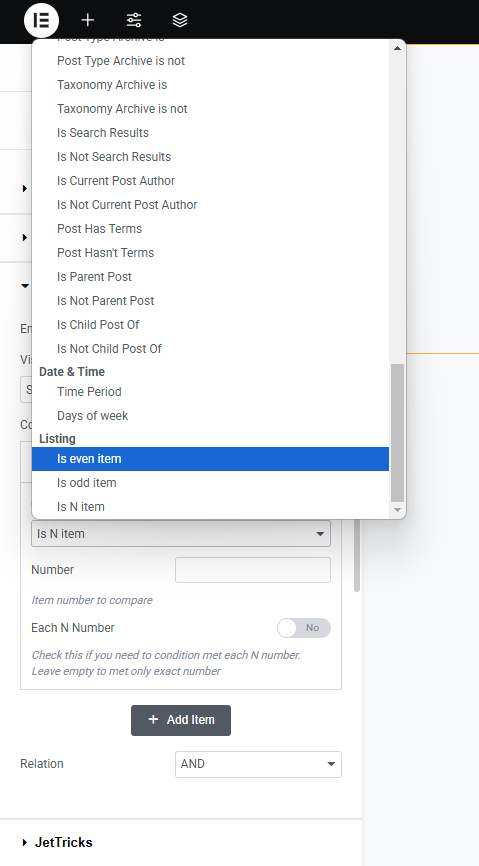
- Is even item — shows the element if the Listing Item in the Listing Grid widget or block is even (second, fourth, etc.);
- Is odd item — shows the element if the Listing Item in the Listing Grid widget or block is odd (first, third, etc.);
- Is N item — shows the element if the Listing Item is N in a row. For instance, if the Number is set to “3,” the element will be shown if the Listing Item is third in a row. If the Each N Number toggle is activated, the element will be displayed for every third item.