In this tutorial, we are going to learn about the General Settings in Rank Math. The General Settings contain the settings that affect the overall SEO efforts of your website and your links, images, and many other things.
That is why it is important to understand what the General Settings are, what they do, and how to configure them for the best results.
Let us begin.
You can reach Rank Math’s General settings through the WordPress menu. Hover over the Rank Math’s menu entry, and from the options that appear, select General Settings.
Once you’re there, you’ll notice that the General Settings are divided into many other settings or sections. This is to help find the exact setting you’re looking for faster.
To find settings, you can use the sections on the left, and we’ve also included a handy search bar, which is even faster if you know what you’re looking for. Here is how it works.
Anyways, you should use the method you prefer. And if any of the settings discussed in this article isn’t available on your screen, then check if you’re using the Advanced Mode of Rank Math, as some of the settings are available only in the Advanced Mode. Here are all the settings in the General Settings of Rank Math.
Table of Contents
You can click any of the links to be taken to that section of the settings easily.
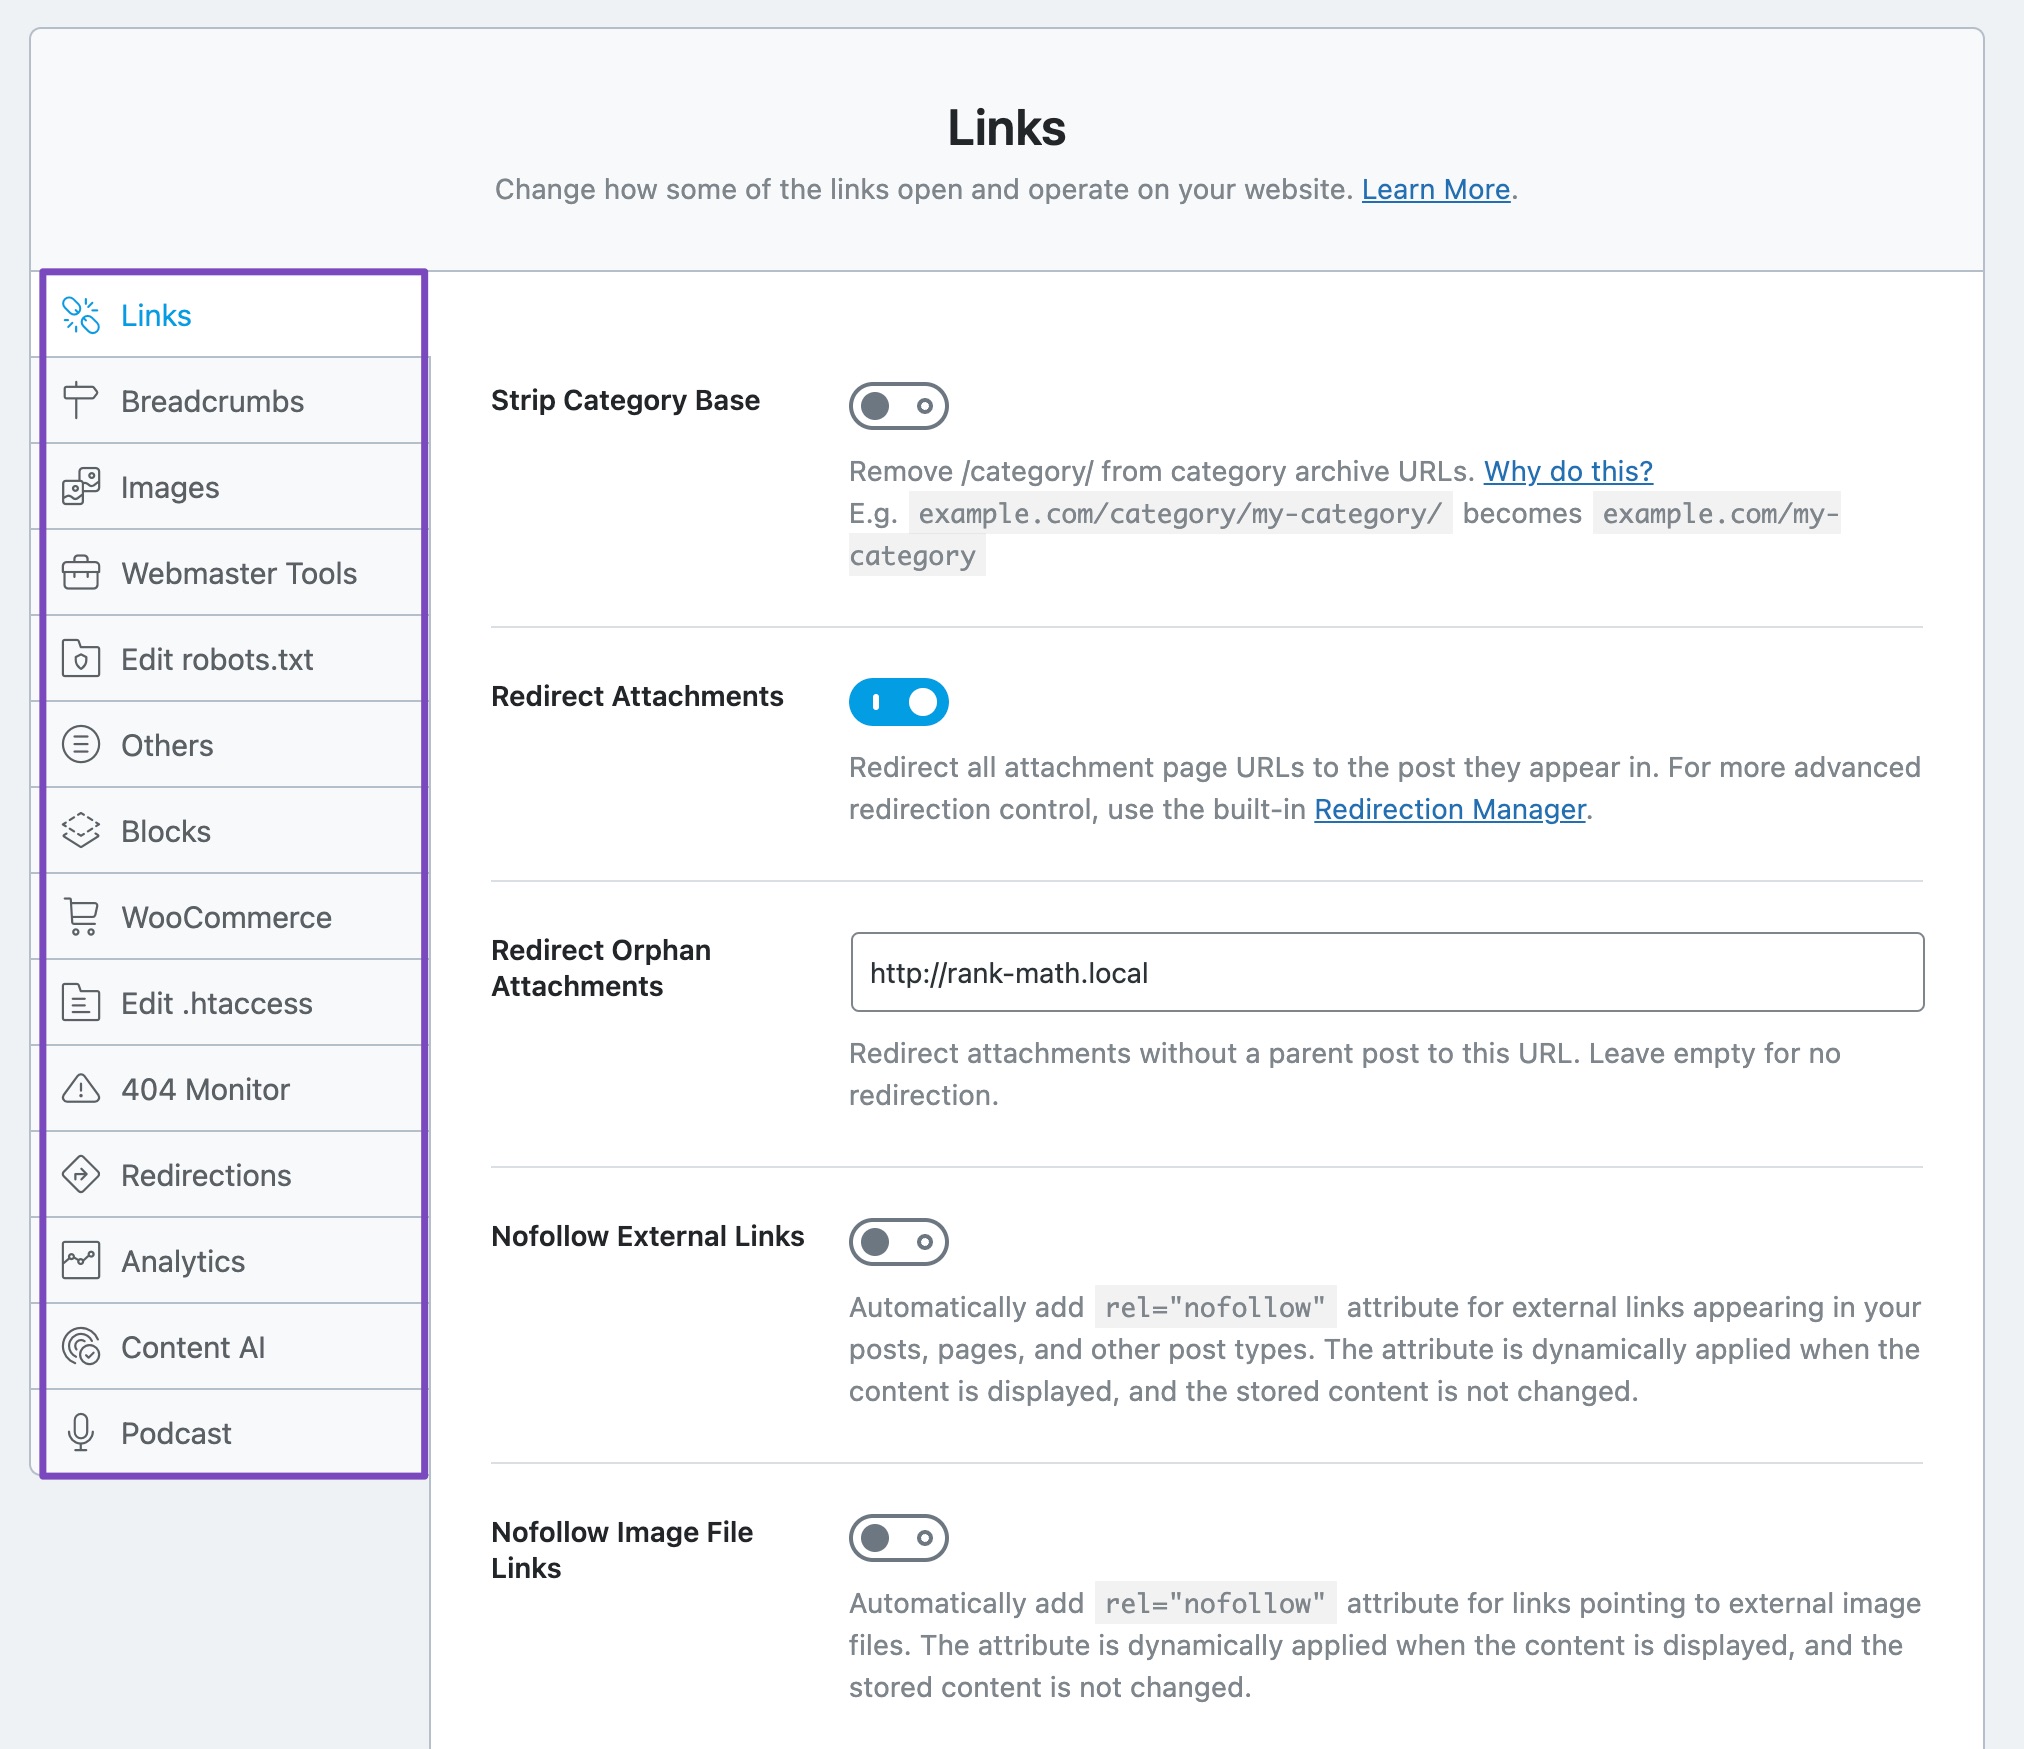
Let us get started with the Links section.
1 Links
As you probably have guessed by now, the Links section has all the settings that modify the behaviour of links on your website. Here are all the settings you’d find in the Links section.
Let us understand each of the settings.
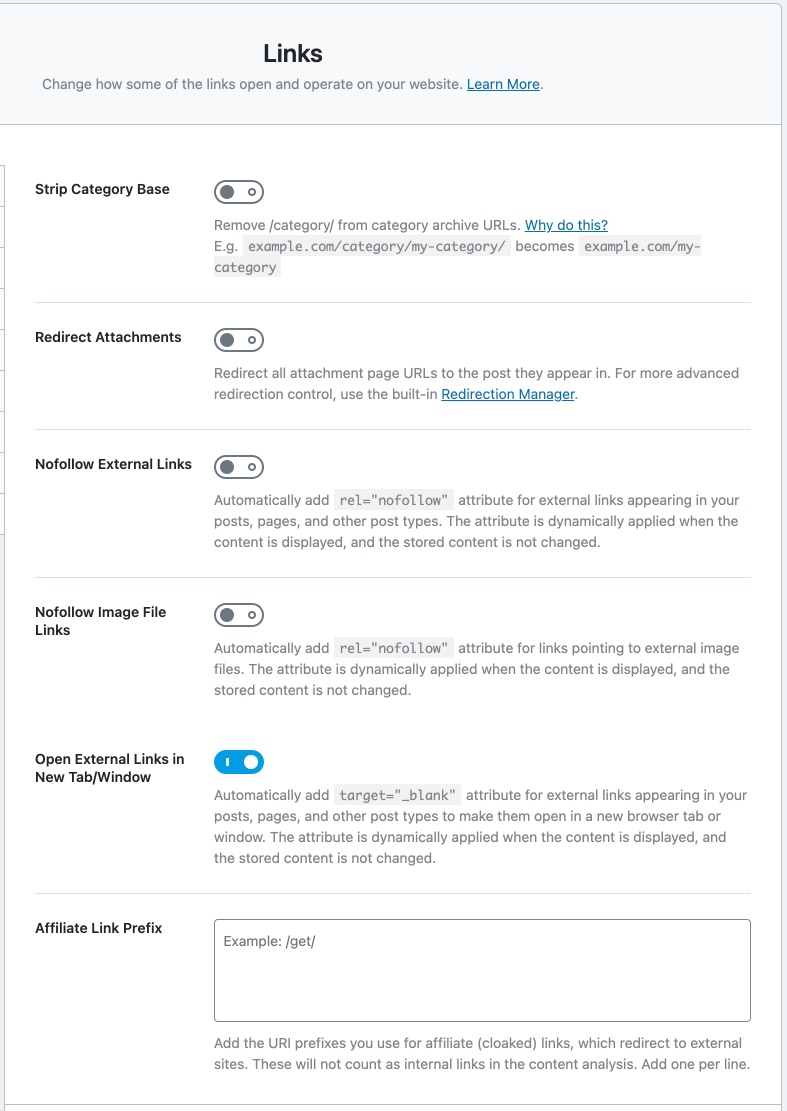
1.1 Strip Category Base
By default, your category archives will include the “category” base on the URL. For example, if you have an SEO category, then the archive page would look like this:
https://yourwebsite.com/category/SEO/If you enable this option, Rank Math will strip the “category” part of the URL, making the URL shorter. So, the URL will become:
https://yourwebsite.com/SEO/This option only affects the aesthetics, and there is no research or evidence to show that removing the category from the URL helps your SEO in any way. However, it does make the URL shorter and more appealing. The choice is yours; if you like shorter URLs, then enable this option.

1.2 Redirect Attachments
Enabling this setting redirects the URLs of your attachment pages to the post that are used in. For example, let us take a post with the URL yourwebsite.com/post-with-image. Let us assume that the post has an image with the name some-image-with-filename.jpg.
Now, the attachment URL of the image would be similar to yourwebsite.com/.post-with-image/some-image-with-filename/
If you enable this option, then if anyone (even search engines) tries to access the image with the URL.
yourwebsite.com/post-with-image/some-image-with-filename/,
They will be redirected to the post with the URL yourwebsite.com/post-with-image.
Doing this might seem insignificant, but it has plenty of SEO benefits, including distributing the SEO value of the links that your images and other attachments build over time. For these reasons, we recommend enabling this setting.

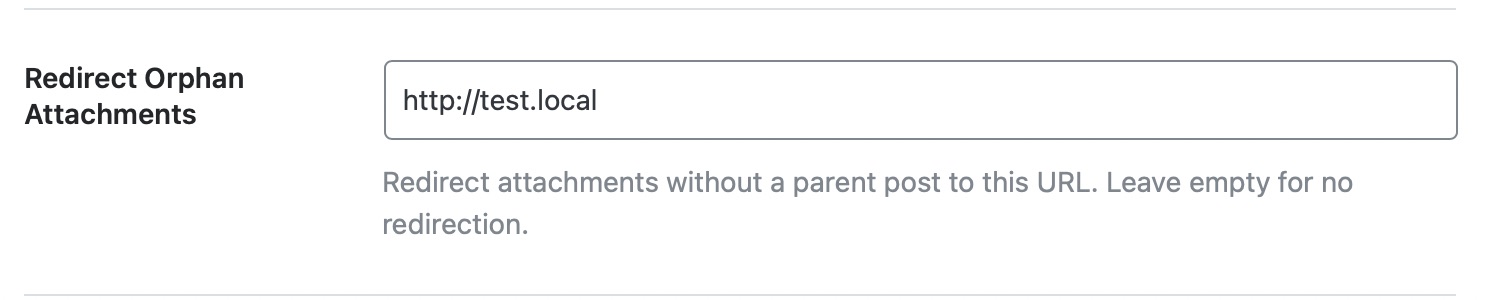
1.3 Redirect Orphan Attachments
Images and attachments that are not associated with any post on your website are called orphan media. In the section above, you chose whether you want to redirect attachment URLs to the post that contained them, but what about the attachments that do not have any posts attached to them?
That is where this setting comes into the picture. Here you can enter the URL where you’d like the URLs of Orphan Media to be redirected to. The preferred setting is your homepage URL.
1.4 NoFollow External Links
This option automatically no-follows external URLs on all your posts, preserving the SEO of your website. We recommend that you enable this setting only if all external links on your website are affiliate links or sponsored links. You can also take advantage of the exclusion and inclusion lists to select nofollow or follow for certain domains.

1.5 NoFollow Image File Links
This option works similar to the NoFollow External Links option above, but this option no-follows any external links to images. We recommend that you enable this setting.

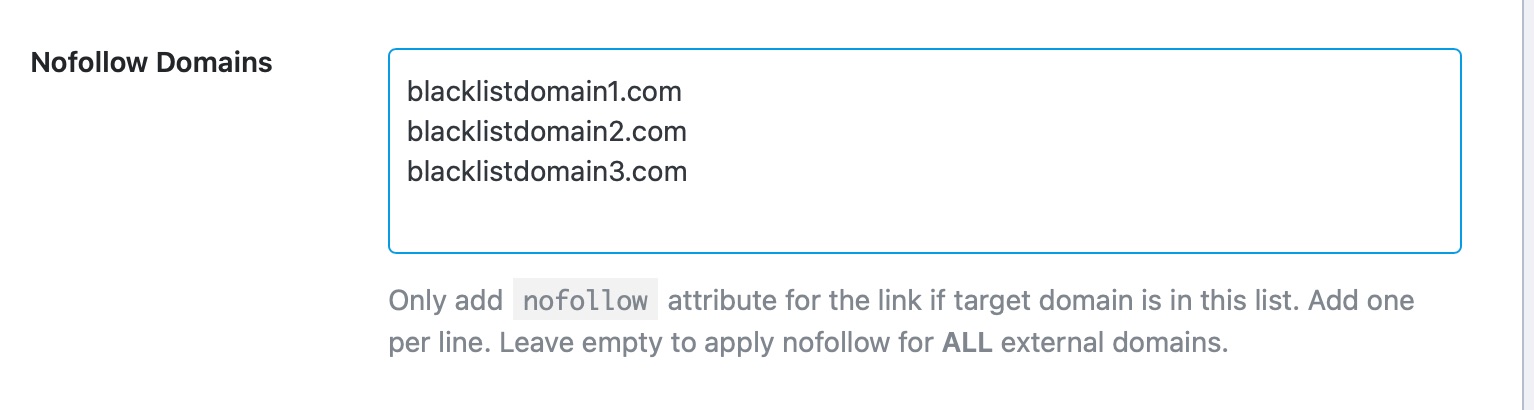
1.6 NoFollow Domains
This setting works in conjunction with the NoFollow External Links option listed above and acts as a blacklist for domains. Simply put, links from your website to any domains that you enter in this section will always be nofollowed.
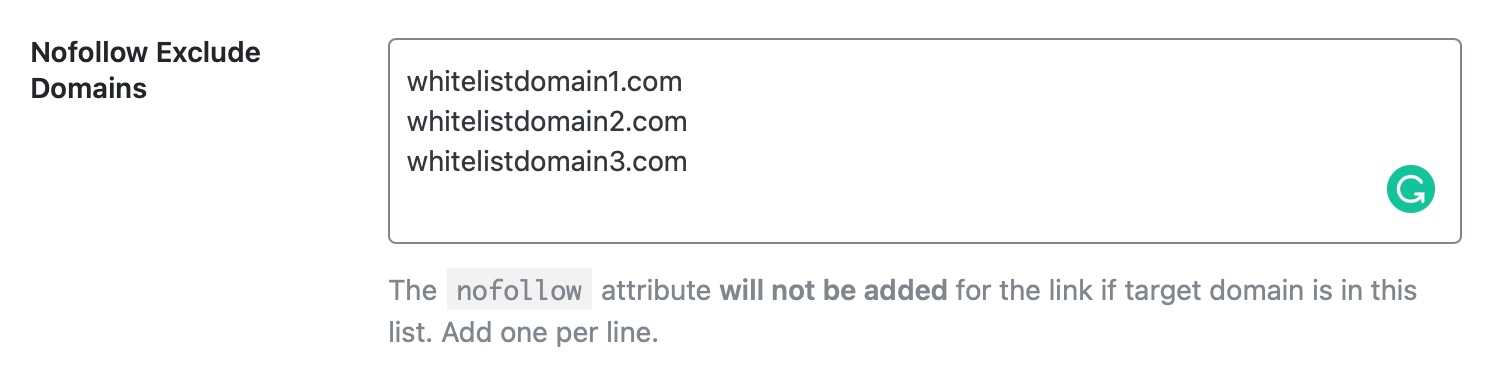
1.7 NoFollow Exclude Domains
This option also works in conjunction with the NoFollow External Links option, but it acts as a whitelist instead. It means that links from your website to any of the domains you enter in this section will be followed.
1.8 How NoFollow Whitelist and Blacklist Actually Work
Rank Math has three sections to manage the link properties of external links.
- NoFollow External Links
- NoFollow Domains
- NoFollow Exclude Domains
This has been done to give you the maximum amount of control over your links. However, it can be a little confusing to understand exactly how it works. Here is a breakdown of different scenarios which will help you understand how the three settings work together.
NoFollow External Links is Disabled
In this case, the NoFollow Domains and NoFollow Exclude Domains sections can be ignored, as they will have no effect, even if you add domains to either of the sections.
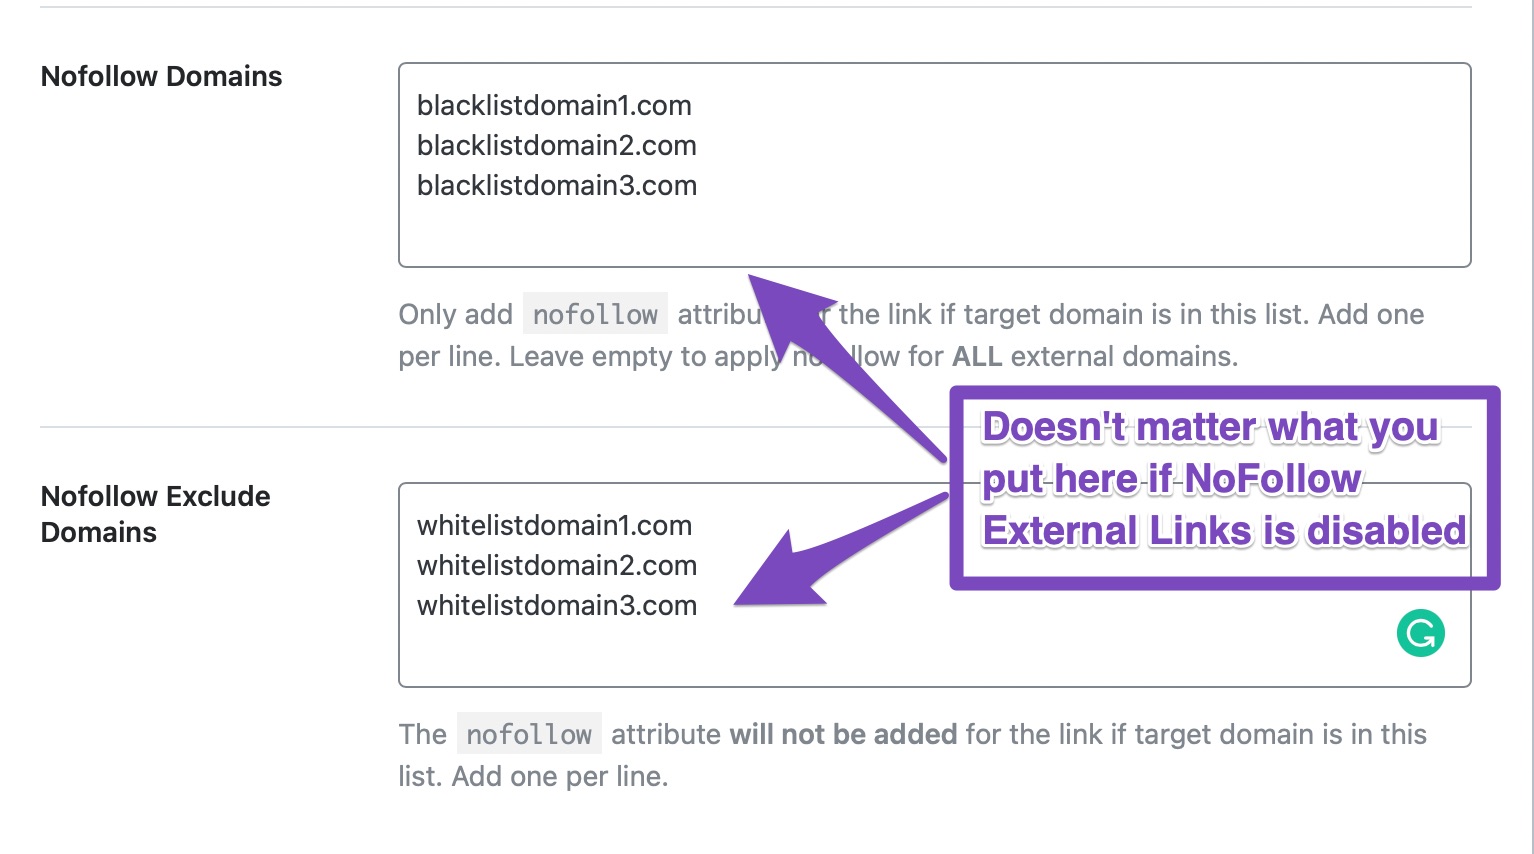
NoFollow External Links is Enabled
In this case, there are again two possibilities.
- NoFollow Domains is Blank: In this case, all external links will be no-followed, except for the domains that are included in the NoFollow Exclude Domains section.
- NoFollow Domains has domains listed: In this case, only the links to the domains listed in the NoFollow Domains will be no-followed, rest of the links will be followed. In this case, the NoFollow Exclude Domains section holds no weight.
To explain simply, if you disable the NoFollow External Links setting, then links will keep working for you as normal. By default, all links would be created followed, and you would have to manually nofollow them.
However, if you enable the NoFollow External Links section, then all external links will be no-followed. You can then use the NoFollow Domains (Blacklist) or the NoFollow Exclude Domains (Whitelist) to narrow the domains you want to nofollow. Note that you can either use the blacklist or the whitelist to manage external links, but you cannot use them at the same time.
Can Redirects Be Used?
While adding domains to NoFollow Domains and NoFollow Exclude Domains, ensure that you’re adding domains exactly the same as you’re adding to your content.
This case is well suited for using short links and affiliate links, where the final URL & domain are often different from the ones you’re adding to your website.
For instance, if you’re shortening your URL (https://final-destination.com/product-page/) to something like (https://example.com/product) and adding this example.com link to your website, then Rank Math can only detect the presence of example.com domain links in your content and apply/exclude nofollow according to how you’ve configured.
So, in this case, you should add the exact domain you’re linking to in the NoFollow Domains / NoFollow Exclude Domains field and not their final destination.
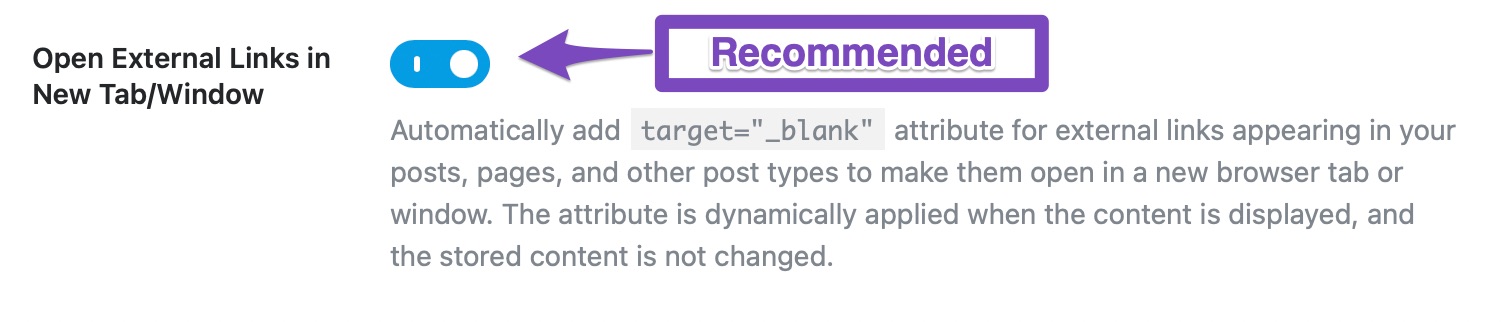
1.9 Open External Links in New Tab
This option applies the target = "_blank” attribute to external links, which will open them in new tabs or windows. We recommend that you enable this setting.
Once you enable the setting, the target attribute is added dynamically on the frontend without making any changes to the actual content. So even if you have not configured this setting to individual links with the link controls option, the external links will now open in a new tab.
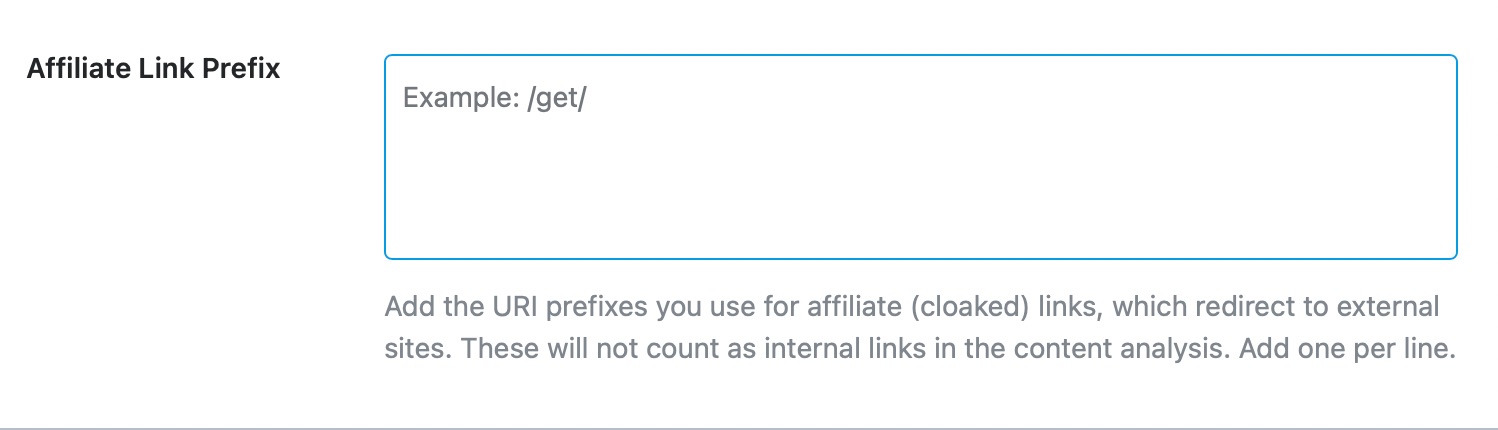
1.10 Affiliate Link Prefix PRO
Sometimes, affiliates need to differentiate cloaked links from regular internal links. Traditionally, all links with your domain as prefixes are counted as internal links. And most automation tools skip cloaked links thinking they are internal links.
With this link prefix option, you can choose the URL base for your cloaked links so Rank Math can automatically count them as outgoing links in the content analysis.
If you are using domain.com/go/ as the base for cloaked URLs, then enter /go/ like this in the field.
In addition to that, Rank Math automatically includes rel="sponsored" attribute for these links (if not added already), in compliance with search engines guidelines for affiliate links.
This concludes the Links section of the General Settings in Rank Math. Let us move on to the next section on the list, the Breadcrumbs section.
2 Breadcrumbs
Breadcrumbs are navigational elements that let users understand where they are on a certain website and also help them navigate the website in an easy-to-understand manner.
In simple terms, they can be compared to “You’re here” signs in large parks, as they both achieve similar things.
Here is an example of how breadcrumbs appear on a website.

Yes, these are breadcrumbs from the article you’re reading right now.
The Breadcrumbs setting in Rank Math lets you configure Breadcrumbs. When you open this section, you’ll only see one setting.
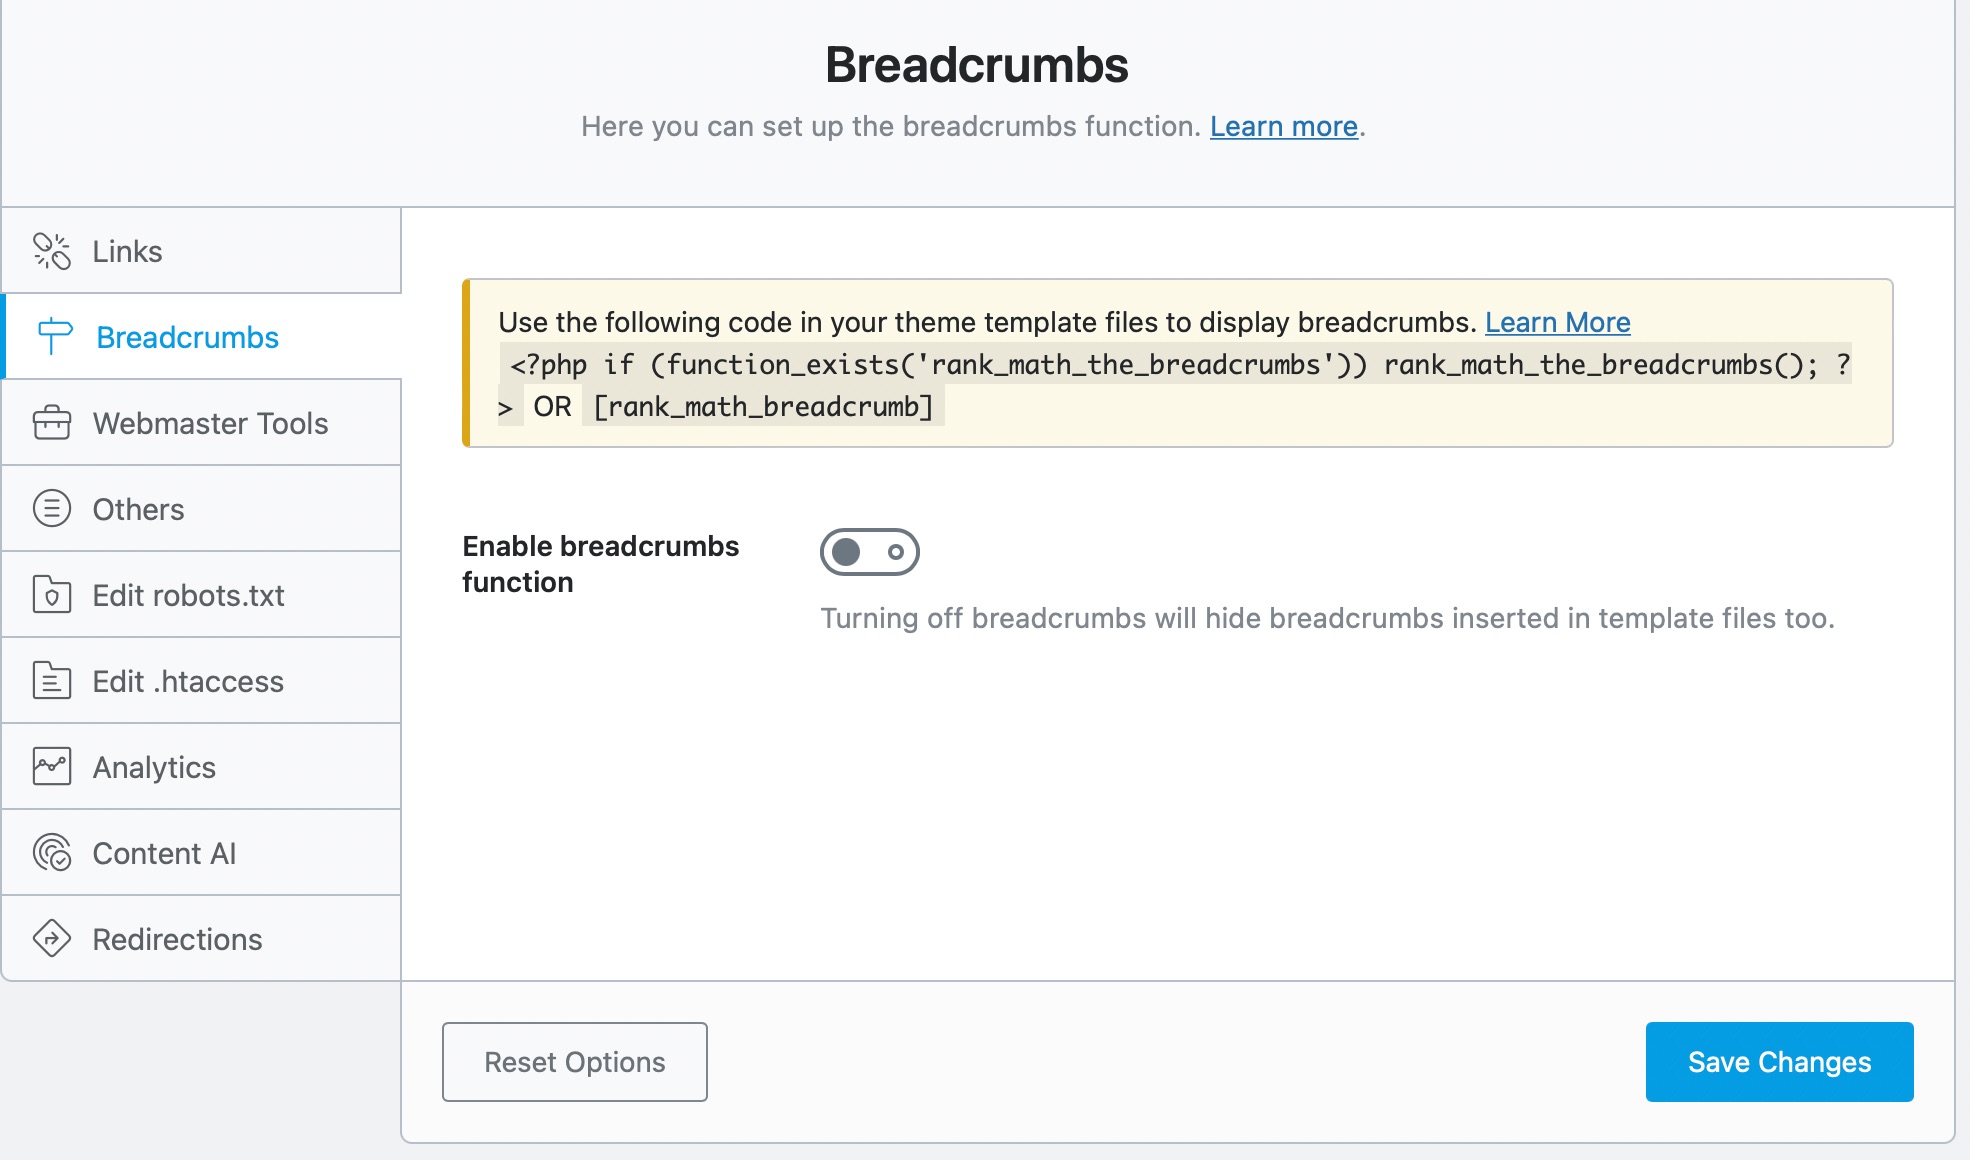
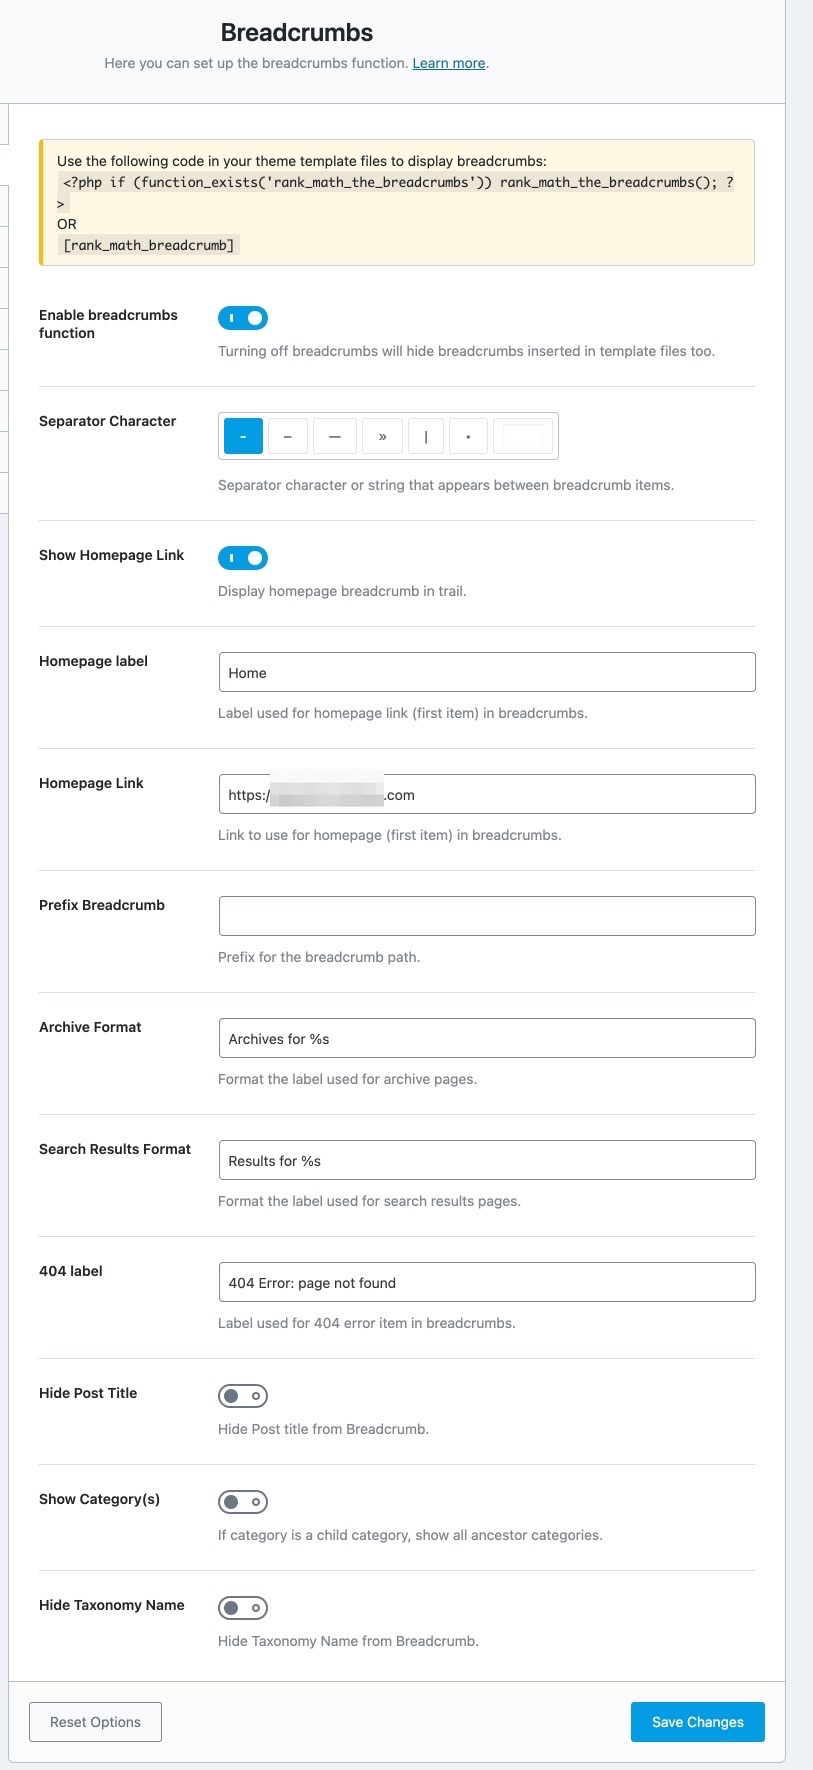
That’s because Breadcrumbs are turned off, and there is no need to show any of the other settings. Once you have enabled breadcrumbs, all the other settings will appear on the screen.
Important Note: If you want Rank Math to handle your site’s breadcrumbs, you may need to ask your theme developer to disable or remove any existing breadcrumbs added by them. After that, you should also add a filter related to Rank Math’s Breadcrumbs on your theme files. This will help the breadcrumbs to appear on your site’s front end accordingly.
Let us understand each of the options one by one.
2.1 Enable Breadcrumbs Function
This setting enables breadcrumbs on your website. Breadcrumbs help users navigate your website and also help search engines index your content efficiently. We recommend that you enable this setting.

Once you’ve enabled the breadcrumbs function, you’ll need to add the code snippet/shortcode to your website for the breadcrumbs to display on the frontend.
2.2 Separator Character
This option helps you set a Separator Character for your breadcrumbs. There are many options available, so choose the one you prefer. You can also set a custom separator character by typing it in the last field.
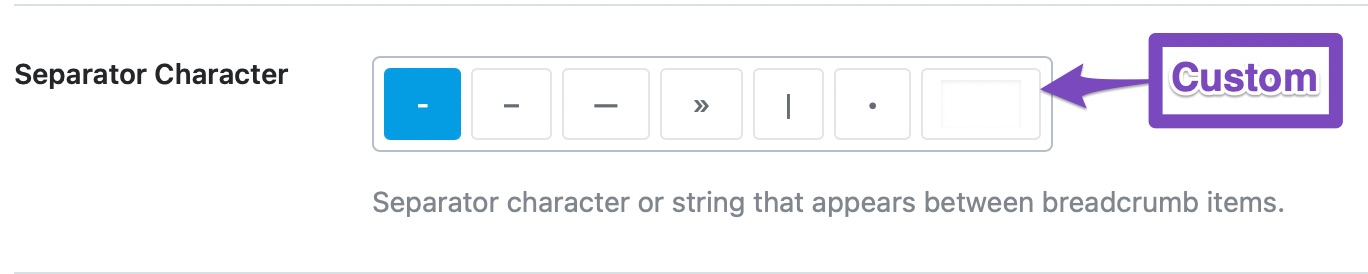
You might have missed it, but guess which separator character are we using?

2.3 Show Homepage Link
If you want your homepage to be included in the breadcrumbs, enable this option. This is more of personal preference, but we’ve seen most websites do include the homepage in their breadcrumbs.

If you enable the Homepage Link, two new settings will pop up under it.
2.4 Homepage Label
Here you can configure what label to give the homepage of your website. All you have to do is type in the label that you want to assign to your homepage.

For example, we have included the homepage link in our breadcrumbs, and the label we’ve assigned is home.

2.5 Homepage Link
This option lets you configure where will the homepage link take the visitor. This is particularly useful when you have many sections of your website like a blog, a store, or others. Using this option, you can configure the breadcrumb to take your visitor anywhere you prefer.

2.6 Prefix Breadcrumb
If you’d like to add a prefix before your breadcrumbs, you can use this option to do so. Popular options would be to add “You are here”, “Navigation”, “Index”, etc.

2.7 Archive Format
This option lets you set a breadcrumb format for the archive pages. You can customize it completely, but we recommend that you don’t remove the “%s” from it, as it represents the taxonomy.

2.8 Search Results Format
This option lets you set a breadcrumb format for search result pages. Popular options are, “You searched for”, “Here is what I found for”, etc. We would recommend that you don’t remove the “%s” from the field.

2.9 404 Label
This option lets you set a breadcrumb format for your 404 pages.

2.10 Hide Post Title
Enabling this option lets you hide the title of the post from the breadcrumb.

For example, here is the breadcrumb of one of our articles with the title.

If you enable this setting, the breadcrumb will change to:

2.11 Show Category(s)
This option enables ancestor categories in the breadcrumbs. What it does is that if your current post is part of a child category, then the breadcrumb will include the parent categories as well. We recommend that you keep this disabled to keep your breadcrumbs small and precise.

2.12 Hide Taxonomy Name
If you use any other taxonomy other than categories, then you can use this option to enable or disable the inclusion of the taxonomy in the breadcrumb. Our recommended setting is “Off”.

2.13 Show Blog Page
If you want to display your Blog page in Breadcrumb, then you can enable this option. This is more of your personal preference.

This covers all the settings in the Breadcrumbs section. Let us move on to the next section, the Images.
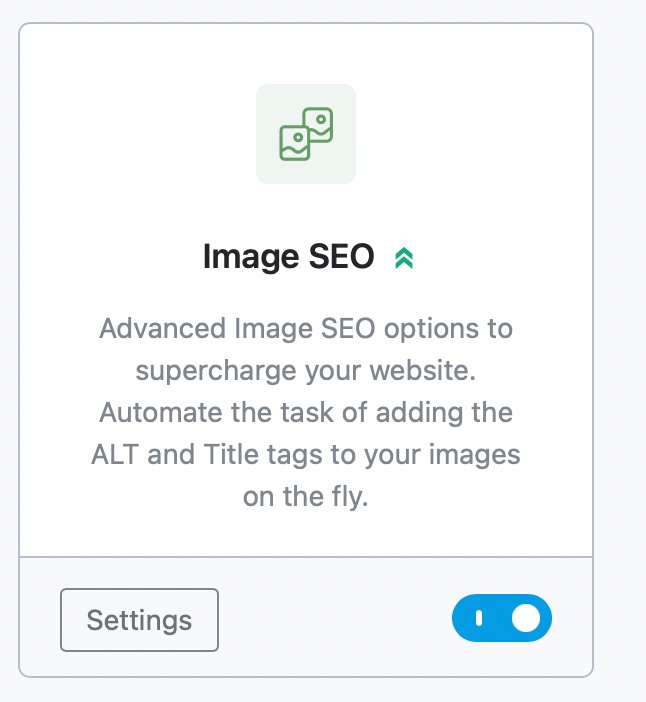
3 Images
When you open the Images section, you’ll notice the settings as shown below:
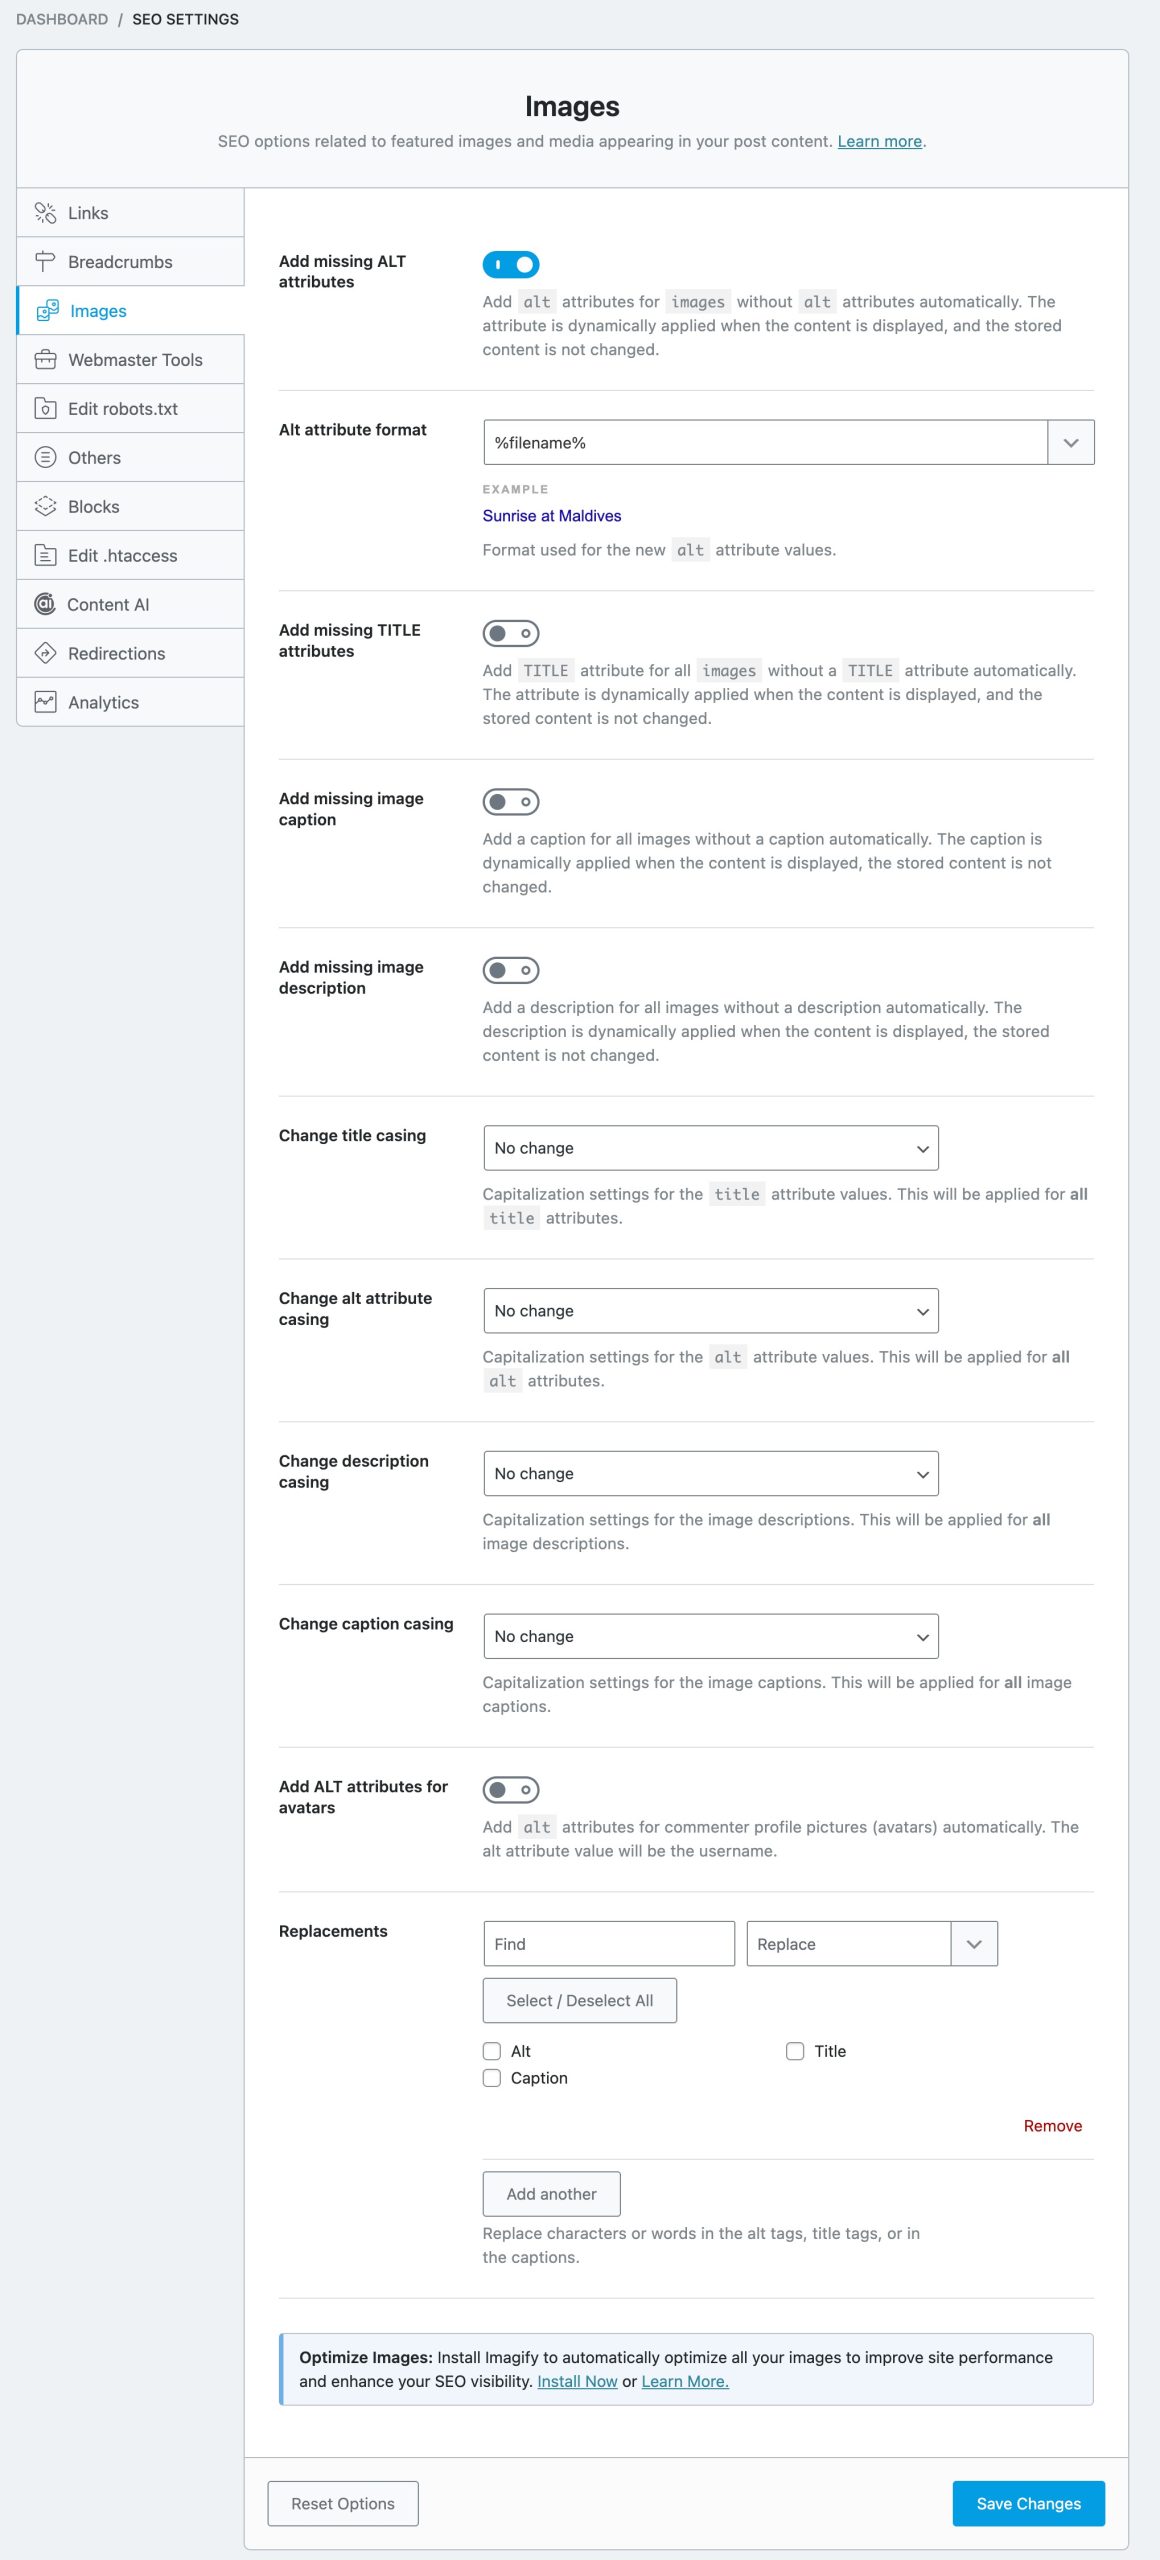
Note: The features of Image SEO are only applicable to the images inside the content (blog posts/articles). For optimizations outside the content area, you should ensure that your theme that is accessibility-ready and optimized.
To utilize all these Image SEO features, you need to ensure that the Image SEO module is enabled from Rank Math’s dashboard.
Let us explore each of the settings.
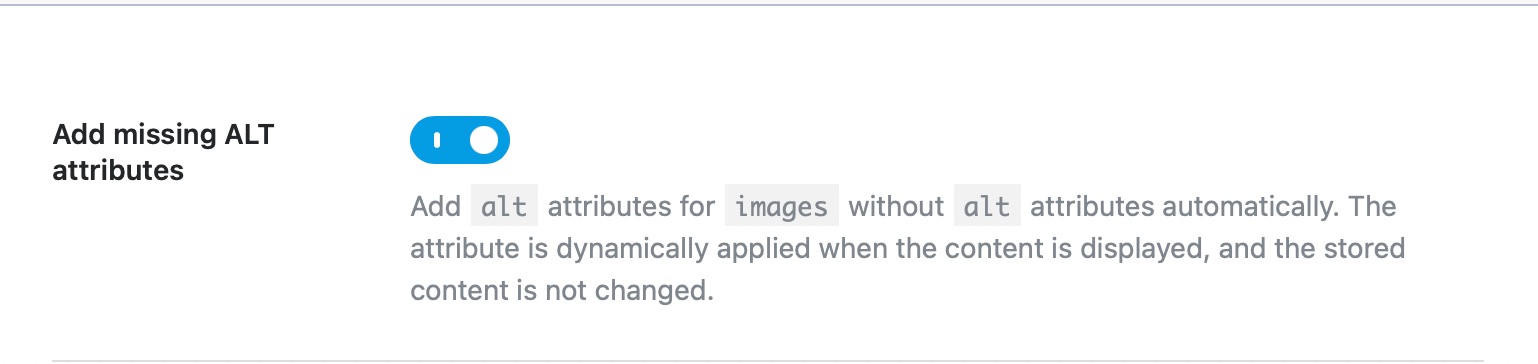
3.1 Add Missing Alt Attributes
Alt attributes are HTML attributes that are considered as “alternative” text versions of images that are displayed on a website when the image is not available or when a visitor wants the text alternative. These attributes can be very helpful when one cannot view images in their browsers. A sample alt attribute is given below:
<img src="img_man.jpg" alt="Man in a jacket" width="500" height="600">
Importance of Alt Attributes:
- Images that Fail to Load: Alt attributes are used to increase the visibility of websites, which are not loading properly and also to improve the user experience. You will get an idea of what the picture is about, in case, if it fails to load due to a low-bandwidth internet connection.
- Visually Impaired Visitors: The alt attribute is a key element of the Web for people who are blind or visually impaired. It provides text that can be read by screen readers or any other programs that read out loud what an image contains.
- Search Engine Optimization: Sometimes, search engines won’t be able to access images on a website. Alt text provides search engines with additional information about the image content on the web pages, thereby helping to boost SEO. Also, image search engines such as Google Images and Bing use alt text to select the best image in response to a search query. For example, when a user searches for a product on a search engine, it will showcase the best images that consist of detailed and relevant alt text information.
Enabling this setting will add Alt Attributes to all the images that do not have their alt text set. Since the alt text is valuable to search engines in understanding your images, we recommend that you enable this setting.
3.2 Alt Attribute Format
If you’ve enabled the Add missing Alt Attribute option, the next question is, how does Rank Math know what an image is about? Actually, Rank Math does not know, and it relies on you to help answer the question with the Alt Attribute Format.
The Alt Attribute Format helps you create a pre-defined format that will be used to create alt text for images. Instead of relying on generic names, Rank Math lets you use the supported variables to create a useful format.

The default variable configured here is %filename%, i.e. the name of the file will be used as the ALT text. You are free to use other variables or static text.
Selecting a variable will update the live preview below it, which will help you understand how the final alt text will be.
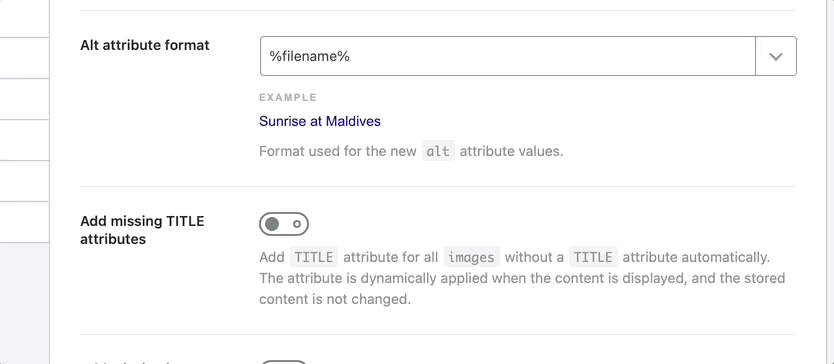
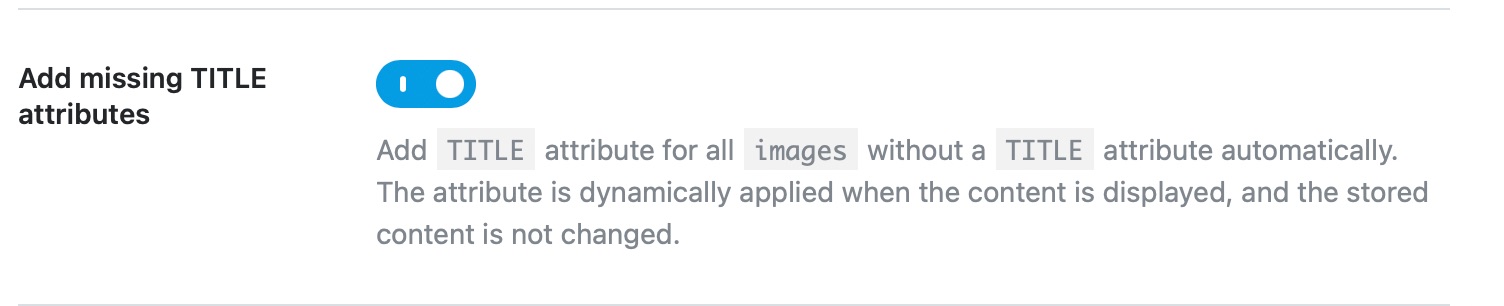
3.3 Add Missing Title Attributes
This option automatically adds the Title attributes to the images without a title. A title also helps search engines understand your images better, and we recommend that you enable this setting.
3.4 Title Attribute Format
The Title Attribute Format option works similar to the Alt Attribute format, the only difference being that it helps define a format to create the image’s title. Use the variables and live preview to create a format.
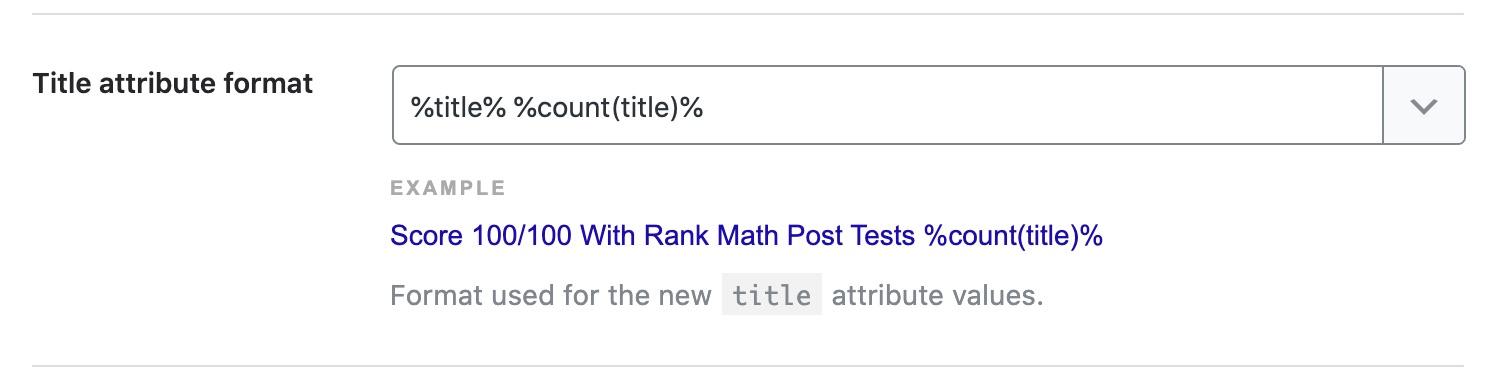
The default format is set to be %title% %count(title)%, but you can always edit and use a combination of static text and variables as well.
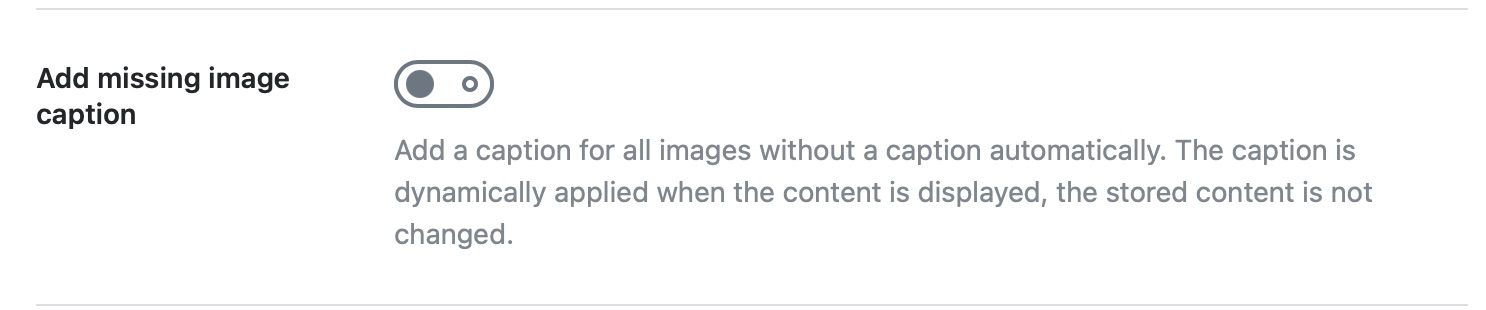
3.5 Add Missing Image Caption PRO
Add Missing Image Caption automatically adds a caption for all the images. Enable this option to add the captions to the images.
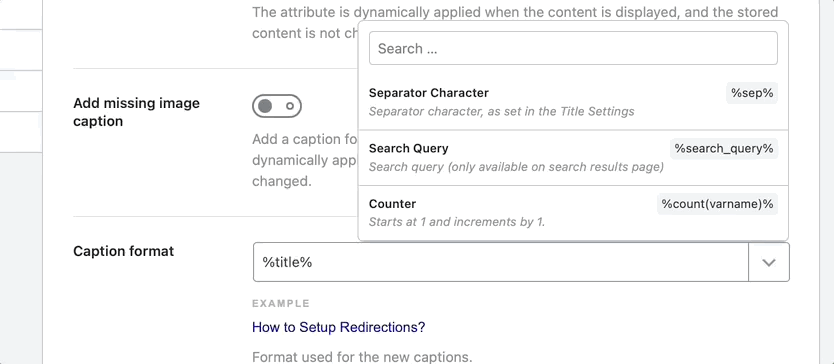
3.6 Caption Format PRO
This option would be visible only if you enabled the previous option, Add Missing Image Caption.
The Caption format helps to define the format used for the new captions. The default format is set to %title% %count(title)%. You can use the variables and live preview to create a format.
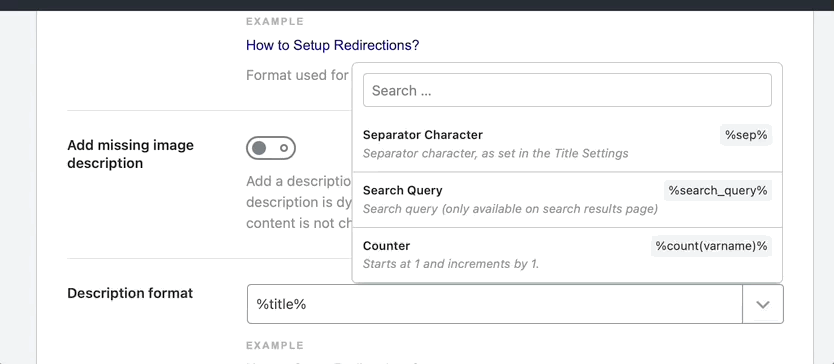
3.7 Add Missing Image Description PRO
The option Add Missing Image Description will let you add a description to the images that do not have any description set. Image description helps the search engines to understand the image better.

3.8 Description Format PRO
Description format works similar to Caption format, and the only difference is that it helps to define a format for the new descriptions. Use the variables to create the format. Again, this option would be visible only if you had enabled the previous option Add missing image description.
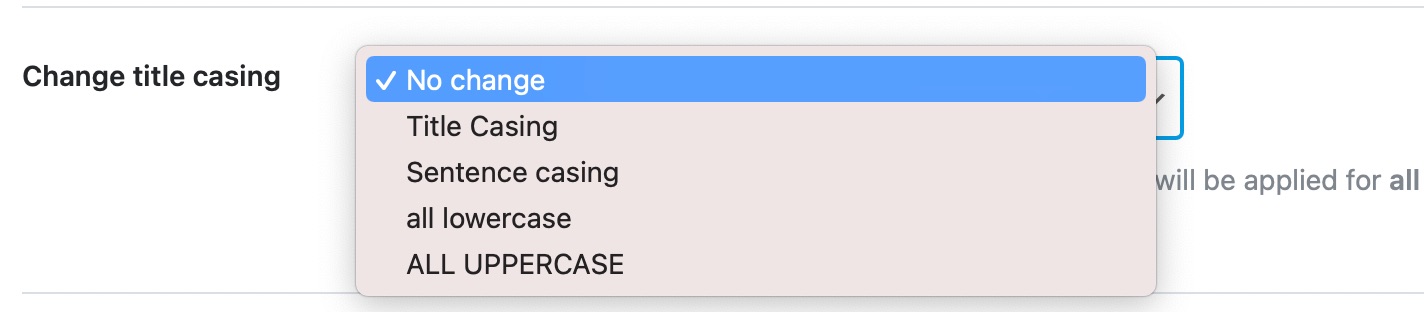
3.9 Change Title Casing PRO
This option lets you change the title case. You can select one from the available options, and all the title attributes will be changed accordingly.
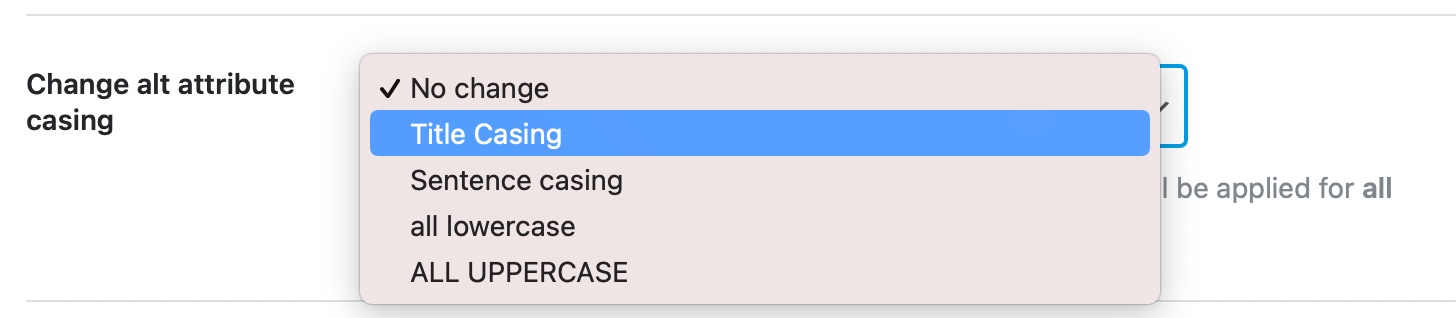
3.10 Change Alt Attribute Casing PRO
This option changes the Alt Attribute casing. The setting will be applied for all Alt attributes.
3.11 Change Description Casing PRO
This option helps to change the capitalization settings for the image descriptions. This will be applied to all the image descriptions.

3.12 Change Caption Casing PRO
This option helps to change the capitalization settings for the image captions. This will be applied to all image captions.

3.13 Add Alt Attributes for Avatars PRO
This option helps to add Alt attributes for the avatars used in the commenter profile pictures.
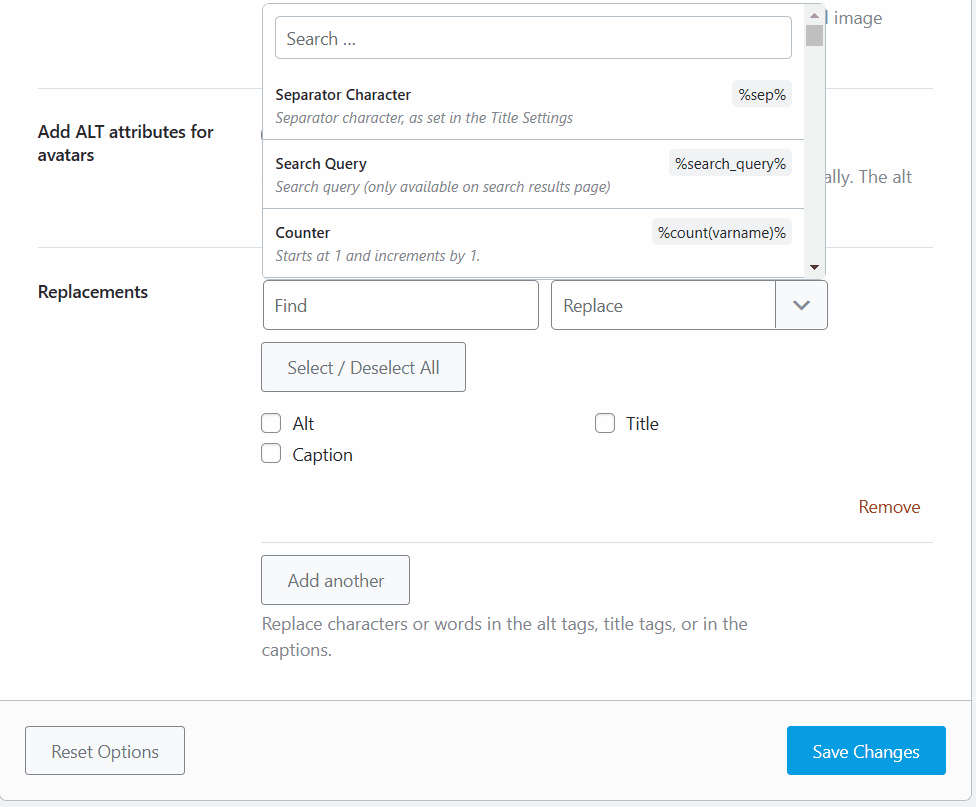
3.14 Replacements PRO
This option allows you to replace characters or words in the alt tags, title tags, or captions. Enter the characters or words in the Find field and the replacement in the Replace field.
Alternatively, you can click the dropdown arrow next to the Replace field to select an option from the list of available variations, as shown below. Remember, you can always use the Add another button below to add more replacements.
Once you finish any changes in the Images section, click the Save Changes button to save your settings. This covers all the settings in the Images section; now, let’s move on to the Webmaster Tools section.
4 Webmaster Tools
Webmaster Tools is the section where you can take the necessary steps to verify your website with various webmaster tools. There are many tools supported, and here is an image that shows all the supported webmaster tools.
Before getting into the verification process, let us understand how the verification process works.
4.1 How Does Webmaster Verification Work
Almost all webmaster tools have similar verification processes. The specifics might be different, but the overall principle is the same. Here are the steps that usually take place.
- You tell a search engine (or another service) about a “property” and claim to own it
- The webmaster tools generate a piece of code that you need to place on your website
- You place the code on your website, proving that you have access to the site and your ownership
- Your property is verified and stays verified till the code is present
The reason why we specify the process is that we won’t be discussing the specifics of getting your website verified with all the webmaster tools. Rather, we will demonstrate the process on one of the webmaster tools, and you can learn the process there. Actually, you don’t even have to verify your website with all the webmaster tools, only for the ones that you want to.
Here are all the supported Webmaster Tools:
- Google Search Console
- Bing Webmaster Tools
- Baidu Webmaster Tools
- Yandex Verification ID
- Pinterest Verification ID
- Norton Safe Web Verification ID
- And more
Let us demonstrate how to verify your website for Google Search Console (formerly known as Google Webmaster Tools).
Start by going to the Google Search Console website, and clicking the “Start Now” button.

You’ll need to log in with a Google account. Once you’re in, you should see a screen similar to this. Note that your Search Console will look different if you don’t have any websites connected.
To add a new property, click the Property Selection dropdown and select the Add property option. Again, if you don’t have any properties added, your view will be a little different.
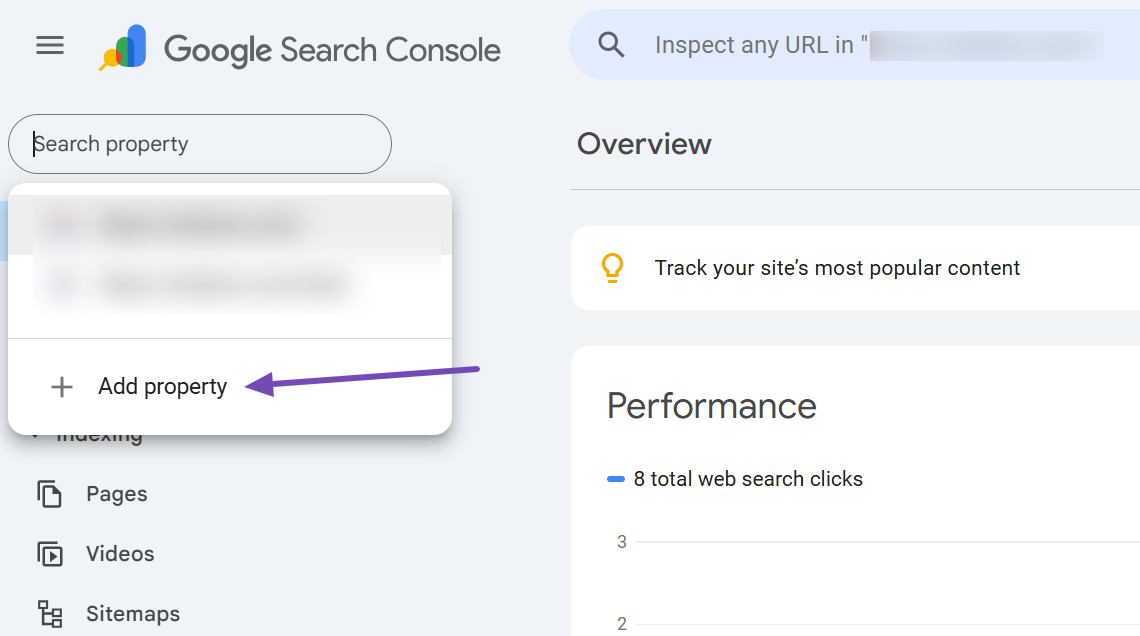
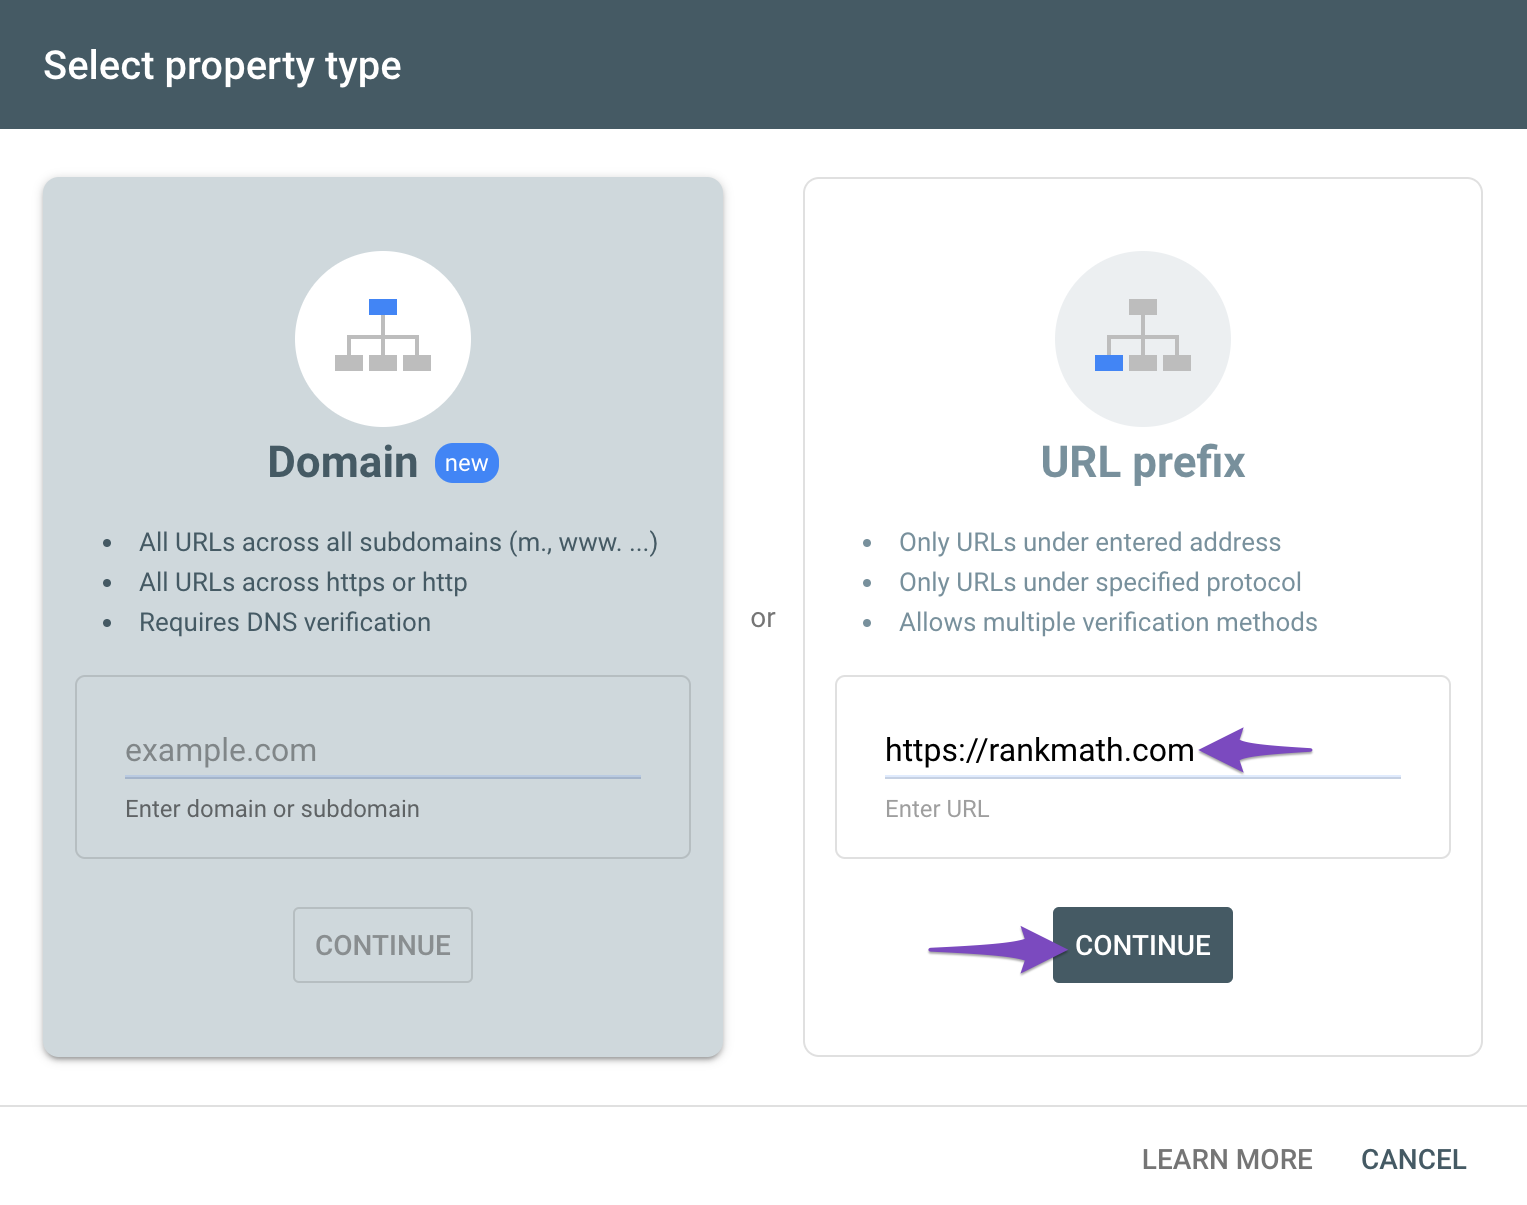
Google Search Console offers 2 types of properties. A domain property and a URL property. For simplicity, we will demonstrate the process using the URL property. Enter your website’s URL in the URL prefix field, and click “Continue”.
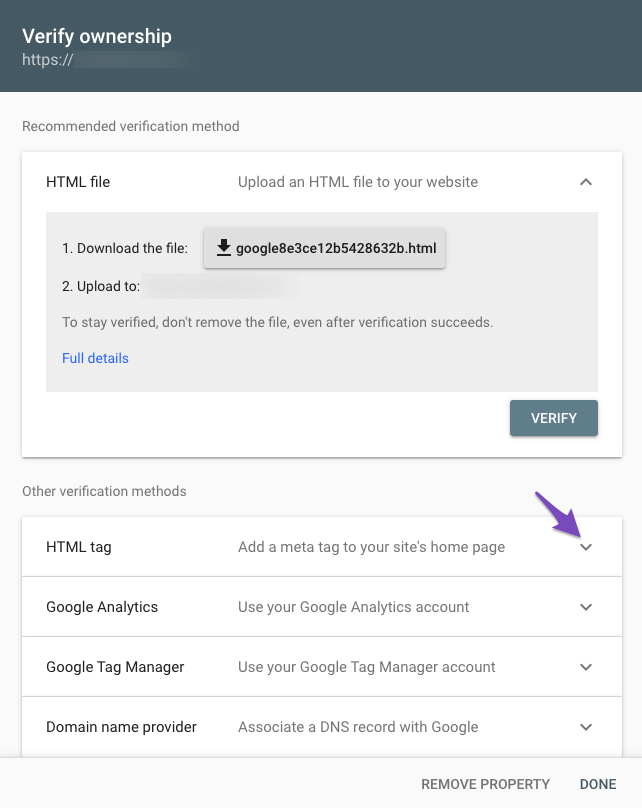
You should see a screen similar to the one below. Here Google is showing you all the ways you can verify your website ownership and also recommending their preferred method.
Since Rank Math already does the heavy lifting for you, you don’t have to choose a complicated verification method. Instead, we will use the HTML Tag method. Click the dropdown next to the HTML Tag option to see its details.
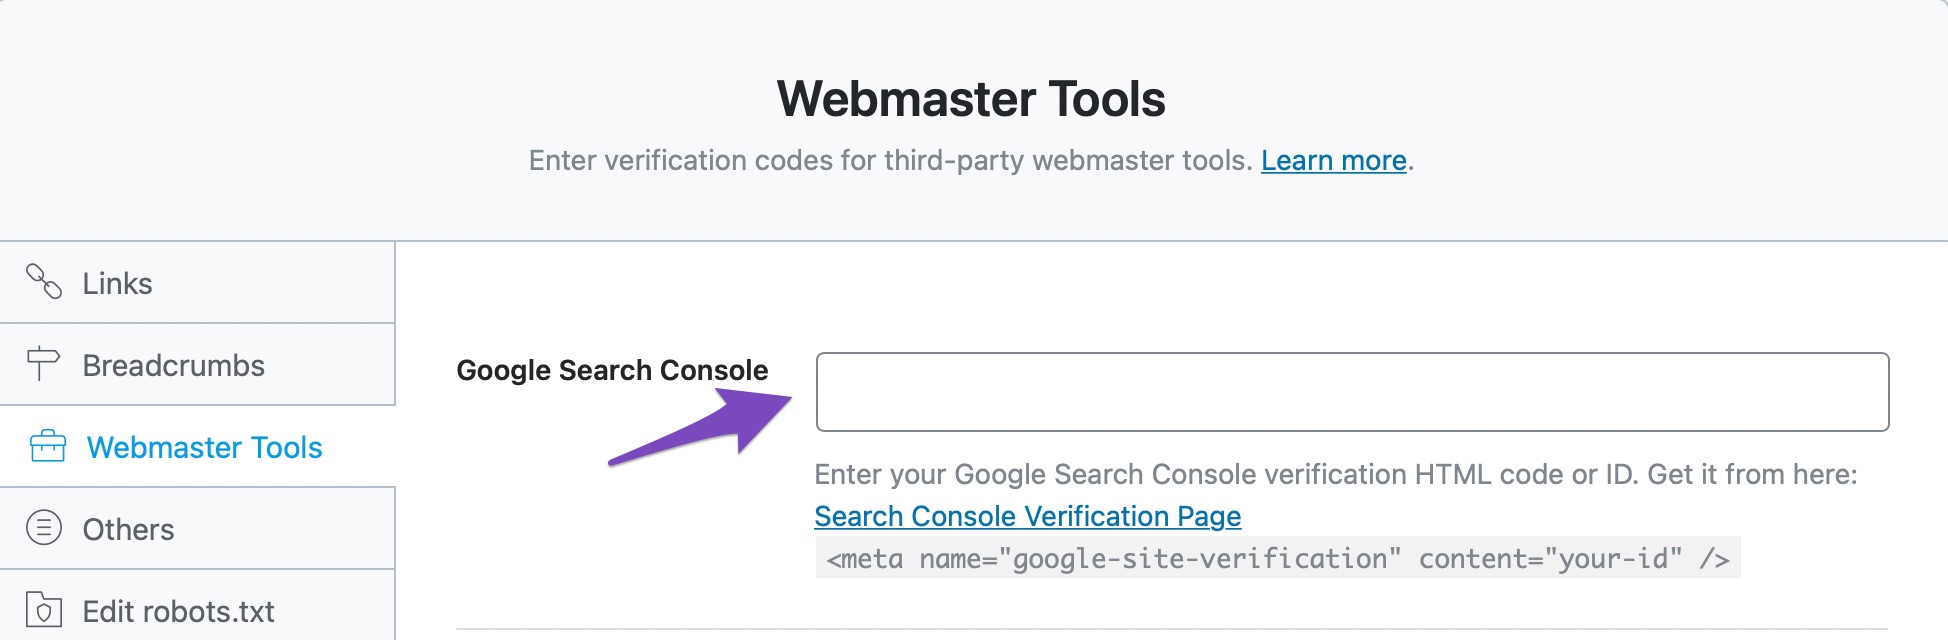
The settings will expand, and you will see the verification meta tag. Copy it, so we can add it to Rank Math.
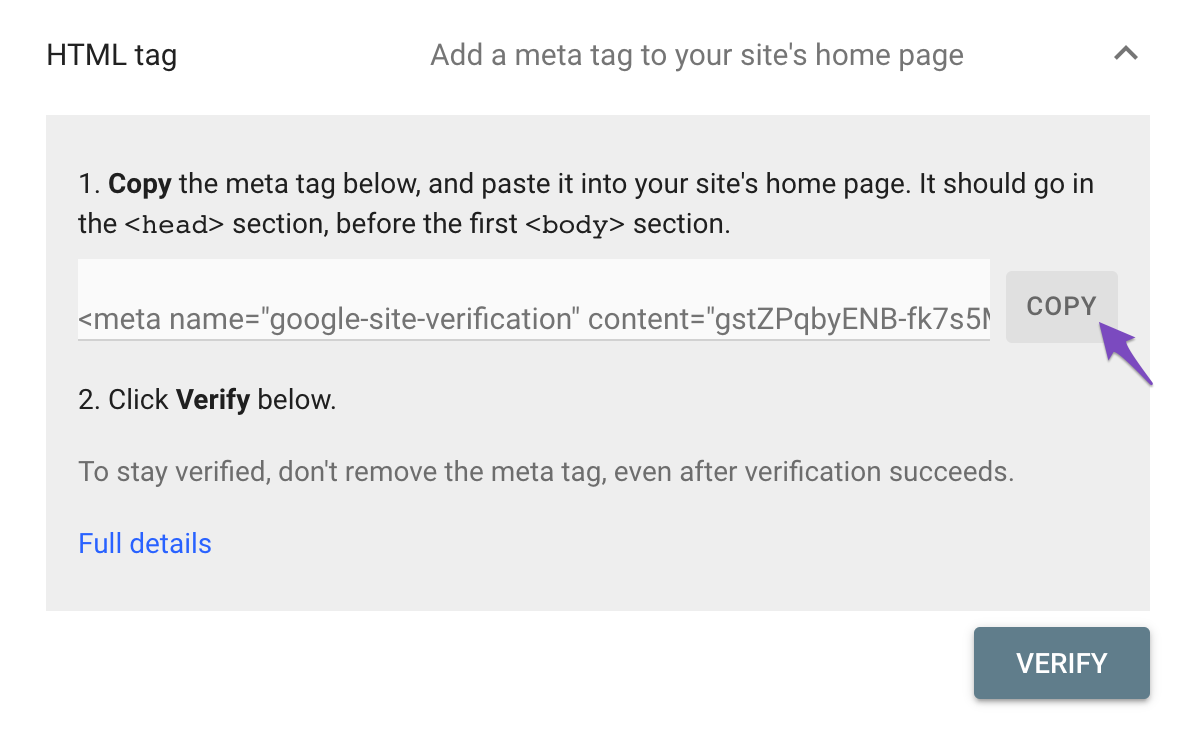
In the Webmaster Tool settings, paste the meta code in the Google Search Console field.
For the code to be applied, you’ll need to update your settings by saving your changes. Head over to the bottom of the page, and click “Save Changes”.

The page will refresh, and you should see a confirmation message on top. Your website will now be verified in Google Search Console.
As we mentioned, the process for verifying with other tools is quite similar, and here are some resources that should help you in verifying your website with other webmaster tools. Remember, you don’t have to follow all the steps from these resources. Once you’ve generated a meta-tag, all you have to do is paste it in the appropriate field.
Use our tutorials for reference.
- Verify Your Website With Bing Webmaster Tools
- Verify Your Website With Baidu Webmaster Tools
- Verify Website for Yandex Webmaster Tools
- Claim Your Website for Pinterest
- Submit a Website to Norton Safe Web
- Verify Your Site Using Custom HTML Meta Tags
That covers the Webmaster Tools section completely. Let us move on to the next section.
5 Edit Robots.txt
Once you open the Edit robots.txt section, you’ll see the default settings available to Rank Math free users, as shown below.
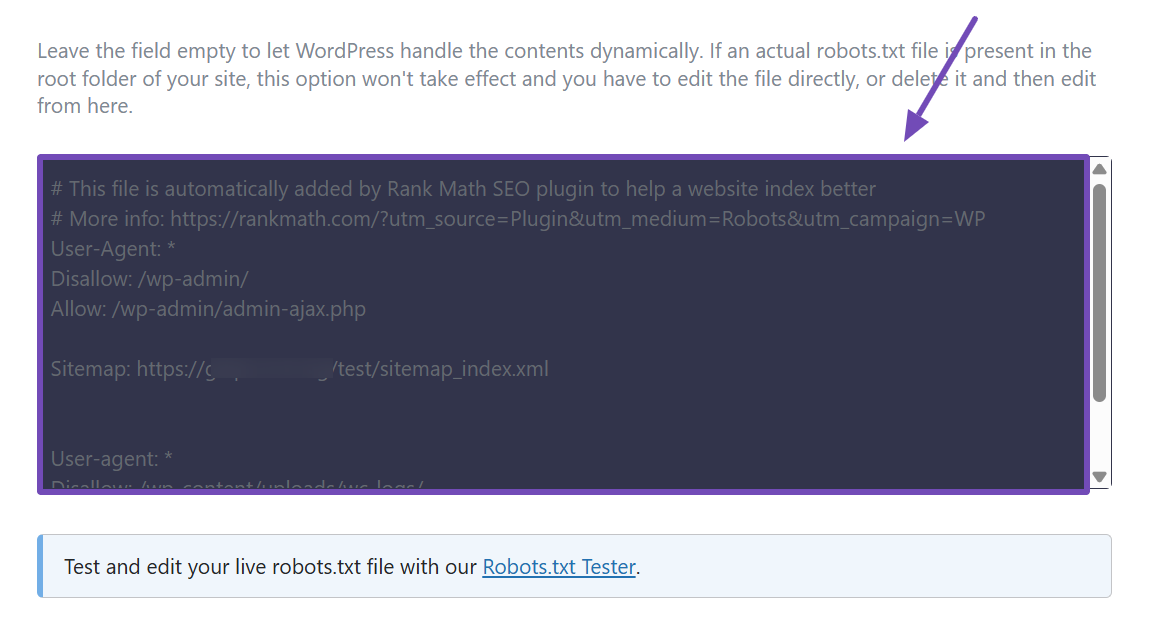
In the text area, you can configure your virtual robots.txt file and use the Robots.txt Tester link beneath it to verify your changes using our external tool.
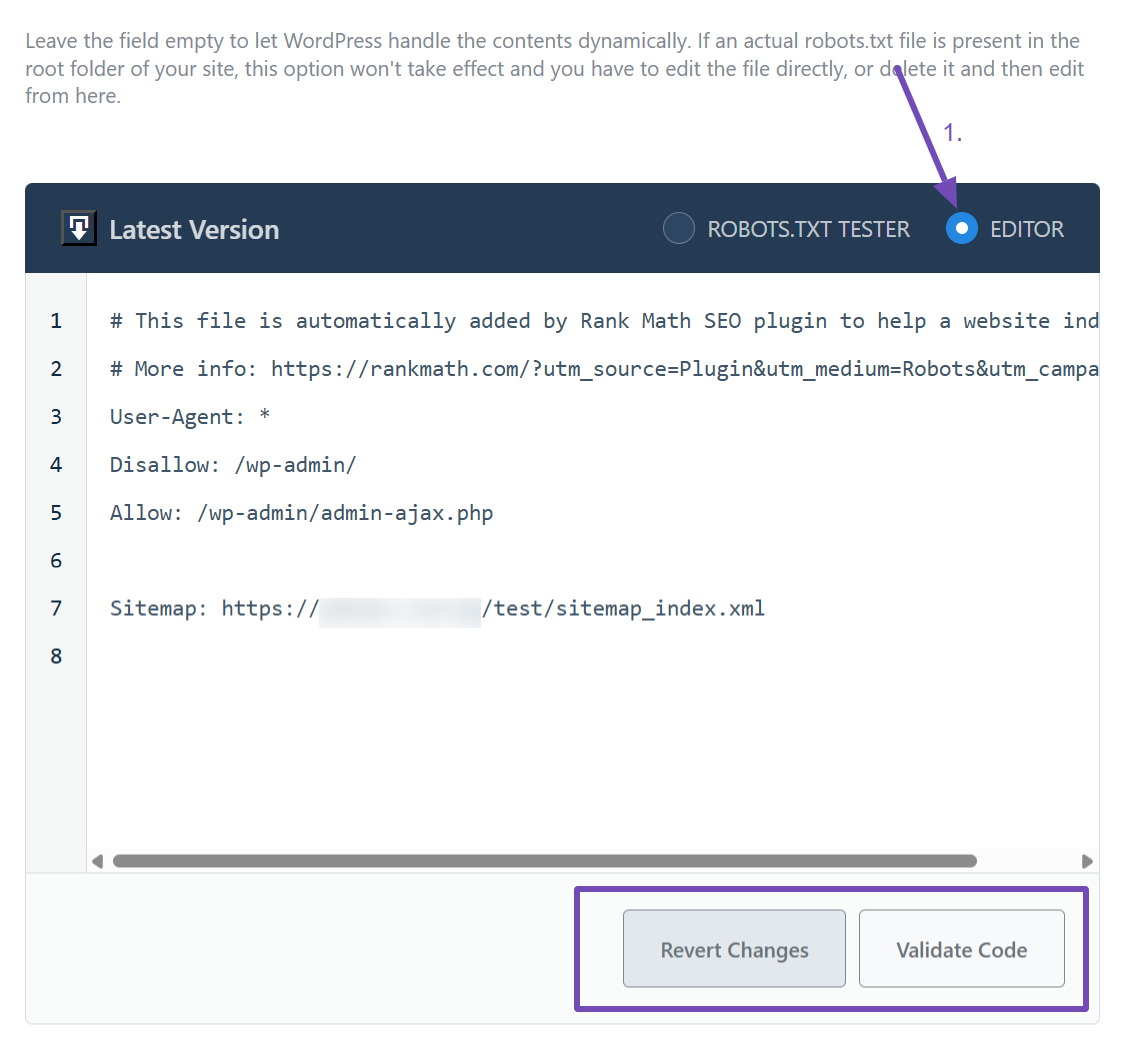
For Rank Math PRO users, a more advanced interface is available. It allows you to both edit your robots.txt file and test it simultaneously.
If you don’t know, robots.txt is a text file present at the root of your website, which helps search engines understand which parts of your website you want them to crawl and index. For example, you wouldn’t want Google to index your website’s admin area, right? You can set this up in the robots.txt file.
We mentioned that you could edit your virtual robots.txt file here. We refer to it as virtual because here, you are not editing your actual robots.txt file, but rather a virtual one.
Rank Math already configures some default settings that should be useful. But any changes you make here will not have an effect on your website if the actual robots.txt file already exists. If it does exist, you would have to edit the file using FTP or any other method, or delete the file completely, and make all the changes through Rank Math.
You can go through our tutorial on how to edit robots.txt with the Rank Math plugin.
6 Edit llms.txt
If you want AI tools like ChatGPT, Claude, or Perplexity to easily access the most important content on your website, this is the perfect place to set that up. And with Rank Math, you can automatically do it using the llms.txt file.
But first, you’ll need to enable the module. To do that, go to Rank Math SEO → Dashboard and make sure the LLMS Txt module is enabled.

If you don’t see it, ensure you’ve switched to Advanced Mode. Once that’s done, the following configurations will become available in the settings:
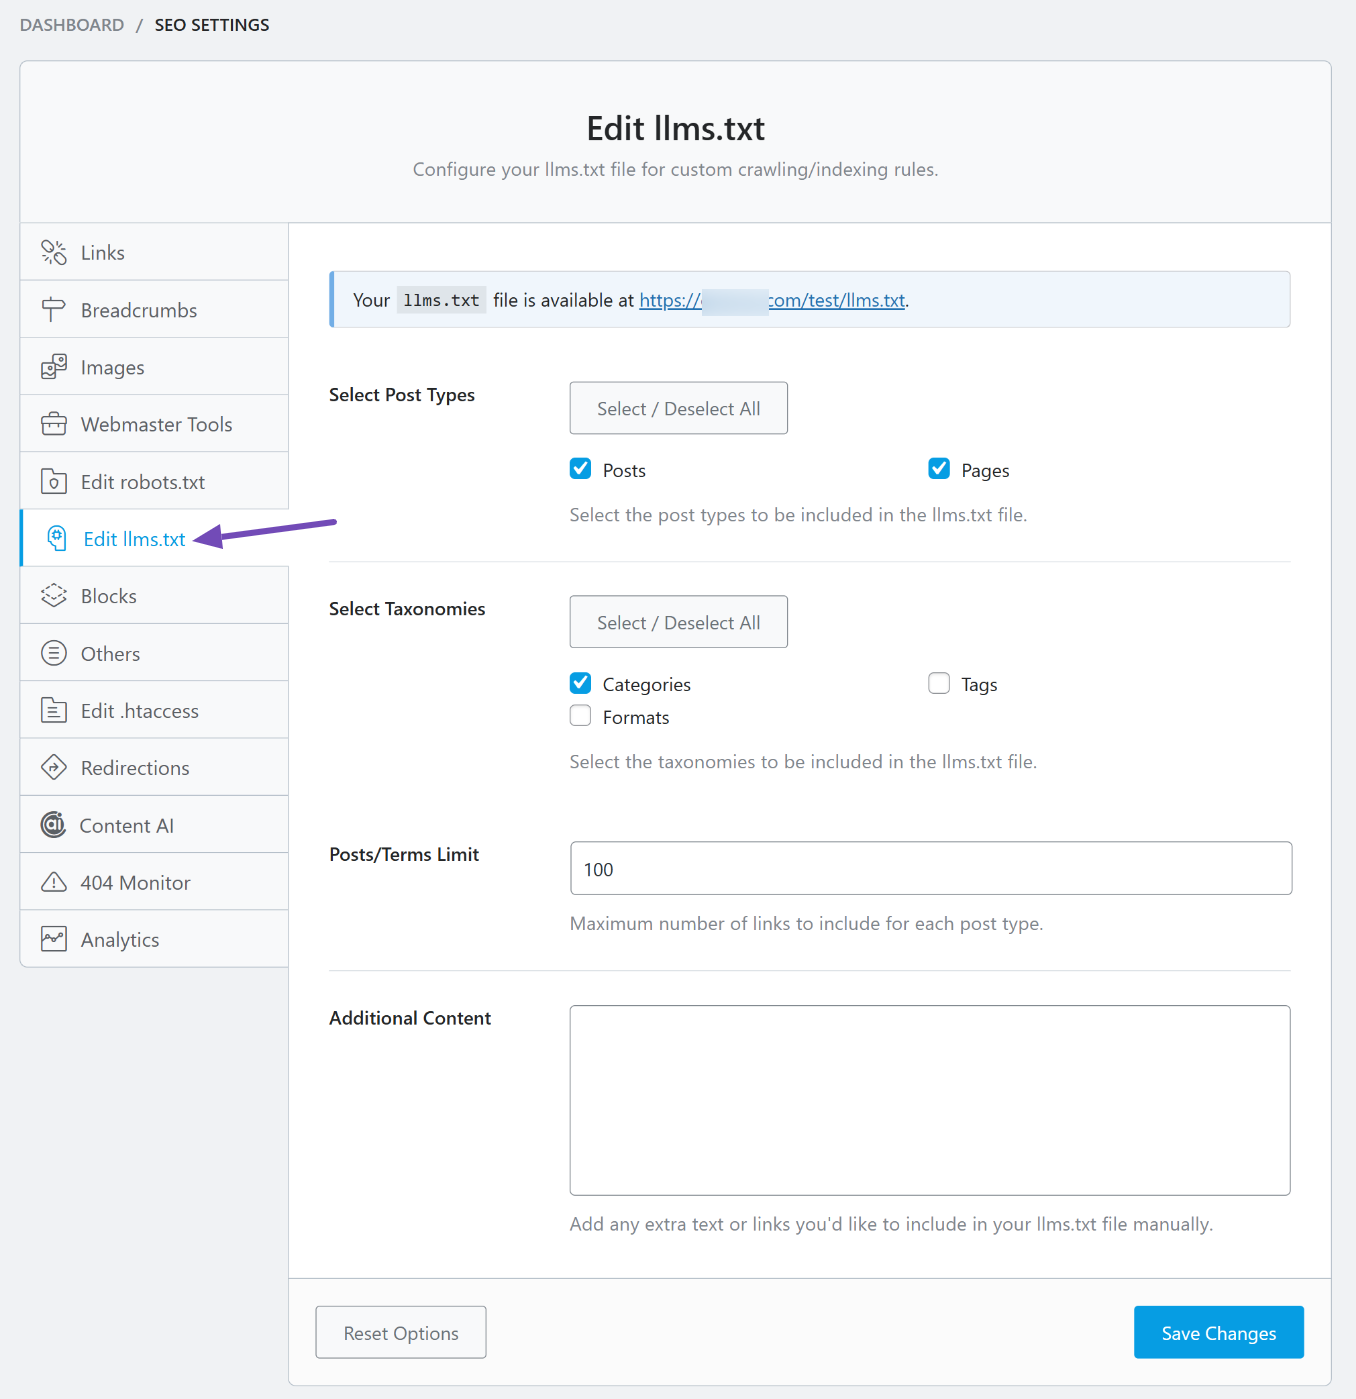
6.1 Select Post Types
Here, you can choose which post types to include in the llms.txt file so AI tools can easily access them. This usually includes Posts and Pages. Whichever ones you select, Rank Math will automatically add their titles, URLs, and short descriptions to the file.

6.2 Select Taxonomies
You can also choose to include your site’s taxonomies, such as Categories or Tags. For example, if you select Categories, each category name and its URL will be listed in the llms.txt file.

6.3 Posts/Terms Limit
There’s no strict rule for how many items should appear in your llms.txt file, but you can set a limit based on your preference. The default is 100, and you can adjust it up or down depending on how much content you want to expose.

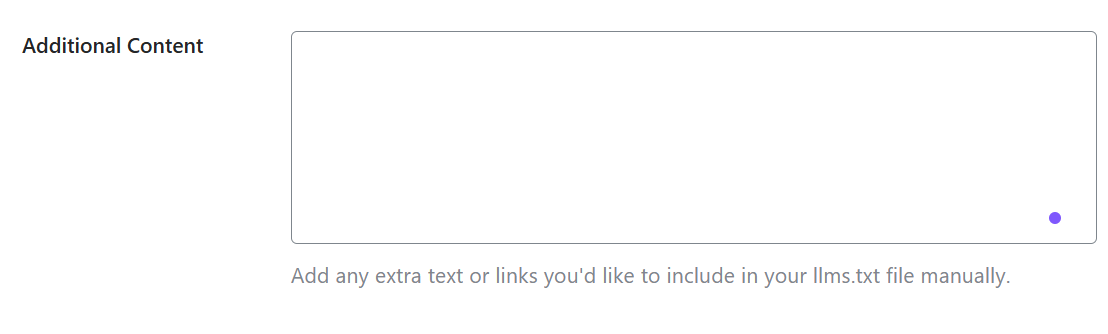
6.4 Additional Content
If you don’t want Rank Math to list all your content, you can selectively add specific pages or posts here. This way, you control exactly what content AI tools like ChatGPT or Claude can access.
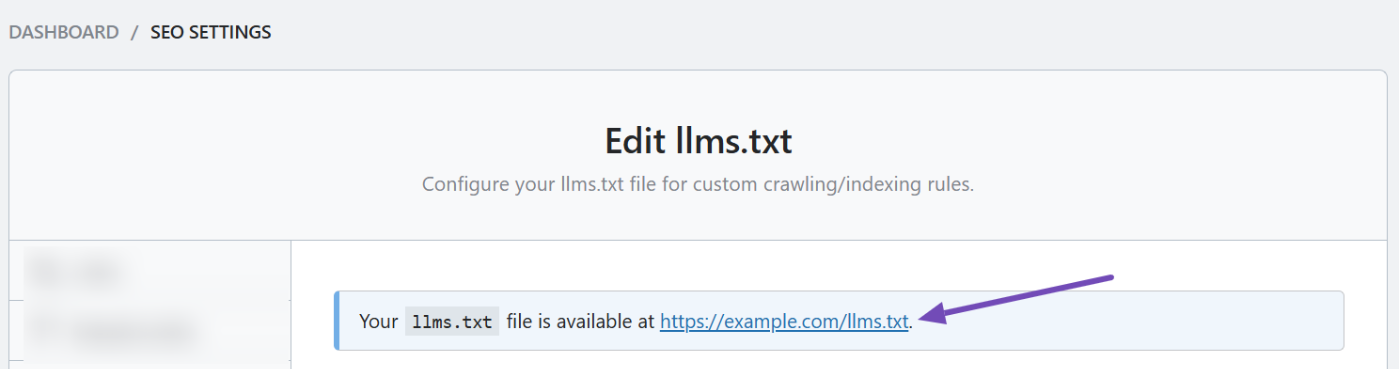
Once done, save your changes and preview how your llms.txt file looks by clicking the preview link at the top of the Edit llms.txt tab.
If you want to read more about the llms.txt file, we’ve provided a full guide for you here.
7 Blocks
This section deals with all the options related to the Table of Contents Block. The Blocks settings are available only when you enable the Schema (Structured data) module.
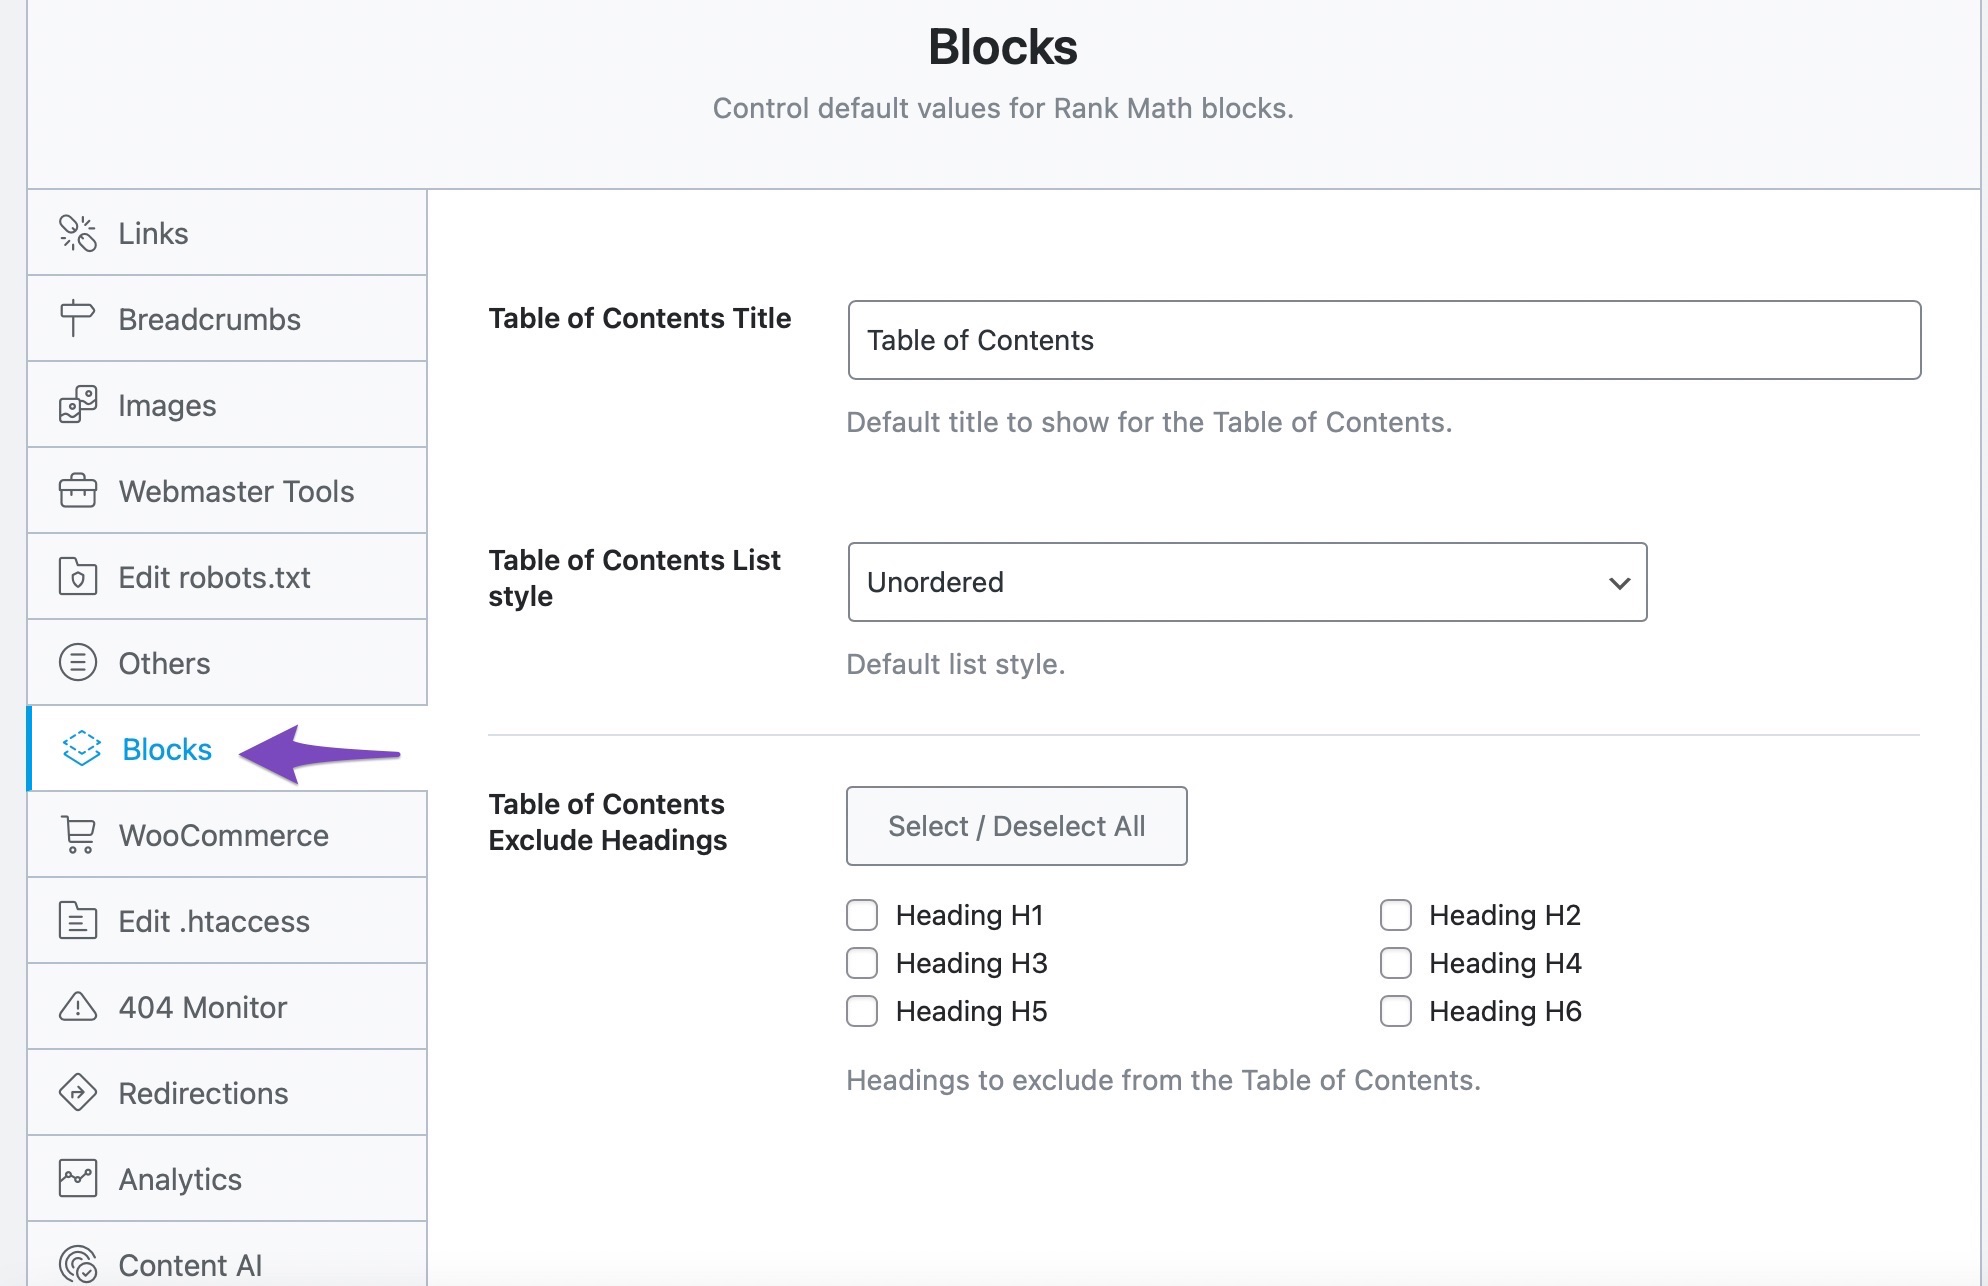
Here are all the options available in the Blocks settings:
7.1 Table of Contents Title
Add the default title for your Table of Contents. But that said, you can always override this default title on a post level. This option is visible in the Advanced version of Rank Math. If you don’t see this option, ensure that you’re using Advanced Mode of Rank Math.

7.2 Table of Contents List Style
Choose the default list style from the drop-down menu. Available options are None, Numbered, and Unordered.

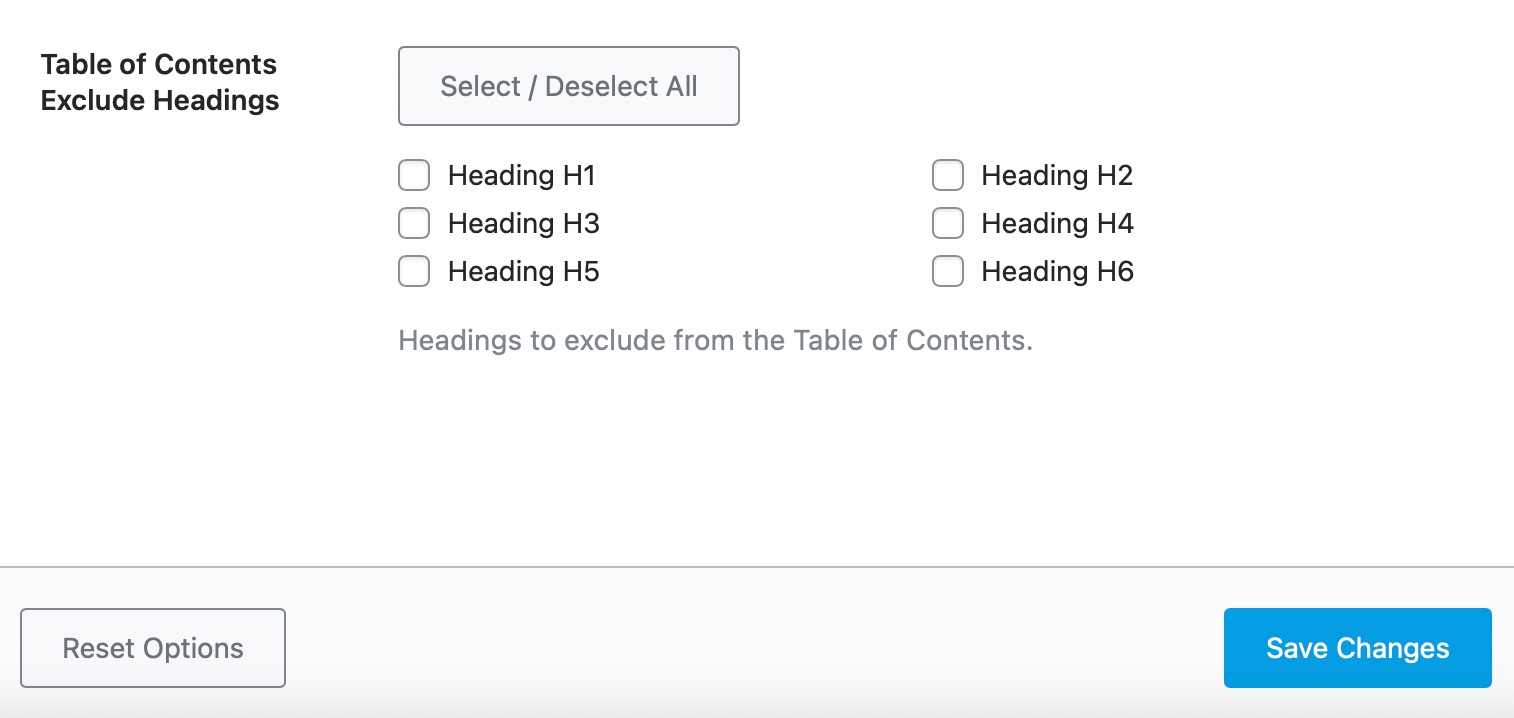
7.3 Table of Contents Exclude Headings
Select the headings you wish to exclude from the Table of Contents.
8 Others
The Others section is home to miscellaneous settings that could not be placed in any of the categories. Here are all the settings in the Other section.
Let us talk about each of the settings.
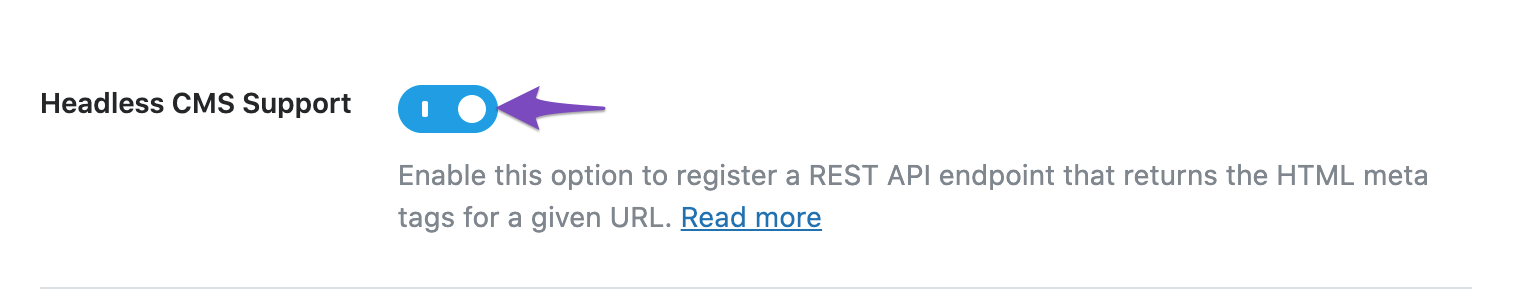
8.1 Headless CMS Support
If your website makes use of WordPress as headless CMS, then you can enable this Headless CMS Support option. So you can make use of Rank Math’s REST API endpoint to receive your page’s HTML Meta tags to use in your favorite front-end web app.
Once you’ve enabled this option, you can send a GET request to our getHead REST endpoint, followed by the URL of the webpage. The syntax is here as follows:
https://your-domain.com/wp-json/rankmath/v1/getHead?url=https://your-domain.com/hello-worldMake sure to replace your-domain.com with your website’s domain name and then replace https://your-domain.com/hello-world with your URL. The REST API will now return your page’s meta tags added by Rank Math. This can be used for posts/categories/user pages or any internal URL and even invalid URLs like 404s/other errors. You can refer to its dedicated KB here.
8.2 Show SEO Score to Visitors
If you have a ton of posts on your website and you just started using Rank Math, then it can be difficult to open each post to check how well they are optimized. This option can come in handy in those situations. When you enable this setting, Rank Math will start displaying the SEO Score of each of the posts on the front end, which will make it easy for you to identify the posts that need the most work.
This option is useful, but it isn’t mandatory for everyone. Only enable this if you have the need.

If you enable this setting, a bunch of new settings open up below it.
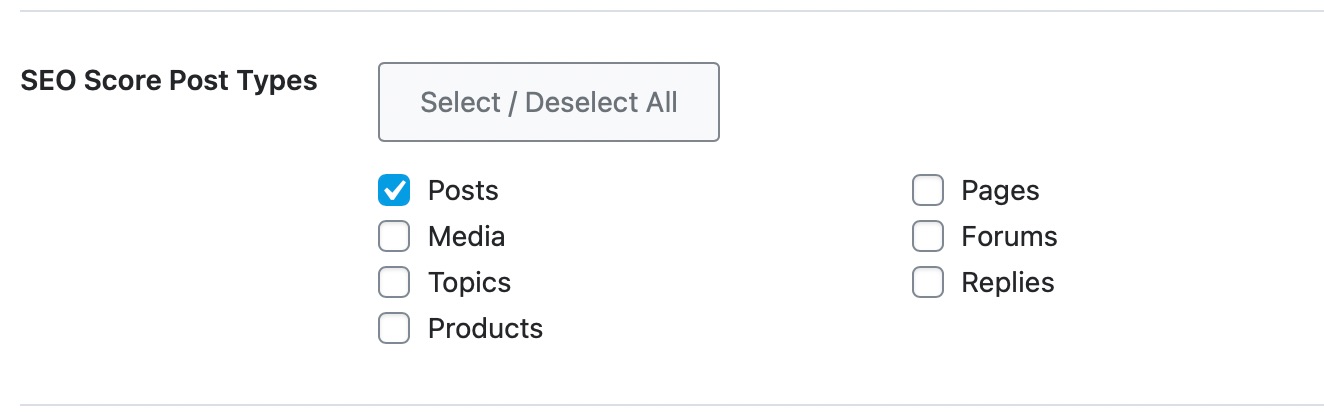
8.3 SEO Score Post Types
This setting lets you select the types of posts for which the SEO score will be displayed. Rank Math will detect and display all types of posts available on your website, including custom post types, and you can select one or more of them.
8.4 SEO Score Template
The SEO score can be displayed in 2 visual formats—Circular or Square—and this setting lets you select your preferred method.

8.5 SEO Score Position
This option lets you pick the position of the SEO score. You can place it above the content, below the content, or both. You can also choose a custom location by using a shortcode.
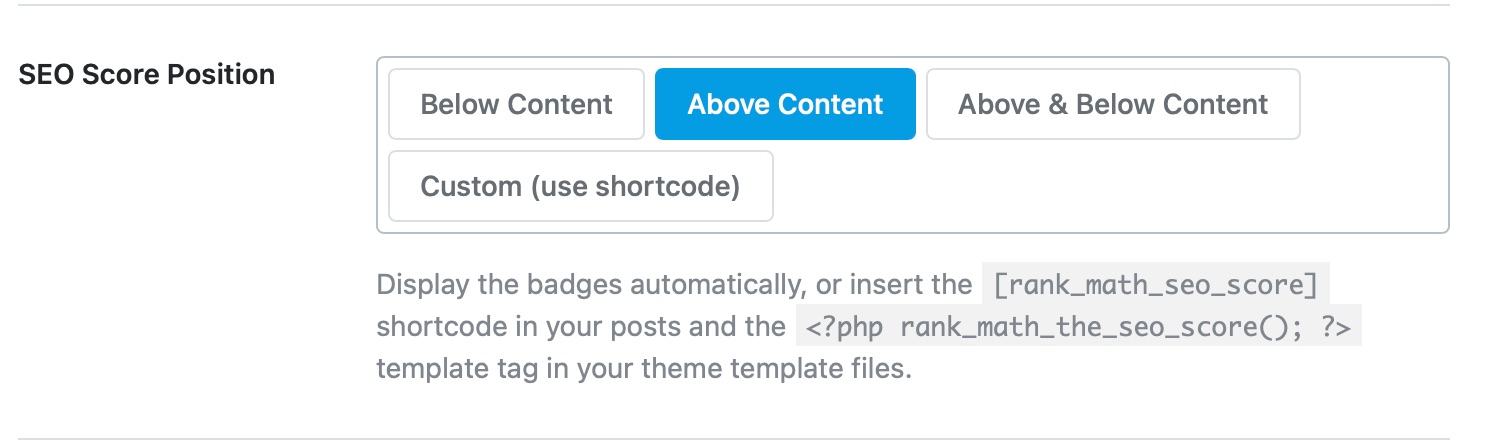
The shortcode you need to use is:
[rank_math_seo_score]If you’re editing your template and making the changes there, you’ll need to use this code chunk.
<?php rank_math_the_seo_score(); ?>8.6 Support Us with a Link
We’ve put in years of hard work to bring Rank Math to you, and if you want to help us spread the word, we’ll be delighted. When you enable this option, Rank Math will include a hyperlink to the Rank Math SEO score on your website to our website. The link will be no-followed, and no SEO value will be passed from your website to Rank Math.

8.7 Usage Tracking
This option allows you to authorize us to collect non-sensitive data on how you use Rank Math. We use this data to identify and fix issues, prioritize the development of your most important features, and improve Rank Math.
The data collected is anonymous, and we do not collect your personal or sensitive information. You can refer to this article for additional details on what we track.
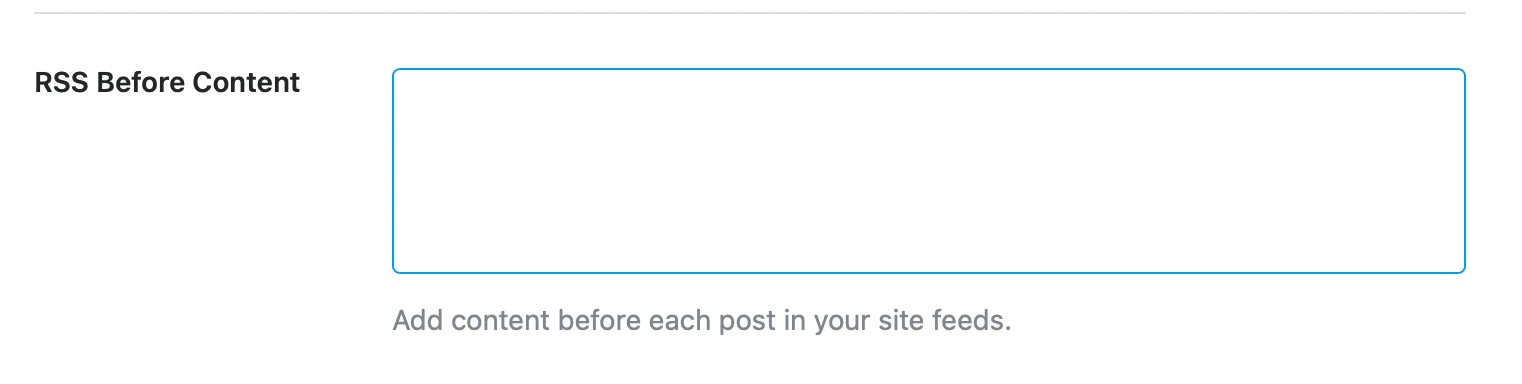
8.8 RSS Before Content
This option lets you add additional content at the beginning of your RSS feed. You can enter any content in the text field and also use the variables listed below to customize the text here.
8.9 RSS After Content
This option lets you add content after your RSS feed. You can use the same variables as in the before content option.
