

Install Steam
sign in
|
language
简体中文 (Simplified Chinese)
繁體中文 (Traditional Chinese)
日本語 (Japanese)
한국어 (Korean)
ไทย (Thai)
Български (Bulgarian)
Čeština (Czech)
Dansk (Danish)
Deutsch (German)
Español - España (Spanish - Spain)
Español - Latinoamérica (Spanish - Latin America)
Ελληνικά (Greek)
Français (French)
Italiano (Italian)
Bahasa Indonesia (Indonesian)
Magyar (Hungarian)
Nederlands (Dutch)
Norsk (Norwegian)
Polski (Polish)
Português (Portuguese - Portugal)
Português - Brasil (Portuguese - Brazil)
Română (Romanian)
Русский (Russian)
Suomi (Finnish)
Svenska (Swedish)
Türkçe (Turkish)
Tiếng Việt (Vietnamese)
Українська (Ukrainian)
Report a translation problem


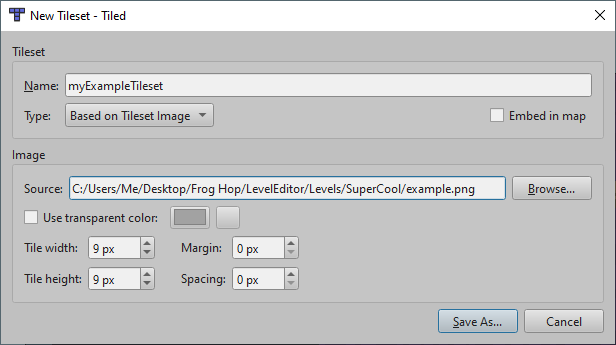
 To import a tileset with custom graphics, first move the image into your level folder. Then navigate to "File -> New -> New Tileset..." Select "Based on Tileset Image" and browse out to the image. Save the tileset underneath your level folder as well. (You may use subfolders to organize assets as you choose, but it's easiest to do this before from the get-go.)
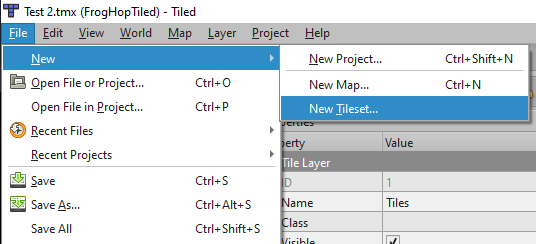
 Frog Hop also works with Image Layers now as well. These layers are best used for background/foreground images, as they allow adding a single image, and can be used to tile an image repeatedly across the map.
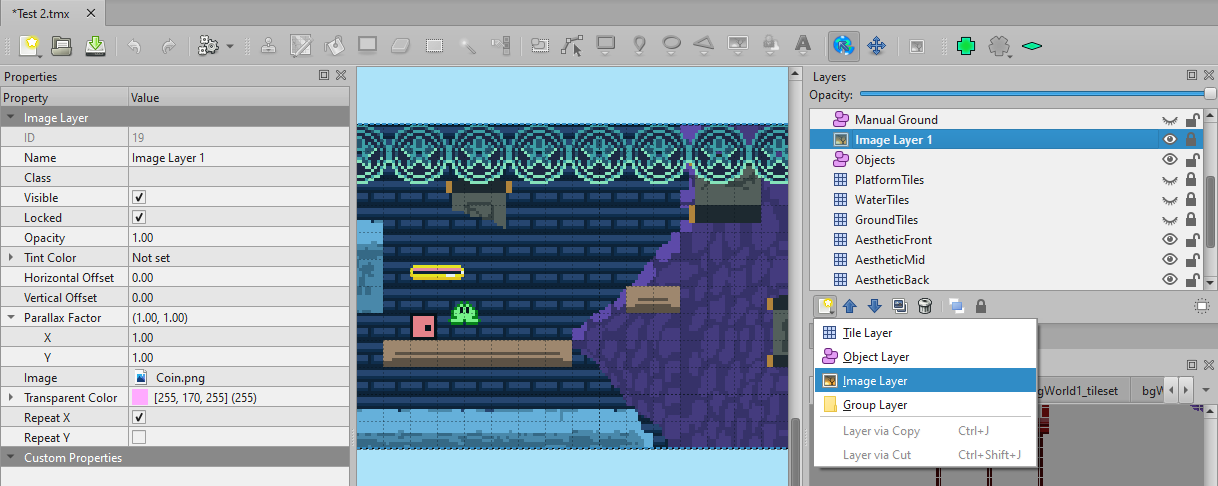 Here are a few tips to steer you on the right path for how to use custom graphics for Frog Hop in the Tiled editor:
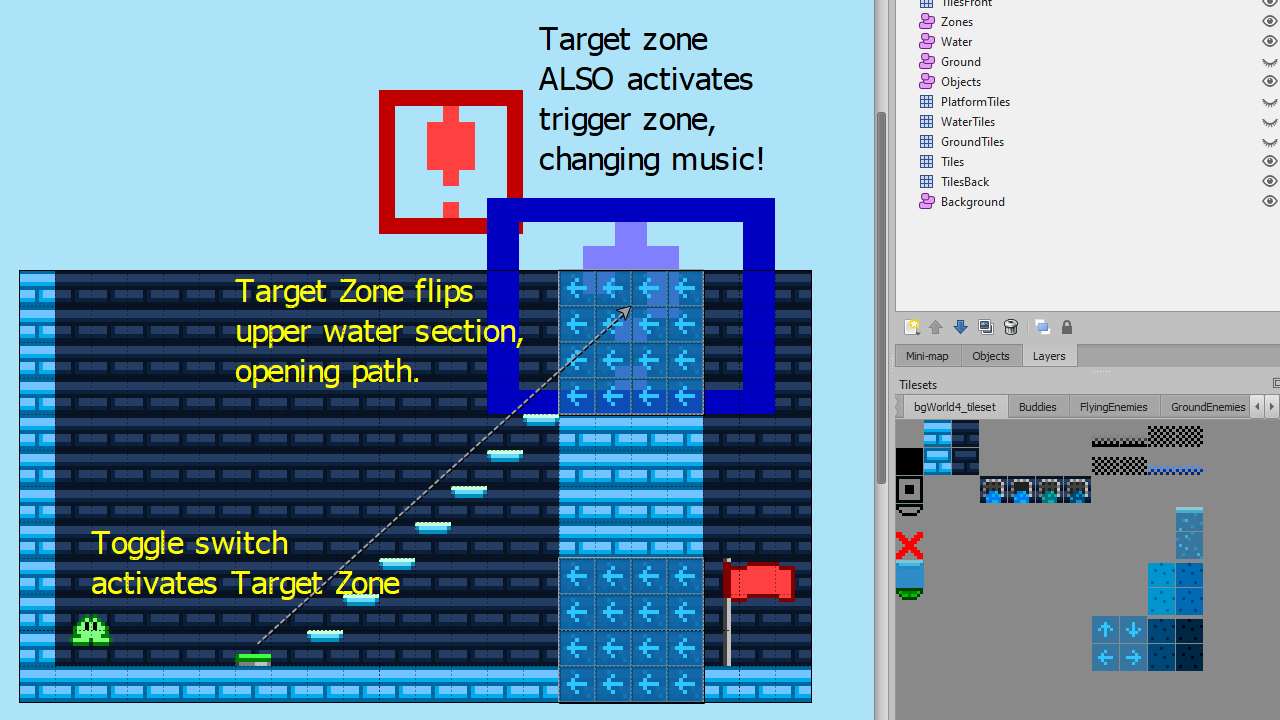 These new features give creators lots of new ways to let their creativity run wild, but we know that it can be a little daunting to learn all the ins-and-outs. Consider joining our Discord server
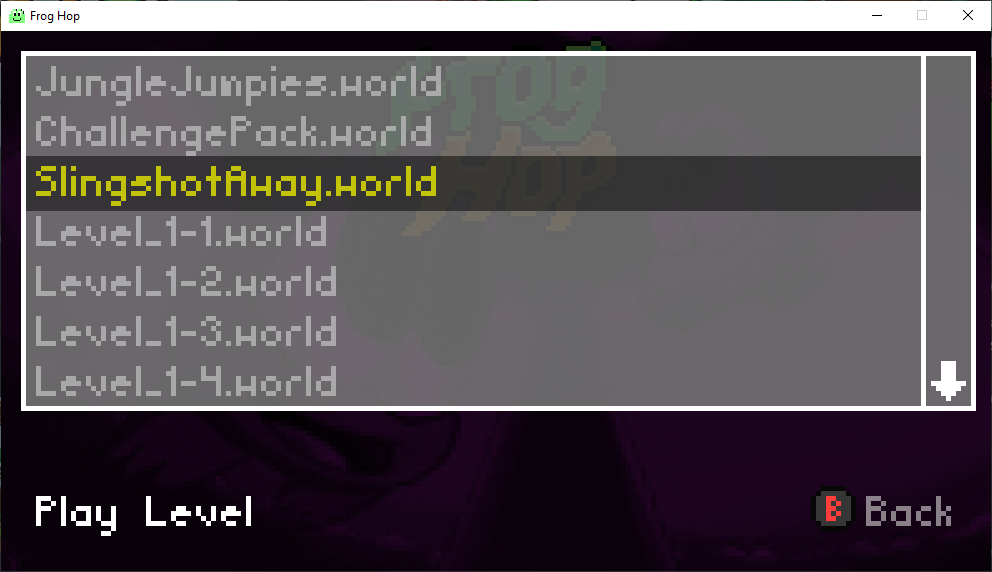 The new menu allows you to select levels to play from a list. This list is populated from .world files located with your LevelEditor/Levels folder. While this does require players to keep there levels at a specific location, it is worth the trade-off in order to support more control schemes and platforms.
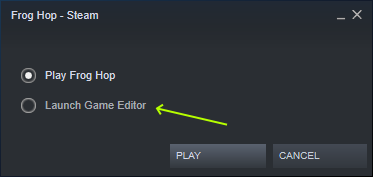 You can also open the editing tool (Tiled) manually outside of Steam (and in fact, this is recommended if you intend to test changes as you build levels!)
 Loading

