6. Defender
This guide explains how to use Defender’s security features to protect your WordPress sites from malicious attacks.
Defender requires PHP 8.0 or greater. See WPMU DEV Minimum Requirements for details.
Once Defender is installed and activated, refer to this guide for assistance configuring and managing Defender. Use the index on the left to quickly access guidance on specific features.
If you haven’t installed Defender yet, then you should visit the Defender Pro page where you can explore the plugin’s many features.
Upon activation or when certain features are configured, this plugin may add cookies to the user’s browser, store personal information in your database, or integrate with 3rd-party applications. You may need to disclose this information to your site visitors. For details, see Our Plugins in our privacy policy documentation.
Every WPMU DEV hosted site comes fully loaded with Pro versions of the following plugins automatically installed for you: Smush, Hummingbird, Defender, SmartCrawl, and Forminator. Not hosting with us yet? Check out our Hosting page to see if we might be a good fit for your projects.
Checklist for Securing Your WordPress Site – We’ve put together a super-handy 16-Step Checklist for Securing Your WordPress Site to ensure you don’t overlook any essentials and help you to build up the most robust security for your site.
Quick & Easy Security Tips – If you’re looking for some simple and effective security tips for your WordPress site, we’ve got you covered. Check out 7 Quick & Easy Security Vulnerability Fixes for a concise guide to fixing any weak points in your site security.
DDoS Protection Guide – If you’ve ever been hit by a DDoS attack, you know how crippling it can be. If your site’s security isn’t as tight as it could be, check out our DDoS Protection Guide and learn how to help protect your site from attacks with Defender’s IP ban, IP lockout, and 404 detection features.
Stop Hackers in Their Tracks – If you’re unfamiliar with security plugins it may be helpful to read our blog post, How to Stop Hackers in Their Tracks with Defender, before proceeding. The post discusses Defender’s features in a less technical manner than this guide and can help users formulate a plan to make the most of our premium website security plugin.
Expert Advice – Looking for some security tips from the experts? We recently interviewed some of our members to provide professional advice on WordPress security. For more information, read our blog, WordPress Security Expert Stories & Security Tips.
Recommended Reading – Looking for a concise guide to using Defender’s prime features to your advantage? Read our blog on how to Get the Most Out of Defender Security.
Prevent Hacking – Prevention is better than cure in many ways but it is crucial when talking about getting hacked – or rather, not getting hacked. For a full guide on how to protect your site from hackers, check out How Not To Get Hacked.
6.1 Quick Setup
Copy chapter anchor to clipboardWhen you initially install and activate Defender, the Let’s get started popup modal will appear.
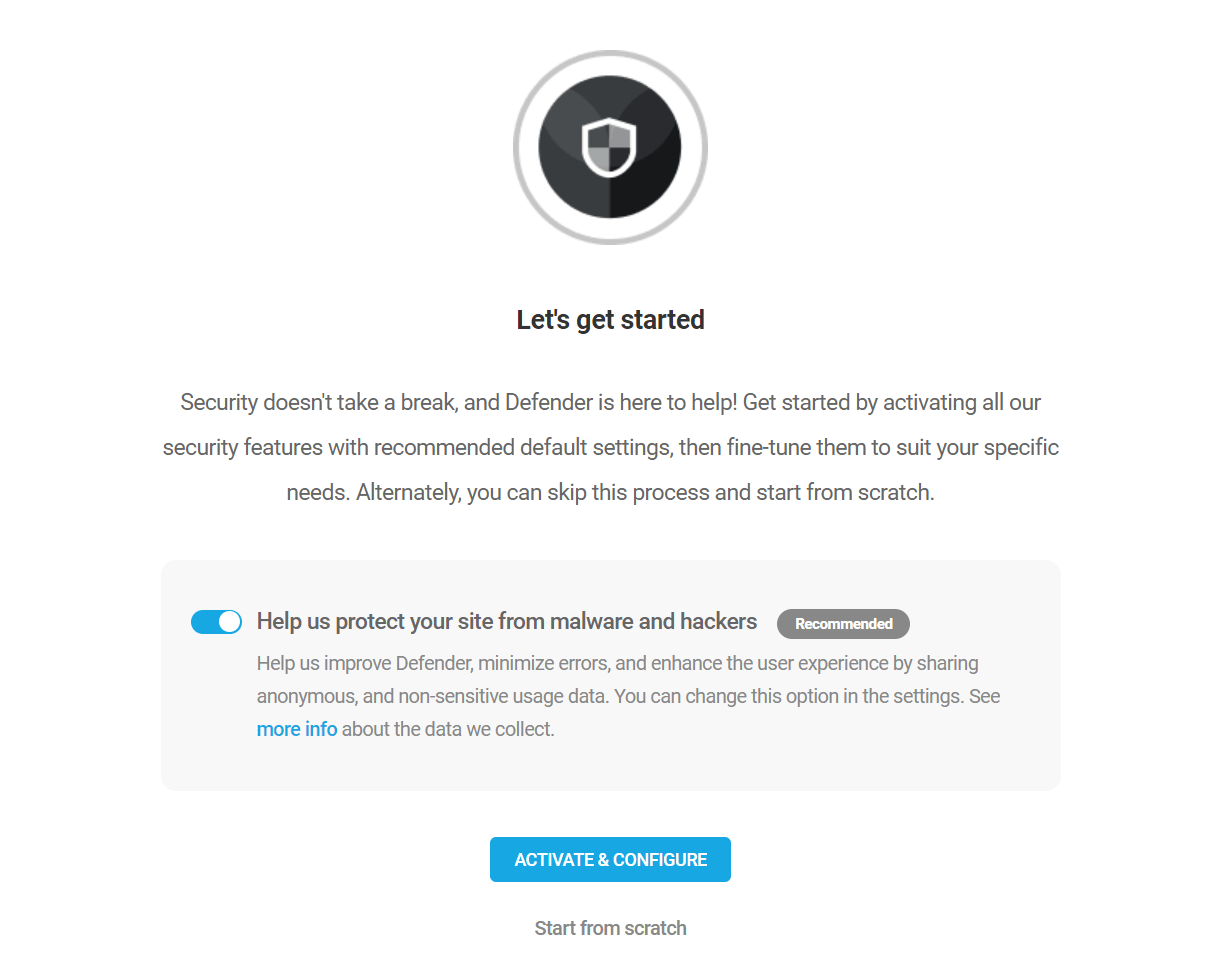
The first step in the wizard will prompt you to optionally enable Usage Tracking. This helps us to make Defender even better by letting our team know how you’re using the plugin. This option can be enabled or disabled at any time in the General Settings.
Then select either the Activate & Configure option or quit the wizard by clicking Start from scratch.
WPMU DEV’s usage tracking never collects your personal data or that of your site users. If you enable this option, we will only collect anonymous data about how Defender is used, what errors occur, and under what circumstances, and we use this data to improve the plugin. Enable the usage tracking option if you want to help out or leave it disabled.
If you are hosting with Kinsta, please note that opcache.save_comments must be enabled for Defender to function properly. If it is not enabled, you will see this notice on all Defender screens: 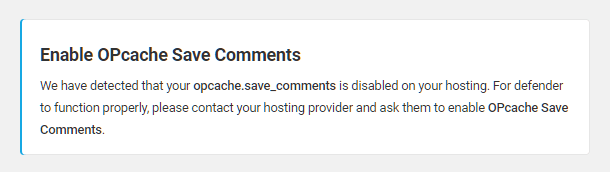
Activate & Configure
The Activate & Configure option will enable all of Defender’s security modules by default. We recommend enabling all features and then configuring any security exceptions you require from within the individual modules. Disabling any feature creates a significant gap in your site’s security.
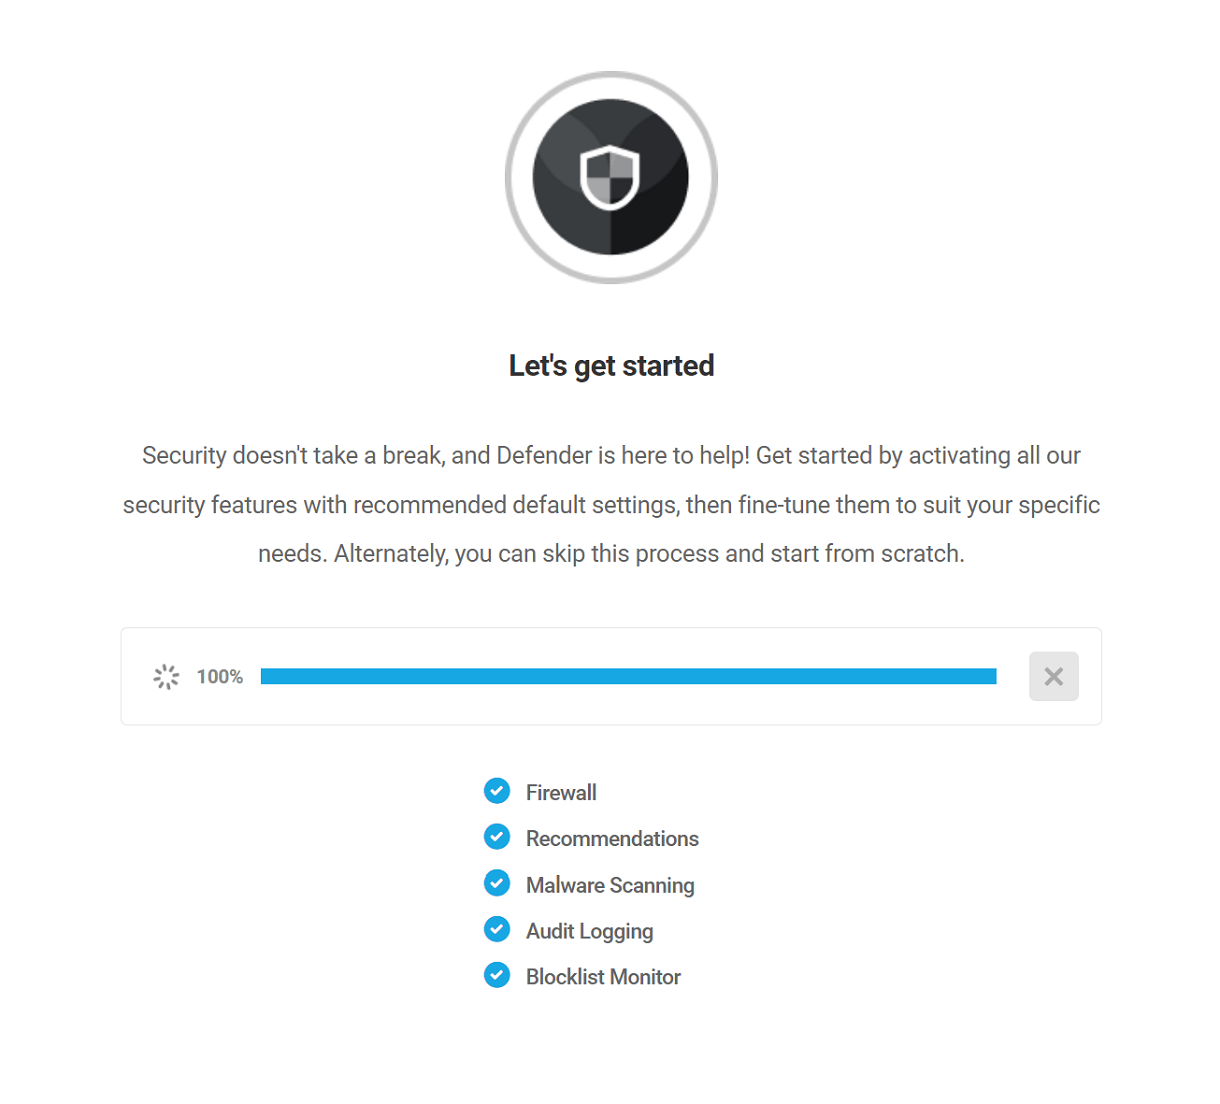
Defender’s key modules include:
- Firewall – Protect your site by identifying and blocking problem users by IP Address.
- Recommendations – These are common security improvements that can be made to enhance your site’s security against hackers and bots.
- Malware Scanning – Defender will run regular security scans and will notify admins if anything suspicious is discovered.
- Audit Logging – Track and log all changes to a site, creating a database of critical information about events impacting your site.
- Blocklist Monitor – Defender will monitor the Google blocklist and notify you if your site appears on the list.
Activate AntiBot
Once the Quick Setup has finished, you’ll have the option to also activate the AntiBot Global Firewall service that proactively protects your site from hundreds of thousands of known malicious IP addresses.
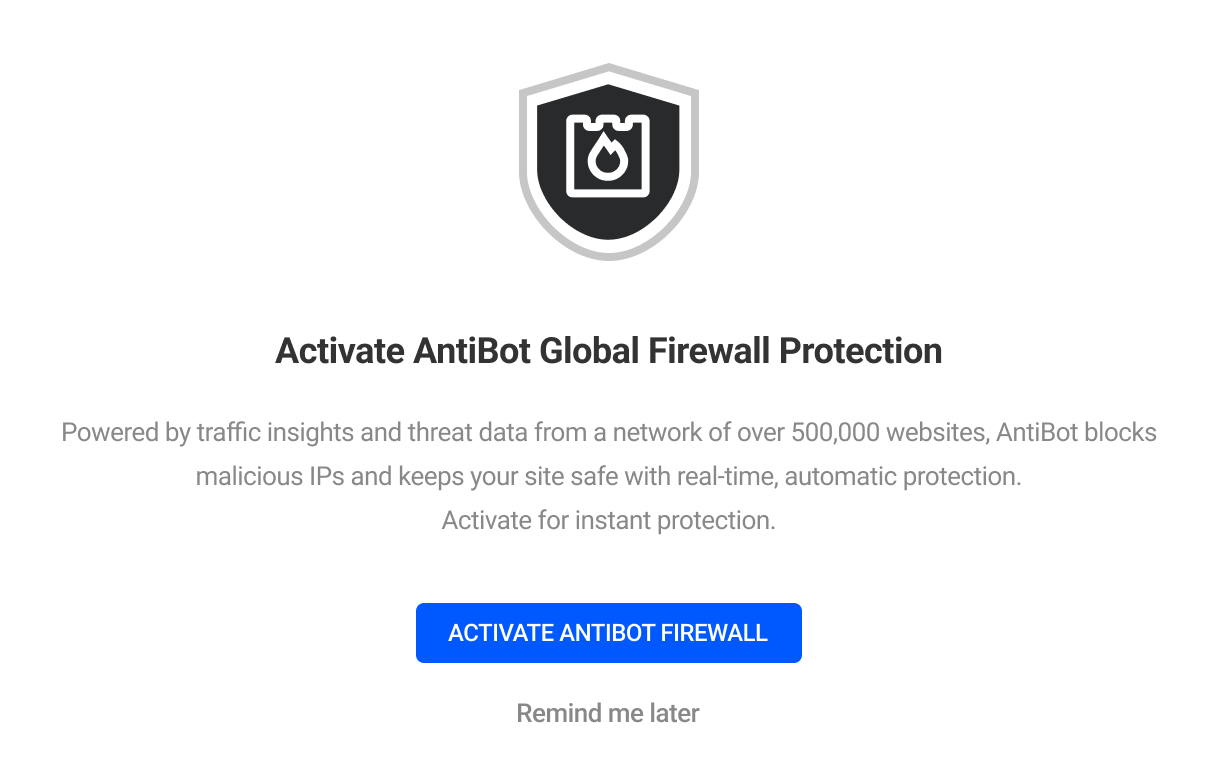
If your site is not connected to WPMU DEV, you’ll see a Connect Site button on this screen instead. Clicking this button will prompt you to connect your site to WPMU DEV before you can activate the AntiBot Global Firewall.
Start from scratch
If you start from scratch, the setup will be skipped and you can start configuring Defender with a clean slate.
6.2 Defender Dashboard
Copy chapter anchor to clipboardThe Dashboard consists of the Overview and Quick Access panels for each Defender module. Admins, particularly those managing multiple sites, can use the Dashboard to determine if a website’s security configuration needs attention.
Overview
The Overview panel provides a snapshot of Defender’s security configuration and activity. In the top right-hand corner, you can use the View Documentation button to access Defender documentation (this document). Use the Overview to quickly assess the site’s current security status:
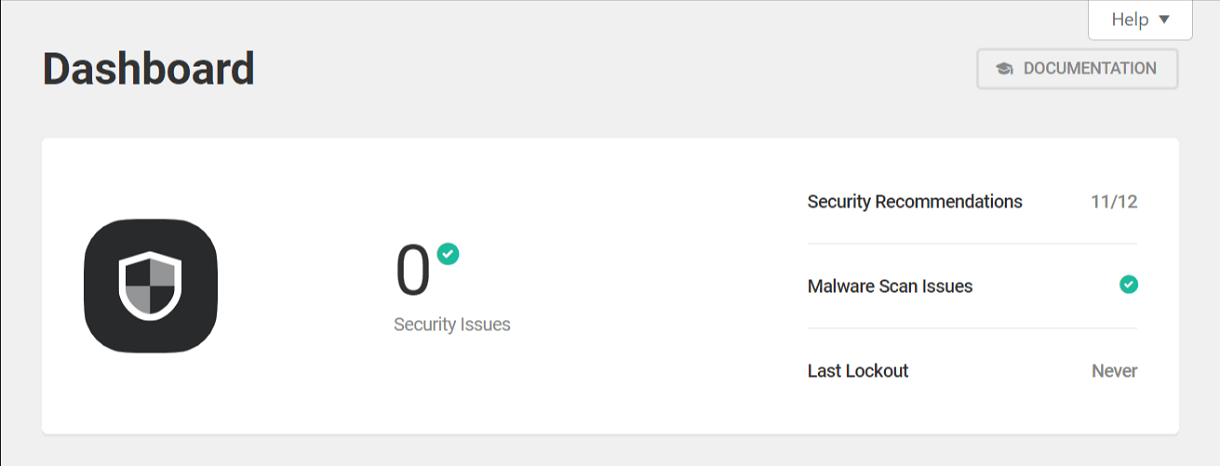
- Security Recommendations – The number of recommendations identified that have been actioned relative to the total number found.
- Malware Scan Issues (Pro) – The number of instances of suspect PHP functions and suspicious code that have yet to be addressed. A green check mark indicates that no unaddressed issues exist.
- Last Lockout (Pro) – The date and time a user was locked-out for exceeding the login attempt threshold.
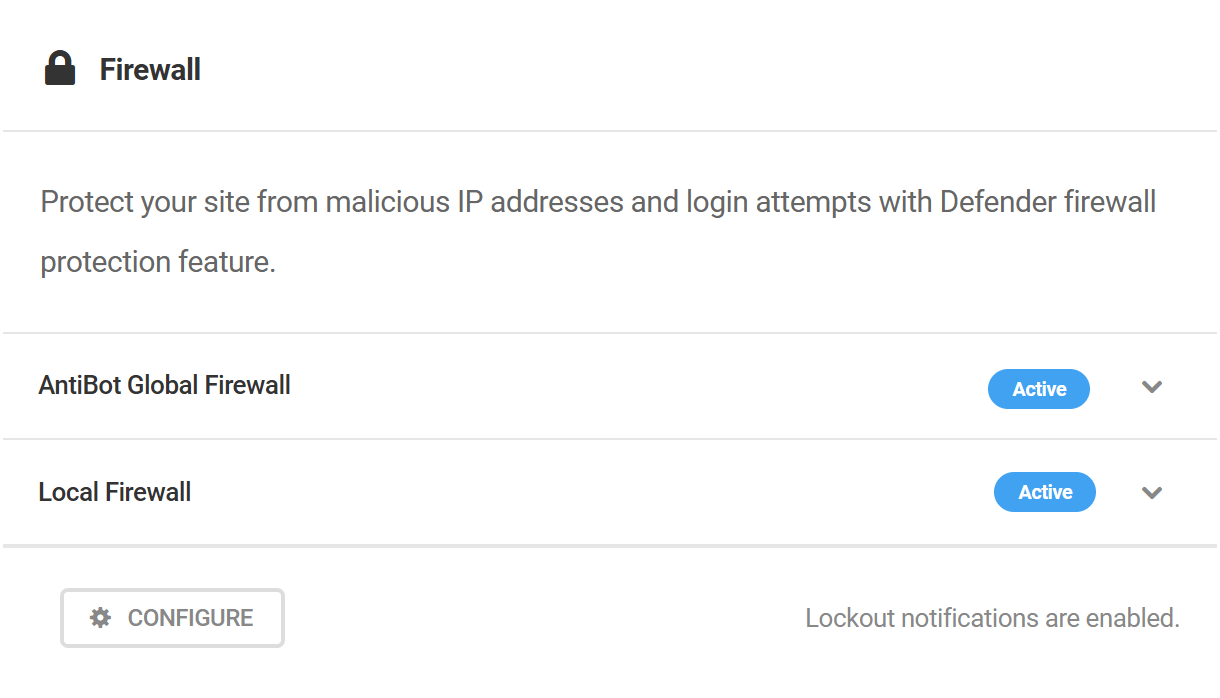
Quick Access
The Quick Access panels provide easy access to every Defender module, allowing admins to activate/deactivate modules, view logs, and generate reports.
- Firewall – Proactively protects your site against known malicious IP addresses, and blocks those that repeatedly attempt to access pages that do not exist or to login with incorrect credentials. Click Configure to open the Firewall module.
- Malware Scanning – The process of checking a site for known vulnerabilities in code and configuration. Scanning is how Defender knows which Recommendations to suggest. Click View Report to access the Malware Scanning module.