🔥 HOT: Search/label/Micro%Beads - Uncensored 2025

Showing posts with label Micro Beads. Show all posts

Thursday, 30 December 2021

Micro Bead Wreath of Hearts

Good afternoon

I'm back this afternoon to share the last of my 2021 Christmas card makes.  Apologies that the selection was a little limited this year, that will teach me for leaving them even later than I usually do!

This will also be my last post of this year as I'm back to work tomorrow.  As you will have seen in my recent posts, I've also decided to step down from all the challenge blog Design Teams I've been part of for many years.  Hopefully this will give me the opportunity to put my spare time to better use and be able to craft more, without having the other commitments and deadlines that come with being on challenge blog Design Teams.  Hopefully it will be something I could reconsider in the future, it sure was fun.  I still remain a member of the Skull and Cross Buns Design Team and will introduce and showcase Emily's products when she needs me.

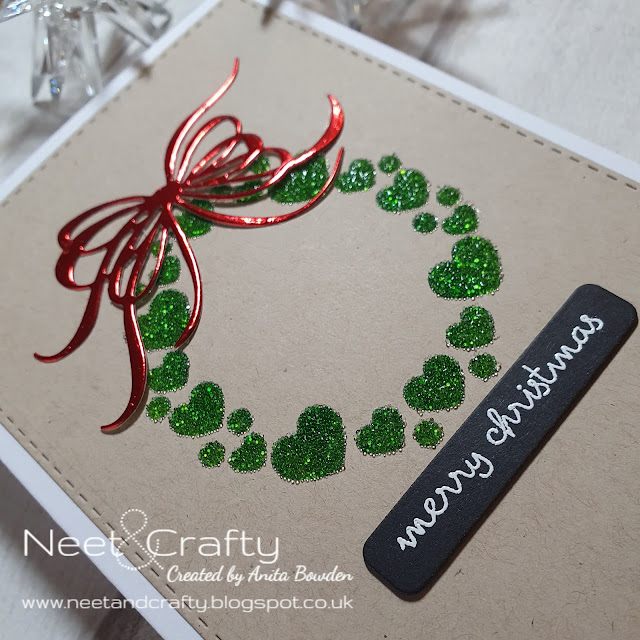
Ok, back to my final Christmas card, and this was the one I made for my other half...


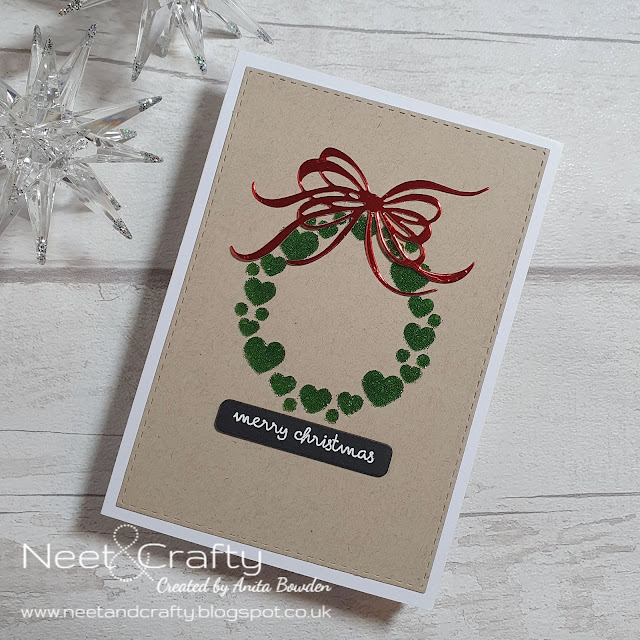
To make it a bit more masculine I began with a die cut panel of kraft cardstock.  I used the same technique as my previous trees card which used micro beads...I inked through the stencil with Distress Ink first and then cleaned the stencil before spreading translucent paste through it over the inked image and then sprinkling on the glass beads.  This was then left to dry completely before adhering the panel to a white card base.  And yes, it's the same sentiment again!  It was on my desk so it got used for pretty much every Christmas card this year!  I heat embossed it on a black die cut strip.  To finish, I die cut a bow from red glossy mirri cardstock and adhered this to the top of the wreath.


Materials used:
  • Dies: Create a Smile - Cool Cuts Double Stitched Rectangles; Altenew - Featured Sentiments Die Set; The Greetery - Fit to be Tied
  • Stencil: Clearly Besotted - Circle Around
  • Stamp: Clearly Besotted - Simple Script
  • Ink: Distress Ink - Rustic Wilderness, Pine Needles; VersaMark
  • Embossing Paste: Sweet Poppy - Stencil Dimensions:Translucent
  • Embossing Powder: Brutus Monroe - Alabaster White
  • Cardstock: Neenah - Desert Storm; red mirri card from stash
  • Accents: Sweet Poppy - Clear Glass Micro Beads

Challenge entries:

AAA Cards - Game #205 - Christmas
Happy Little Stampers - December Christmas Challenge - Anything Goes
Happy Little Stampers - December Stencil Challenge - Anything Goes
NBUS - Challenge #33 - The Greetery bow die and the wreath stencil are new to my stash
CHNC - Challenge #574 - Anything Goes Christmas
Uniko - Challenge #68 - Celebrate (Reds and Greens)
STAMPlorations - December Stencil Challenge - Anything Goes


I just love the online crafting community and want to say thank you all for your support and encouraging feedback throughout this year.  It's so great to know that I can provide lots of inspiration, and gain some back too!

So, all that's left to say is...

Wednesday, 29 December 2021

Trio of Micro Bead Trees

Hi guys

Tonight I'm sharing one of my very last cards made this year.  

I purchased a new stencil from Clearly Besotted, last month I think, which features some really cute abstract trees and I wanted to use it at least once this year.

As I've only used them once before, I decided to use my clear glass micro beads on this one...


Firstly, I die cut a stitched rectangle before adhering the stencil in place with some low tack tape.  I then ink blended through the stencil with three shades of Distress Ink.  I removed, cleaned and dried the stencil and placed it back in position.  I spread some stencil paste through the tree apertures and quickly removed the stencil before sprinkling over the micro beads.  The paste is opaque to begin with but turns translucent as it dries, and also then holds on to the beads once dry.  I left the panel overnight to dry then gave it a brush over to remove any beads that weren't fully adhered.


To finish I adhered the panel to a card base and then added a black sentiment strip, with the sentiment heat embossed in white.  You can see a closer view of the micro beads in the photo below.


Materials used:
  • Dies: Create a Smile - Cool Cuts Double Stitched Rectangles; Altenew - Featured Sentiments Die Set
  • Stencil: Clearly Besotted - Trimmed Trees
  • Stamp: Clearly Besotted - Simple Script
  • Ink: Distress Ink - Blueprint Sketch, Wilted Violet, Picked Raspberry; VersaMark
  • Embossing Paste: Sweet Poppy - Stencil Dimensions:Translucent
  • Embossing Powder: Brutus Monroe - Alabaster White
  • Accents: Sweet Poppy - Clear Glass Micro Beads

Challenge entries:

AAA Cards - Game #205 - Christmas
Happy Little Stampers - December Christmas Challenge - Anything Goes
Happy Little Stampers - December Stencil Challenge - Anything Goes
NBUS - Challenge #33 - new stencil
CHNC - Challenge #574 - Anything Goes Christmas
STAMPlorations - December Stencil Challenge - Anything Goes


I hope you liked this one.  I have another to share using micro beads so I'll probably be back with that one tomorrow morning.  That's all for today, I hope you'll pop back again.


Sunday, 27 December 2020

Elegant Tree with Micro Beads

Hi there

I've shared all my multiple makes with you so now I'll start sharing a few individual cards I made for certain people this year.  Today I'm sharing my first card using glass micro beads which I purchased from Sweet Poppy.  This was the Christmas card I made for my bestie this year.


I die cut the upper panel first using a stitched rectangle die, obviously you can't feed anything through a die-cutting machine after using this technique.  I then ink blended through the tree stencil with three shades of ink before then spreading translucent paste over the top.  You then need to work quickly to add the micro beads after removing the stencil before the paste starts to dry.  I used clear micro beads here over translucent paste so the colours then show through once dry.  Next I manipulated a clear sentiment stamp to follow the curve at the base of the tree and then stamped and heat embossed in silver.


Once completely dry, and allowing any warping to flatten out, I adhered the panel over some silver no-shed glitter cardstock and then adhered this flat to the card base.  I just love the effect of these beads and how it sparkles, it's so pretty!  


Materials used:
  • Stencil: Funky Fossil Designs - Elegant Tree
  • Ink: Altenew - Lagoon, Bamboo, Hydrangea; VersaMark
  • Embossing Paste: Sweet Poppy - Stencil Dimensions: Translucent
  • Stamp: Clearly Besotted - Cosy Christmas
  • Embossing Powder: Wow! - Metallic Silver
  • Accents: Sweet Poppy - Clear Glass Micro Beads

Challenge entries:

Crafty Hazelnut's Christmas Challenge - Challenge #522 - Anything Goes Christmas
Always Fun Challenges - Challenge #194 - Christmas
Allsorts Challenge - Week 603/4 - Sparkle and Shine
NBUS - Challenge #21 - first use of micro beads and this stencil
STAMPlorations - December Stencil Challenge - Anything Goes
Uniko - Challenge #62 - 'Tis the Season (option: Sparkle)


I still have a few more individual cards to share so will be back again very soon.


Related Posts Plugin for WordPress, Blogger...