⚡ NEW: Search/label/Simple%Stories - Full Archive

Showing posts with label Simple Stories. Show all posts

Saturday, January 2, 2016

December Daily Part 2 with Laura

It's Laura here today,  popping in super quick to share a video for the last half of my December Daily album for 2015!

If you have ten minutes to spare I would love for you to give it a watch!


Have a happy Saturday!
Laura
xo

Monday, December 21, 2015

Manufacturer Spotlight | Simple Stories

Hi friends! 


Simple Stories  is back in our Manufacturer Spotlight, they have once again hit it out of the park with their wonderful Claus & C. collection!


You can see the full line up of this collection here, you will notice that much of it is retired, it has sold out - yes it is that popular!  WE still have limited quantities of some of this collection in stock, so if you are crushing on it like we are, you should probably touch base with us!

On the Simple Stories blog you can see some gorgeous inspiration using this collection ; like this post with 2 great layouts and this post with a fun December Daily.  Plus you can check out Laura's reveal here in case you missed, or her December Daily part 1 video here.

And they are having a DT Call should you wish to throw your hat into the ring!  I cannot find a link to the application process, but I have an email with all the details in it and I am happy to forward it to you!

Have a great day!


Saturday, December 19, 2015

December Daily Part 1 with Laura

Hi there!

It is Laura popping in for a little visit on this Saturday before Christmas!  Can you believe we are less than a week away from the jolly old guy visiting us?

I thought I would share my December Daily album, well the first half of it!  This video is about 15 minutes long and almost as long as I can get in one upload on You-Tube.  I will share part two after my album is completed, which should be after Christmas.

I used mainly the Claus & Co. collection from Simple Stories, and added in a few items from my stash. blending old and new is a great way to get to play with new product while still using up your leftover or hoarded goodies!


I hope you enjoy it, thanks for visiting!

Tuesday, December 1, 2015

Laura's Monthly Reveal | Simple Stories

lHi there!

I have so much to share today for my reveal! I had so much fun playing with the Claus & Co. collection from Simple Stories!  FYI, there are lots of pics in this post!

Anyway, let me show you all the goodies that I was given to play with:

I basically rec'd all of the patterns shown
here, plus the alpha sticker sheet.


and this set of super fun paper
washi tape strips
these fun interactive elements
some photo stickers - love these!
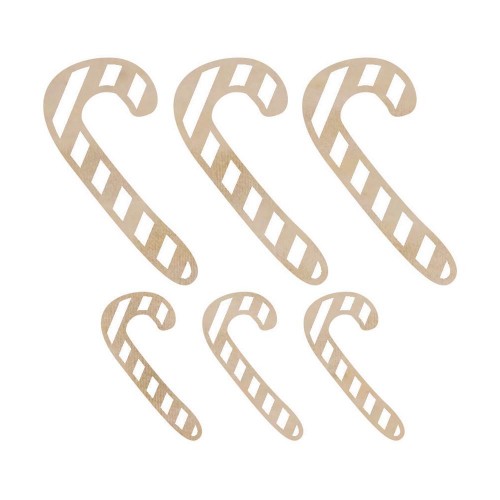
Kaisercraft wood candy canes
My Mind's Eye Christmas epoxy stickers
Fabscraps small chipboard snowflakes

I also added in the coordinating Simple Stories chipboard pieces from my stash and some randomness that is listed below.

Merry Little Elf

I was inspired by the string of Christmas lights on one of the patterned papers and decided to create my own paper string of lights to hang a couple of photos from.


I used a Silhouette store cut file for the lights and stitched over a pencil drawn semi circle for the strand of the lights.


I combined two types of alpha stickers and another sticker to create my title, I like the fun look it gives.


I fussy cut some holly from one of the patterns and layered it over a holly that was printed on this background sheet for some extra pop.


As the name suggests, these clear stickers are great for layering right over photos.

We believe

For this page, I began by creating a grid pattern using some 4 x 4 cut part cards from one of the patterned papers and a photo, which was layered over a piece of vellum and then a patterned paper.  All of this was then adhered to a full sheet of patterned paper.


I had fun creating a few clusters of embellishments and doing some machine stitching.


Another mixed font title.


I really liked that these chipboard elements were not adhesive backed, I seem to be removing the adhesive from most embellishments lately so that I can use them strategically.


As a final step I adhered some Washi tape strips, in various widths,  around the outside of my page and then stitched around them.  I really love this fun look.

Joy Card

I created this quick step card using the Fabscraps chipboard snowflakes, which I embossed in green to coordinates with the patterned papers.  One of the My Mind's Eye epoxy stickers makes for a great sentiment and a random wooden button from my stash, that I embossed in metallic gold, helps to balance things out.

Let it Snow Tag

This simple tag features a snowman sticker layered on white cardstock to help him stand out a bit more and a second sticker as a sentiment. I punched a circle around a glittered heart from one of the patterned papers and hole punched it so that it could hang from the bow.

Wishing you a Sparkle Card

This card was so simple, by utilizing the 4 x 6 cut apart cards that were on one of the patterned papers, I whipped it up in seconds.  This is a great idea if you are short on time but still want to make your own cards.


I did, however, add a bit of detail to the inside.  I thought this pocket from the interactive elements set would make a great gift card holder.


And speaking of interactive elements, this card was another simple creation, by cutting off one side of a tri-fold file folder and adding a couple of stickers and bit of Washi, it whipped up real quick!

Merry & Bright

This layout was better in my head than on paper, but I like several of the elements that I was able to incorporate.. 


I really like the colour of the Tim Holtz pumice stone distress paint with this collection.


The texture paste adds a fun and almost chimney like effect.


Another mixed font title and fun glittery gold accents.  The great thing about these glittery epoxy accents is that the glitter doesn't rub off, at all, not even one little bit!  There is a little more information about this layout on my blog, if you care to check it out.

I really loved playing with these products and they are super hot right now and selling quickly, I noticed that Simple Stories is actually out of stock on a lot of it, so grab yours before it is gone!

Supply List: Simple Stories pattered paper, washi tape, stickers and chipboard; Fabscrap chipboard snowflake card; misc ribbon; Martha Stewart Texture Paste; Tim Holtz distress paint; TCW stencil; misc. grey cardstock; American Crafts white cardstock; misc. vellum.

Thanks for visiting!

Tuesday, November 10, 2015

Manufacturer Spotlight | Simple Stories

Hi friends!


Simple Stories is in our Spotlight this month, we just loved their beautiful fall line,
 

Pumpkin Spice and wanted to be sure to share more of it with you! 

Over on their blog, they have some gorgeous DT reveals, like this darling mini album.

They are also sharing a sweet fall photo prompt as a free download, to inspire you to get that camera out and capture the moments!  It is super pretty and you could print it and add it to your project!

So glad you visited today!


Sunday, November 1, 2015

Monthly Reveal with Laura | Simple Stories Pumpkin Spice

Hi there!

It's Laura here today sharing some cards and layouts with you for my monthly reveal using the super sweet Pumpkin Spice Collection by Simple Stories! I adore this collection, with its rich fall colour scheme and great embellishments, it was so fun to work with! Let me tell you a bit about my projects.

Happy Fall

I so LOVE this background paper, it is magic.  So of course it had to be a main part of my layout.  It worked perfect for this page with its tight focal area, leaving a lot of white space (or gorgeous wood grained space) open.


Here are a couple of close up photos of my embellishment clusters, I used lots of pop dots to give my page some dimension.  I also added in a bit of texture paste and floss for extra texture.  I dug into my stash for some alpha stickers that would coordinate and found these super oldies from Studio Calico.  I think they work perfectly, and given their age it was high time I used some of them ;)

Fall Delights

This burlap look paper with the flowers printed on it is another great pattern. I always love the look of these type of papers with a spray of flowers or other pattern in the corner, but struggle with how to use them and often end up using the B side.  So this time I challenged my self to use the side that I struggle with and guess what? I love the way it turned out! 


I used a die cut from the collection as part of my title and die cut the word "delights" with my Silhouette.  I really like the look of mixed alpha titles.


More great stickers and die cuts with added dimension thanks to my stash of pop dots!


Autumn Colours

I added a piece of vellum to this page, although I was hoping it would be a little more translucent so that you could see the work I put into the background, I just wanted it to sort of play off the wispy clouds in the photos a bit.


I love these epoxy Bradz, no piercing and no little prongs to deal with!


Another title that is part die cut and part Silhouette cut.


This collection comes with some of the sweetest stickers and die cuts, just perfect for every day photos.

I also created a set of mini gift cards, there was just something about these little round stickers, with cute sentiments on them that spoke to me!


You will be seeing more from me using this collection, in the meantime, please visit my blog if you want to learn a bit more about these projects and see which sketches I used to jump start my designs.

Supply List: Simple Stories stickers, patterned paper and Bradz; American Crafts cardstock; Ranger Texture Paste; misc vellum and floss; Studio Calico alphas.

Thank you for visiting today!

Wednesday, April 22, 2015

mini album page insert | Tutorial with Laura

Hi there!

Laura here with a fun tip for you today, when I shared my latest reveal, I shared a mini album that I created using the amazing "I am" collection by Simple Stories .  I thought I would share with you how I created this bonus page, it is really easy and adds a bit of extra dimension to my album.

I started out by measuring the height of the page, figuring that I would like it to come to the mid point between the 2nd and 3rd rings on my album.  This is 5.5 inches in my case, but yours could vary.  So I cut my patterned paper to 5.5 x 12 inches.


 Next I measured the width of my pages, which is 7 inches. This became my score line. 


 Thus making my page have a really great flap effect.


Next I rounded the 2 outer corners on the right, and punched my holes using another page as a template.


I decided to add a peek a boo effect on my page, so I choose a heart shaped die close to the size I was going for and ran it through my Cuttlebug, eyeballing the location.  I should have been more specific, but it turned out okay.


See...


And closed....


And in the album....


 And closed and embellished...


This is what it looks like opened and embellished.


Super fun and super easy!

Thanks for visiting!
Laura
xo