


Stamp 2 of the same images
Color them the same way... in this case I will be popping up the candles... so I only colored them! You will see why...

Next I cut out the candles that I was going to pop up and I am getting them ready for the next step which is...

 when the candles are adhered... you can see how they are lifted away from the card ... adding a lot of dimension to the card.
And here is the final result! This is so easy and really adds a great little bit of pop (literally) to your cards...
 Please check out all of the wonderful stamps that DRS has to offer here... and if you have not done so, check out the Challenge we have for this week making a single layer card! there is a chance to win some blog candy... Thanks for stopping by!

 After I cut the 9 x 6 paper, I folded it in half and laid it on the bag to see where it would look right... then I measured in 2.5 inches from the right and 2.5 inches from the left. I put a dot at each measurement to get ready to cut the slot for the handles.
 Next, I randomly stamped the pumpkin image from DRS all over the front of the bag topper
 I got out my trusty crop-a-dile and set copper eyelets in the front and back of the topper to allow a place for ribbon to be tied! Here, I used large copper eyelets.
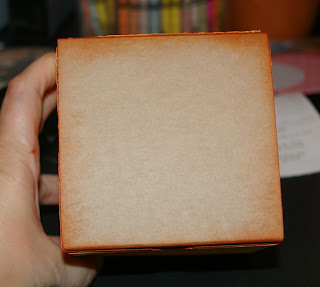 I ran the paper for the sides through the cuttlebug and inked the design with orange ink to show off the embossing on the paper.
 I stamped this gorgeous image from DRS on the front panel and colored it with chalks... I LOVE this image and how Fall like it is! I can smell the turkey roasting and the cider mulling!!!


